Wireless Display feature streamlines the process of connecting PCs, tablets, and mobile devices like smartphones to Room Displays, TVs, and Projectors. The Wireless Display feature eliminates the use of AV, VGA, and HDMI cables. This gives you the freedom to move around the room while presenting your screen. Wireless Display also known as (WiDi), it’s a technology developed by Intel and it supports 1080p Video quality, 5.1 surround sound, and low latency for interacting with applications sent to the TV from a PC. In Windows you can find the Wireless Display feature, it’s not coming as an inbuilt app, but you can add this feature as an additional feature. Find the WiDi feature below.
Tech Name: WiDi (Wireless Display)
Rate: 300MB
Range: 20 Feet Range
Frequency: 60GHz
Video Support: WiDi 1.0 720P, WiDi 2.0 1080P
Audio Support: 5.1 Channel
Supported device: Portable Computers, Laptops, Desktops, HDTVs, and Projector.
How WiDi Works?
To present your screen Wireless, both the sender and receiver must have compatible wireless communications technologies. WiDi uses Wi-Fi for the transmission and reception of compression audio and Video instantly. WiDi is reliant on the processor, graphics, operating system, and wireless networking components of the system. Intel WiDi application supports systems only with a 4th Generation processor. Generally, WiDi just converts the computer processes the graphical data into network packets, and broadcasts them wirelessly. These packets are received by a wireless monitor, and it converts the network packets back to graphical data and displays them. WiDi Protocol is a standard that supports HD resolution and 5.1 audio channel with Low latency and interacting app featured. Most of the Laptops, projectors, and HD displays that supports WiDi transmission.
How to Add Wireless Display feature in Windows 11?
Wireless Display feature is not an inbuilt feature, but you can install this feature as an Optional feature.
Open Windows Settings by pressing Windows + I and from the left-hand side click on Apps.
Under Apps, click and Open Optional features.

Under Optional features, click on Add an optional feature > View features.

Search for Wireless Display. Check the Wireless Display feature and click on Next and Install.

The installation will take time depends on your system performance and network speed. Once the installation is completed, the wireless display will be added to the Start Menu as a Connect app. Now you can open the Connect app and connect with another device’s display.
To uninstall follow the same steps above and open the Optional feature, from the installed Optional feature choose the Wireless display and click on Uninstall. Uninstallation will take some time.
How to Use Wireless Display feature in Windows 11?
Before using this feature, you need to modify the Projection settings to allow the device to Project the screen. By default, the Projection settings is turned off for security purpose.
Open Windows settings by pressing Windows + I and from the left-hand side click on System and from the right-hand side choose Projecting to this PC.

Click and open Projecting to this PC, just click on the first drop-down menu and choose Available Everywhere. If you want, you can set up the PIN to Pair both devices during Projection.

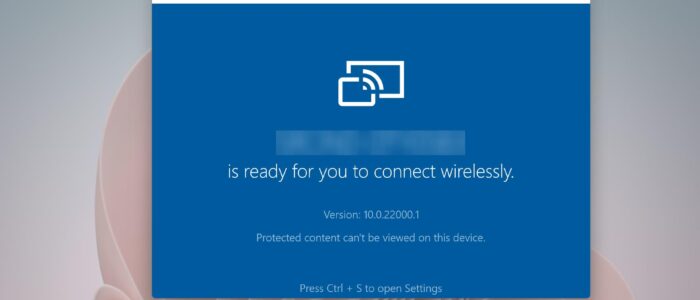
Now you can wirelessly present your screen to the Display, and it will appear in the connect window.
Note: In order to Project your screen wireless, the device must be connected to the same network. Otherwise, the connect app won’t detect any display.