Google Chrome extensions are small software programs that are used to customize the browser for a better experience. It helps users to tailor Chrome functionality and behavior to individual needs or preferences. Google chrome extensions are built using HTML, CSS, and JavaScript. Mostly Extensions are created to fulfill a single purpose, and it must have a minimal user interface. Chrome extensions can be download and install from the Chrome Web Store, but recently google increased its restrictions for installing third-party chrome extensions to protect users from malicious code. So if you want to download and install any extension you have to download it from the chrome web store.
Also, Google Chrome allows you to manage these installed extensions using the Chrome Extension manager. You can Open Chrome Extension manager using chrome://extensions/ URL. Extension Manager allows you to enable or Disable Extensions, you can see details of any installed extensions, and finally, you can Remove extensions. By default Remove option is present in all the Extensions, anyone can easily Remove these extensions by clicking on the Remove button. If you want to prevent any extension, then this article will guide you to Hide Remove Option in Chrome Extensions Page. So this avoids unwanted removals of any extension.
Hide Remove Option in Chrome Extensions Page:
To Hide Remove Option, we are going to use the Registry editor method. Note: Modifying the Registry is risky, and it causes irreversible damage to your OS Installation Follow the steps correctly. Friendly advice Before Modifying Registry Creating Restore Point is recommended.
Open the Run command by pressing Windows + R and type Regedit and hit enter. This command will open Registry Editor Console.
Now Navigate to the following path.
HKEY_LOCAL_MACHINE\SOFTWARE\Policies
Now follow the below-mentioned steps carefully, we need to create three registry keys under the Policies registry key.

First right click on the Policies and choose New > Key and name the key as Google, Next Right-click on the Google Key and choose New > Key and name it as Chrome, and finally right-click on the Chrome Key and choose New > Key and name it as ExtensionInstallForcelist.

Click on the ExtensionInstallForcelist registry key and from the Right-hand side right-click on an empty area and choose New > String Value. Name the String Value as 1.

Now Double click on 1 String Value and set the value. Getting String value is little tricky.
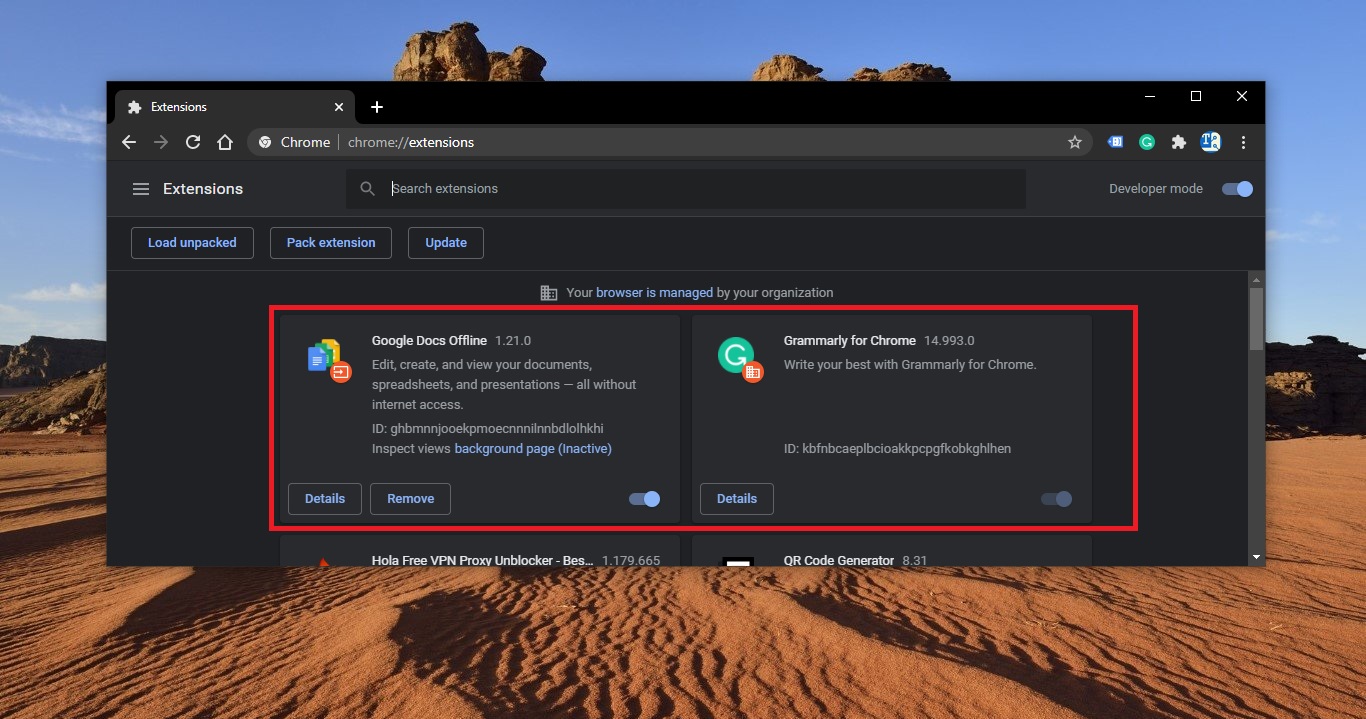
Open the Chrome Extension page and select the extension which you want to hide the Remove option. Under Each extension name, you can see the ID. Copy that ID and paste into any text editor.

Next right click on the String value and choose modify and under the Value field Paste this extension ID which you copied before following below-mentioned Text.
;https://clients2.google.com/service/update2/crx
Example: kbfnbcaeplbcioakkpcpgfkobkghlhen;https://clients2.google.com/service/update2/crx

The value should look like this. Click on Ok and Relaunch the browser.
After relaunching you can go to the extension page and there Remove option will be no longer visible.
You can follow the same steps to hide another extension. Just give the string value name as 2 for the 2nd one and 3 for the 3rd one.