OpenJDK is the short form of Open Java Development kit, it’s similar to Oracle’s JAVA Development kit which is used to develop Java applications. Open JDK is the open source implementation of the Java Platform Standard Edition and its free to use with General Public License Version 2; GPLv2. The main difference between Oracle JDK and Open JDK is that Open JDK is free to use and Oracle Java Development kit requires commercial license. There are many Open JDK vendors out there in the market, one of the most popular Open JDK vendor is Redhat OpenJDK vendor. You can download AdoptJDK, Zulu OpenJDK or Community OpenJDK. In this article i have shown the steps to download and install Community OpenJDK.
Install Open JDK in Windows 11/10:
In this article we are going to see how to install Open JDK in Windows 11/10, the steps shown below are the same for Windows 10 and Windows 11.
First, Download Open JDK from the Official site. Click here to download Open JDK.
This website contains the new and older versions of Open JDK releases. Choose the required version and click on Download.
I have downloaded the Open JDK 11 version, you’ll get a zip file once you downloaded the file.
Extract the Zip file and move the extracted folder to C drive for your convenience.

Open the run command by pressing Windows + R and type sysdm.cpl and hit enter, this command will open the System Properties Window.
Under System Properties, click on the Advanced tab, and click on Environment Variables.

Under Environment Variables, Click on Path and choose Edit.

Now new Window pop-up will appear, click on New and copy-paste the Open JDK extracted folder path.

Once you entered the path, hit enter and click on OK.
Then click on Apply and OK.
How to Verify Open JDK?
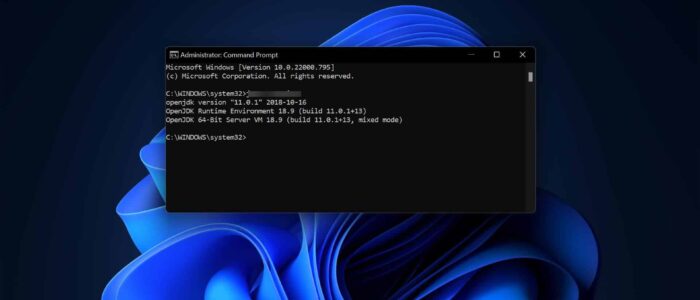
We can verify the installed OpenJDK Version using Command Prompt.
Open Run command by pressing Windows + R and type cmd and hit enter.
Now type the following command and hit enter.
Java -version

This command will show the Open JDK version, if this command shows just Java version then you need to Uninstall all available Java versions.
Open Programs and Features and make sure there is no installed Java or JDK version. if you find any java version then uninstall it.
After the uninstallation just restart your system once. type the same command, now you can see the OpenJDK versions.
Read Also:
Fix Java Error Code 1618 in Windows 10