Generally, kiosk mode is usually meant to refer to a particular “mode” that most browsers offer. When you set up and account with the assigned access feature, the user does not have access to the desktop, Start Menu, or any other part of the PC. “Kiosk Mode” is offered by browser applications (Internet Explorer, Chrome, Firefox, etc) to run the application full screen without any browser user interface such as toolbars and menus.
You can use the Kiosk mode feature in Windows 10 Pro, Windows 10 Enterprise, and Windows 10 Education editions to restrict a local standard user account on a PC so that it only has access to a single Universal Windows Platform (UWP) app you select. The account can only access and use the selected UWP app.
Set up and Turn on Kiosk Mode for an Account:
1. While signed in to your administrator account, add a new local account as a standard user that will be used for assigned access.
2. Sign in to the new local standard user account, open the Store app, and install the app (if not already) you want to use with assigned access.
3. Sign out of the new local standard user account and sign back into your administrator account.
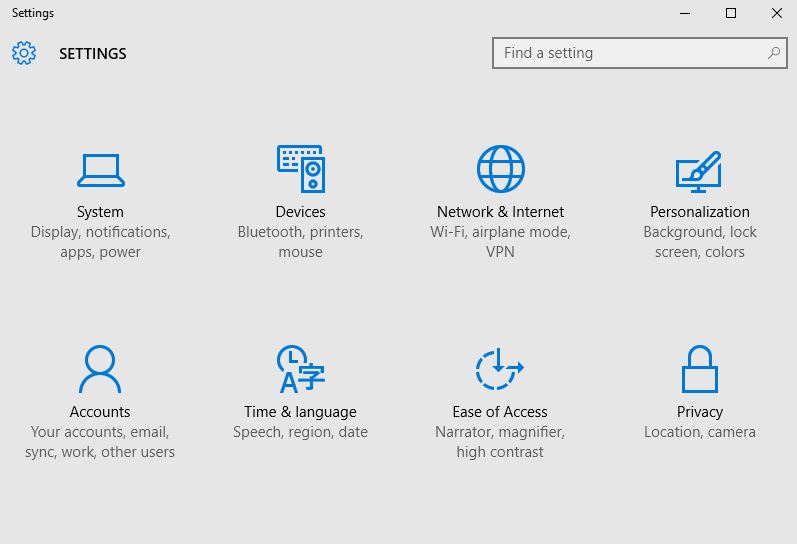
4. Open Settings, and click/tap on the Accounts icon.
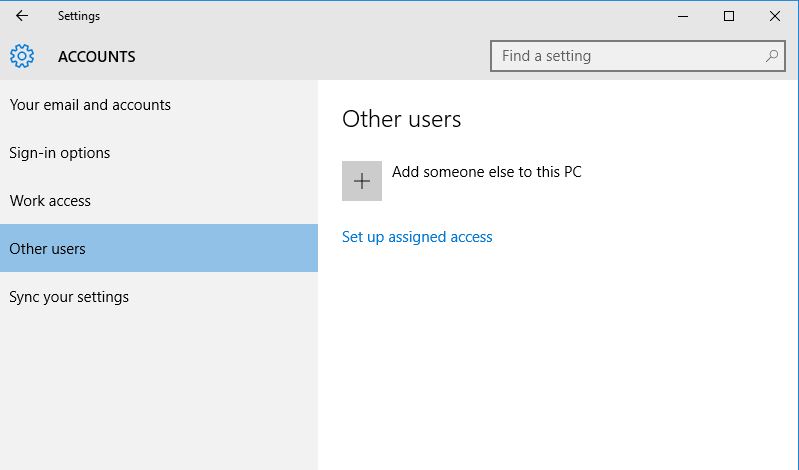
5. Click on Other users on the left side, and click on the Set up assigned access link on the right side.
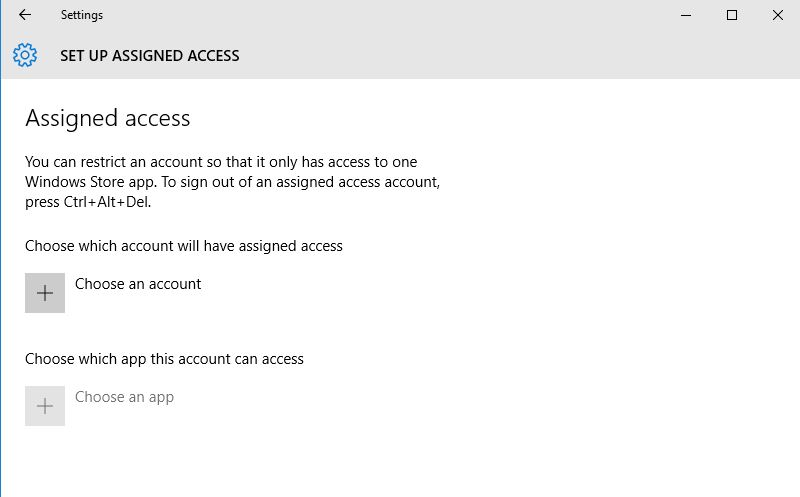
- Click on Choose an account.
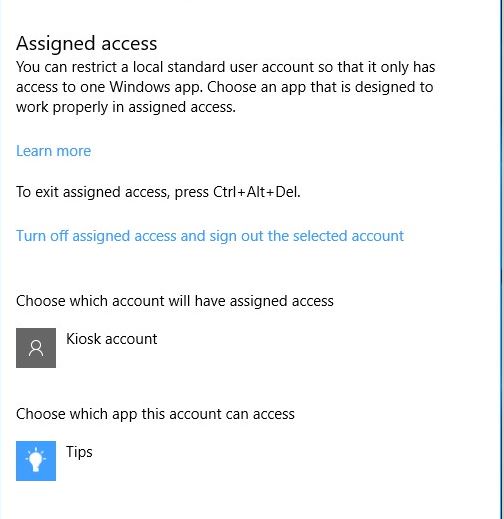
7. Select the local standard user account (ex: "Kiosk account") created from step 1 above.
8. Click on Choose an app.
Note: - You can always change this setting for what app to use with assigned access.
9. Select an available app (ex: "Tips") you want to use with assign access.
10. Assigned access is now setup and turned on for the selected account. You can now close Settings if you like
11. Whenever a user signs into the selected account (ex: "Kiosk account") with assigned access, they will only have access to the selected app (ex: "Tips").
Note: - If you like, you could set Windows 10 to automatically sign in to the account with assigned access at startup to not see the sign in screen.
How to Turn Off Kiosk Mode for an Account?
- Open Settings, and click/tap on the Accounts icon.
- Click on Other users on the left side, and click on the Set up assigned access link on the right side.
- Click on the Turn off assigned access and sign out the selected account link.
- You can now close Settings if you like.


