SuperFetch is a Standard Windows feature that is introduced in Windows Vista and it was renamed after the 2018 update. The Official description of the SuperFetch service says that it “Maintains and improves system performance over time”, It analyses the usage patterns of your frequently used programs and apps and preloads their data into memory. So, whenever you are calling for the program, it will load fast. This service quietly runs in the background and monitors the frequently used apps and preloads them into RAM ahead of time. SuperFetch appears as “Service Host: SysMain” in the Windows Task Manager. By default, the SysMain service is enabled in modern computers, If you notice that SuperFetch is slowing down your PC then disabling the SuperFetch will increase the Speed. This article will guide you to Enable or Disable Superfetch in Windows 11/10.
Disable Superfetch in Windows 11/10:
In Windows, you can enable or disable SuperFetch using two different methods, follow the below-mentioned methods to Turn on or Off SuperFetch.
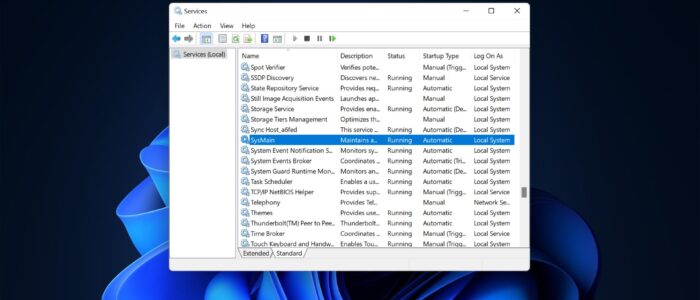
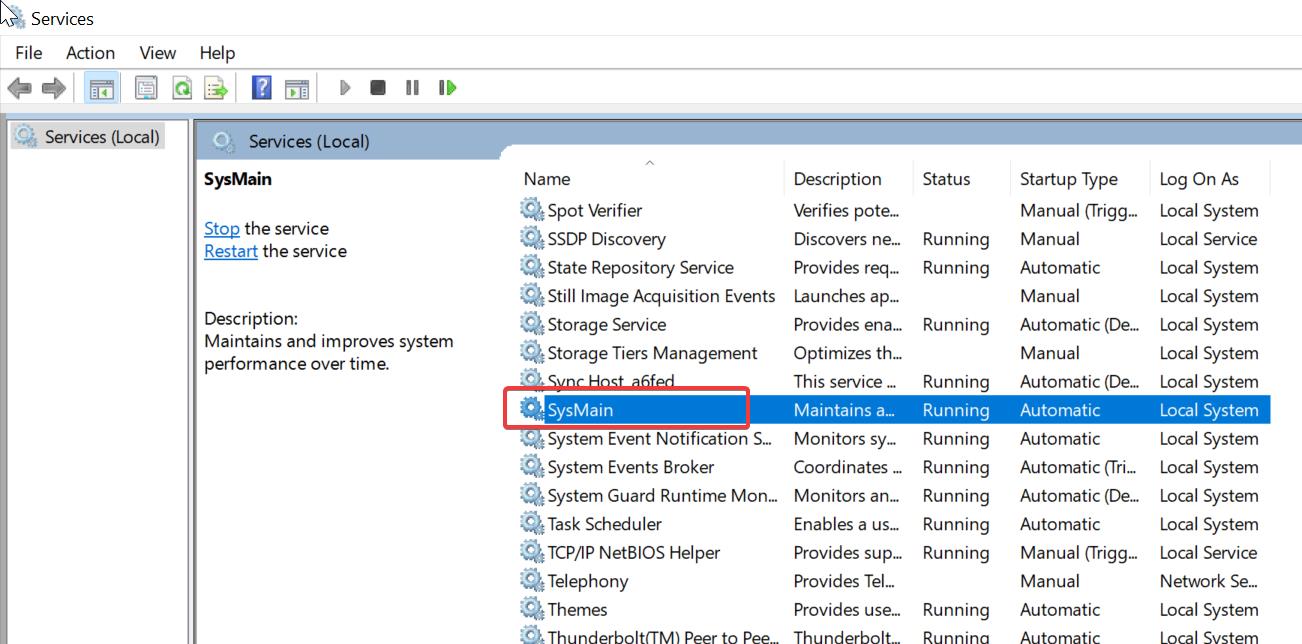
Open the Run command by pressing Windows + R and type services.msc and hit enter, this command will open the Services Management Console.
Look for the SysMain Service and right-click on the SysMain service and choose Properties.
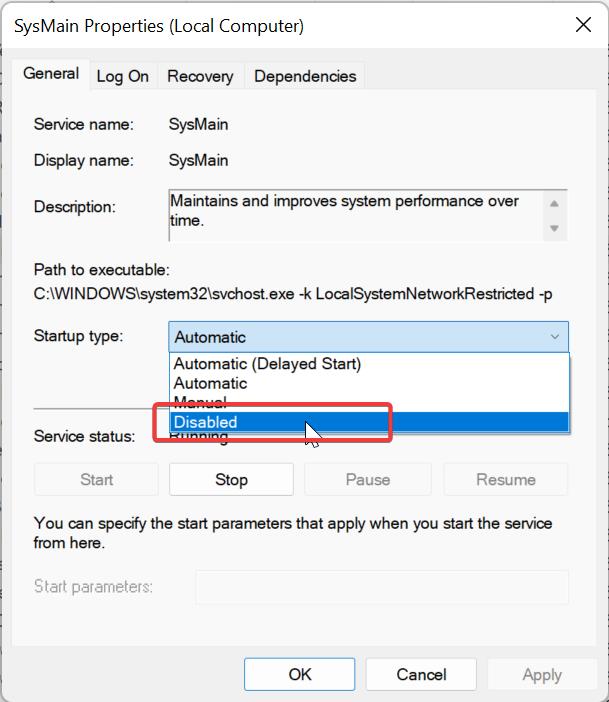
Under SysMain Properties set the Startup type to Disabled and Stop the process and click on Apply and OK.
Restart the system once to make it effective.
Disable Superfetch Using Command Prompt:
Open Command Prompt in elevated mode, Search for cmd and right click on it, and choose Run as Administrator.
Type the following command to disable the SuperFetch.
sc stop “SysMain” & sc config “SysMain” start=disabled
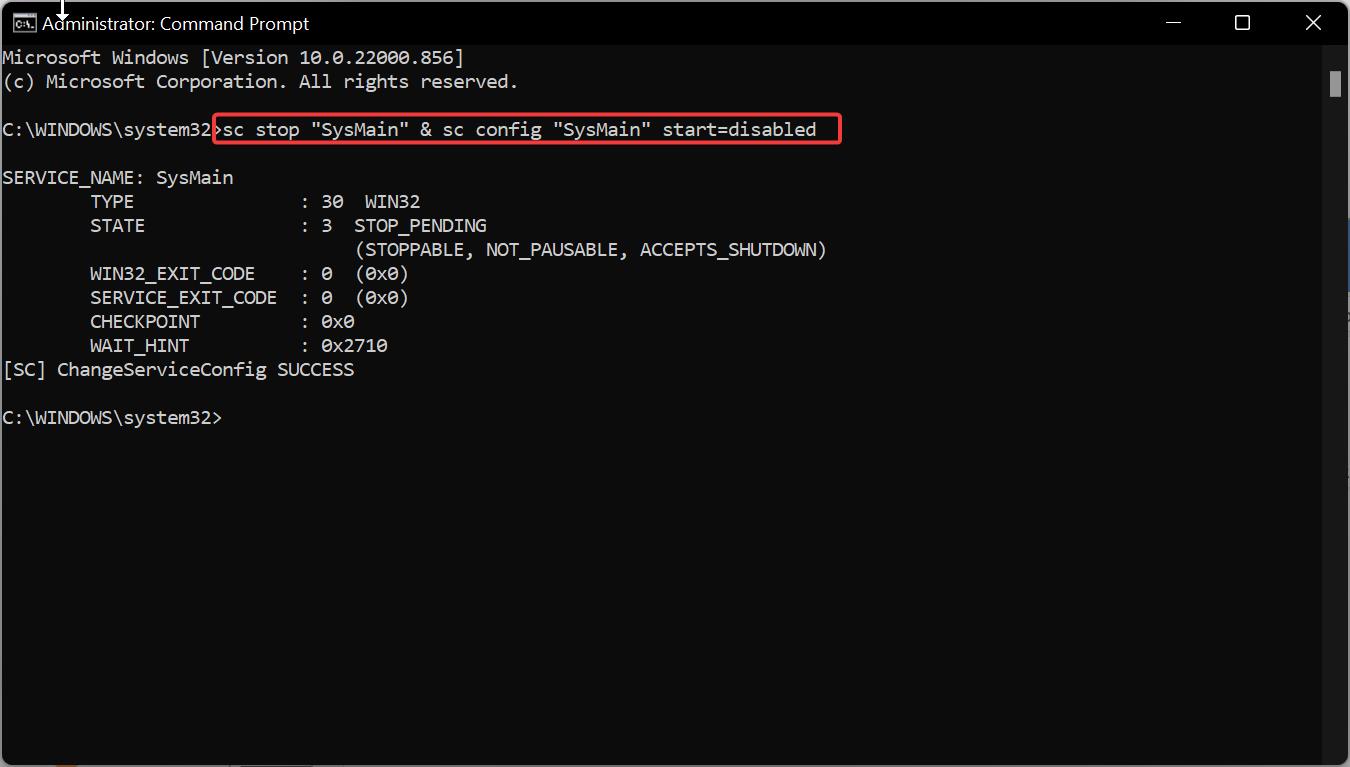
Restart your system once to turn off the SuperFetch.
Enable SuperFetch:
Open the Run command by pressing Windows + R and type services.msc and hit enter, this command will open the Services Management Console.
Look for the SysMain Service and right-click on the SysMain service and choose Properties.
Under SysMain Properties set the Startup type to Automatic and Start the process and click on Apply and OK.
Restart the system once to make it effective.
Using Command Prompt:
Open Command Prompt in elevated mode, Search for cmd and right click on it, and choose Run as Administrator.
Type the following command to disable the SuperFetch.
sc config “SysMain” start=auto & sc start “SysMain”
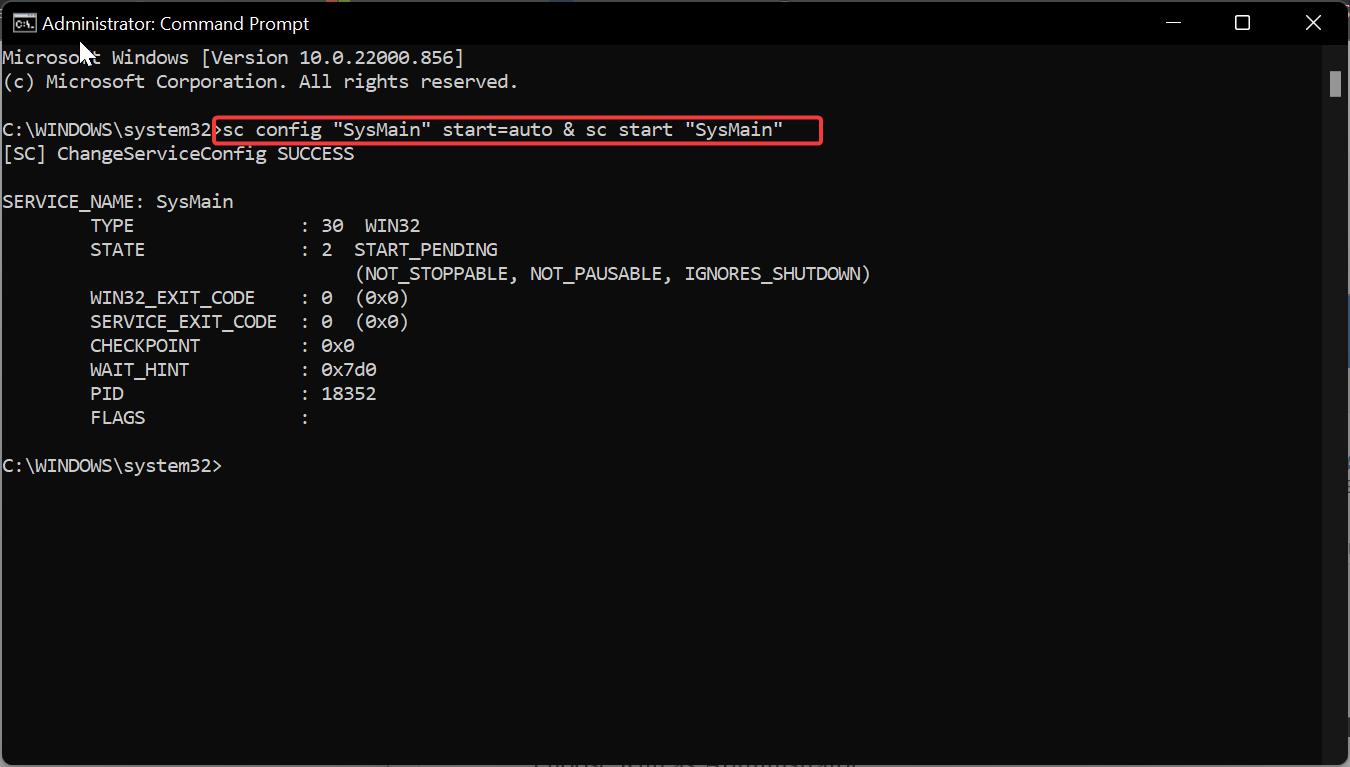
Restart the system once to enable the SuperFetch.
Read Also: Fix 100% Disk and CPU Usage issue in Windows 10/11[20 Ways]

