Setting Gitbash as your default terminal in VS Code can significantly enhance your productivity and streamline your Git workflows. Visual Studio Code (VS Code) is a popular code editor that offers various options for setting up your preferred terminal. In this article, we’ll guide you through the steps to set Gitbash as your default terminal in VS Code.
Set Gitbash as a Default Terminal in VS Code:
Before setting Gitbash as a default terminal in VS code, make sure the Gitbash is installed, if not follow Step 1 and install the Gitbash. Next, we need to add a Gitbash profile in VS Code, and finally, we have to set the Gitbash profile as a default terminal in VS Code.
Step 1: Install Gitbash
If you haven’t installed Gitbash on your system yet, you’ll need to do so before proceeding. Gitbash can be downloaded from the official website of Git. Simply go to Git’s official website, choose the appropriate installer for your operating system, and download the Git, install the Gitbash by following the onscreen instructions.
Step 2: Open Visual Studio Code
Make sure you have Visual Studio Code installed on your machine. If you don’t have it, you can download it from the official website. Once you installed VS Code, open VS Code to proceed.
Step 3: Open the Integrated Terminal
In VS Code, navigate to the top menu and click on the “View” option. From the dropdown menu, select “Terminal” or use the Keyboard shortcut “Ctrl + ` “ to open the integrated terminal.

Step 4: Access the VS Code Settings JSON file
Next, you need to access the user or workspace settings in VS Code. To do so, click on the Settings gear icon located at the bottom left corner of the sidebar. From the dropdown, select “Settings”, or you can use the keyboard shortcut “Ctrl + , “ (comma) to directly open the settings. Next, click on “Open Settings (JSON)” from the top right corner.

Step 5: Add the following Code to JSON
First, we need to add the Git bash profile to the VS Code JSON file, copy-paste the following code to the JSON settings file in the VS Code, and Save.
"terminal.integrated.profiles.windows":{"Git Bash":{"path":"C:\\Program Files\\Git\\bin\\bash.exe"}, },
"terminal.integrated.defaultProfile.windows": "Git Bash"
These lines of code add Git bash profile to VS Code and set Git bash as a default profile.
Step 6: Restart Visual Studio Code
After updating the settings, it’s essential to restart VS Code for the changes to take effect. Close the editor and open it again.
Step 7: Verify Gitbash Integration
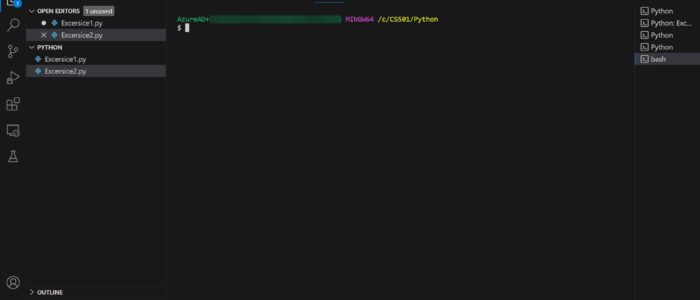
Once you’ve restarted VS Code, open the integrated terminal again (Ctrl + `). If everything is set up correctly, Gitbash should now be your default terminal within the editor.
Read Also:
How to Reset Windows Terminal to Default Settings?
Fix Updates are disabled because you are running the User-scope error in VS code
How to Install Any Browser Using Terminal in Windows 11?

