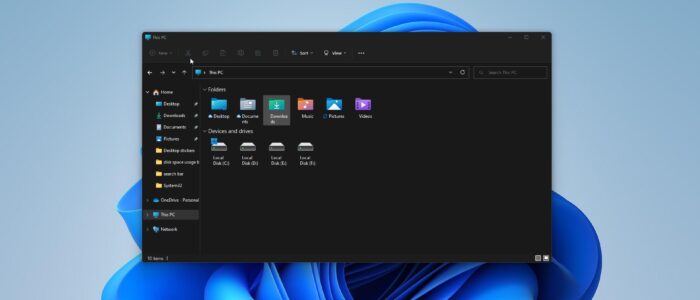
In Windows 11/10 if you open file explorer and click on This PC, the first thing you’ll notice is the Disk space usage information bar under the partition drive letters. This is the default view of the file explorer in Windows 11/10. The Disk space usage bar gives you the size information of the disk or partition, and the amount of free space out of the total space in that particular drive or partition. You can see the bar information when the view is set to Tiles mode, and this is the default view setting. If the Disk space usage bar doesn’t show up on your system then this article will guide you to fix Disk space usage bar missing issue in File Explorer.
Fix Disk Space Usage bar missing in File Explorer:
If you encounter this issue, then follow the below-mentioned recommended resolution methods, not in a particular order. Mostly this issue will occur post-Windows update, restart your system once and let the pending updates install.
Solution 1: Reset Folder View to fix Disk Space Usage bar missing:
Open File Explorer by pressing Windows + E, and from the left-hand side click on This PC.
And from the top click on the three dots and choose Options. This will open the Folder View Options.
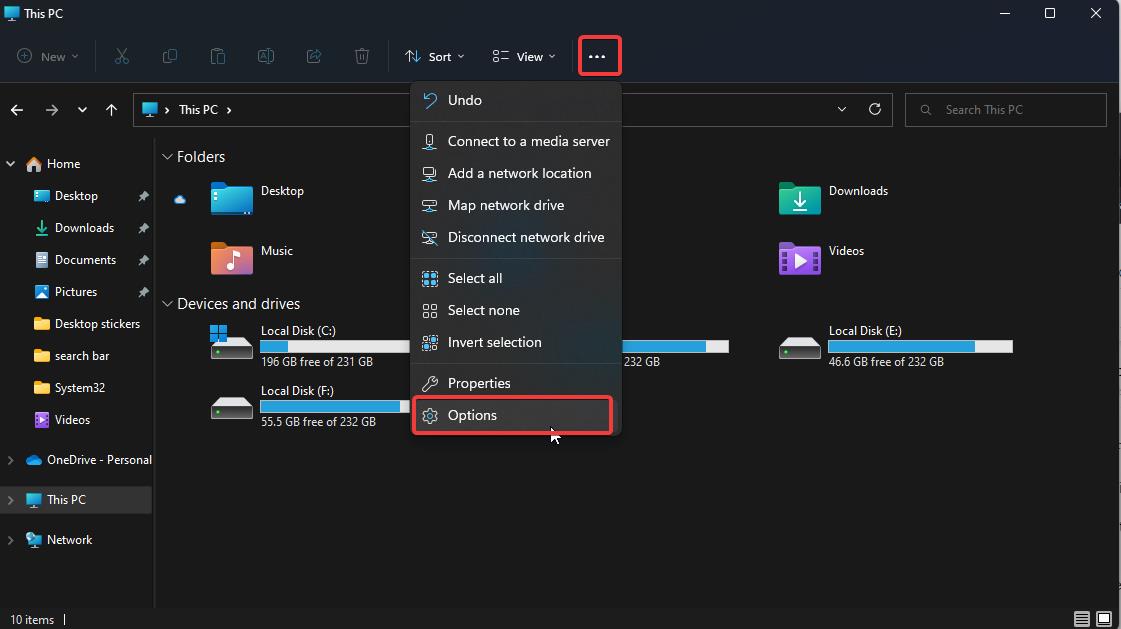
Or you can directly click on the Search icon on the Taskbar and search for File Explorer Options.
Under Folder Options click on the View tab and then Choose Reset Folders.
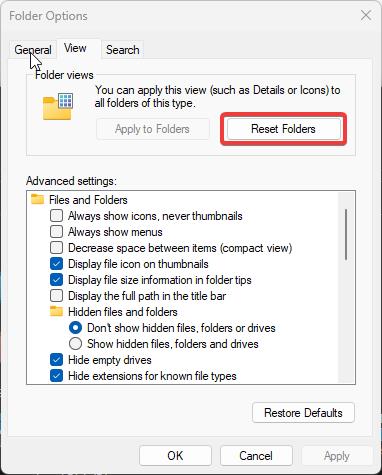
This will reset the PC folder view to the default, now you can relaunch the File Explorer and verify the disk space usage bar on This PC.
Solution 2: Change the View Settings:
Open File Explorer by pressing Windows + E, and from the left-hand side click on This PC.
And from the top click on View and then choose Tiles.
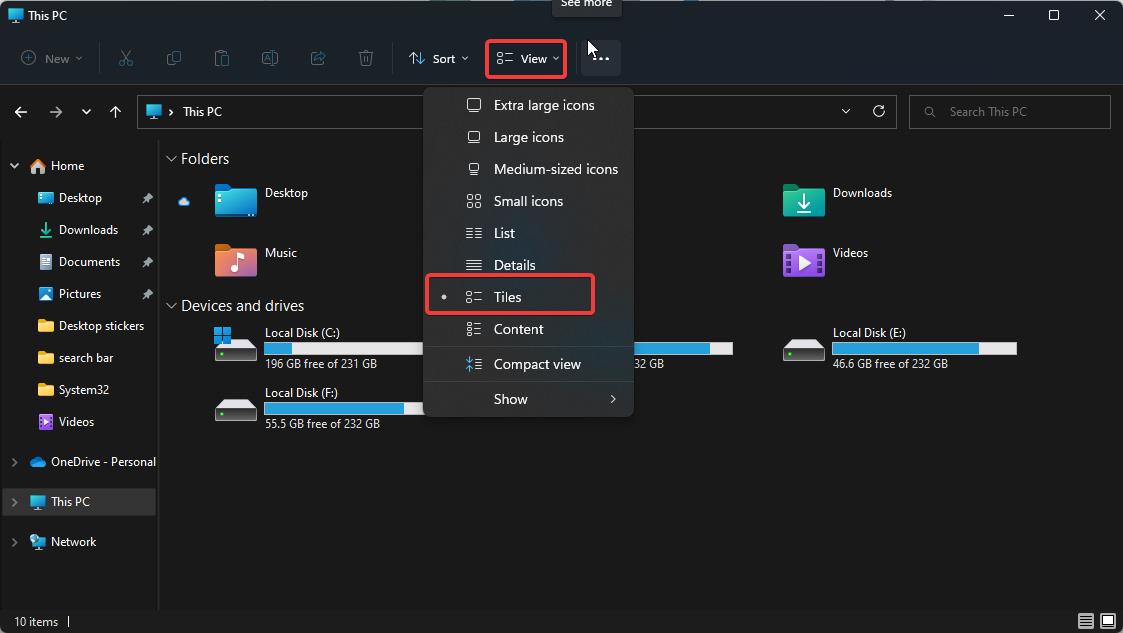
This will immediately change the view type and now you can see the disk space usage bar, if you used any theme to modify the folder view, after uninstalling the theme the folder view would remain the same. Use the above steps to set the default folder view settings for This PC.
Solution 3: Check the TileInfo Registry Value:
Open the Run command by pressing Windows + R and type Regedit and hit enter, this command will open the Registry editor console.
Now navigate to the following registry path.
HKEY_CLASSES_ROOT\Drive
From the left-hand side click on the Drive Registry key and from the right-hand side look for the String Value named TileInfo.
If you are unable to find the TileInfo String value or the TileInfo string value is missing then right-click on the Drive registry key and choose New > String Value and name it as TileInfo.
Double click on the TileInfo and set the Value Data as mentioned below.
prop:*System.PercentFull;System.Computer.DecoratedFreeSpace;System.Volume.FileSystem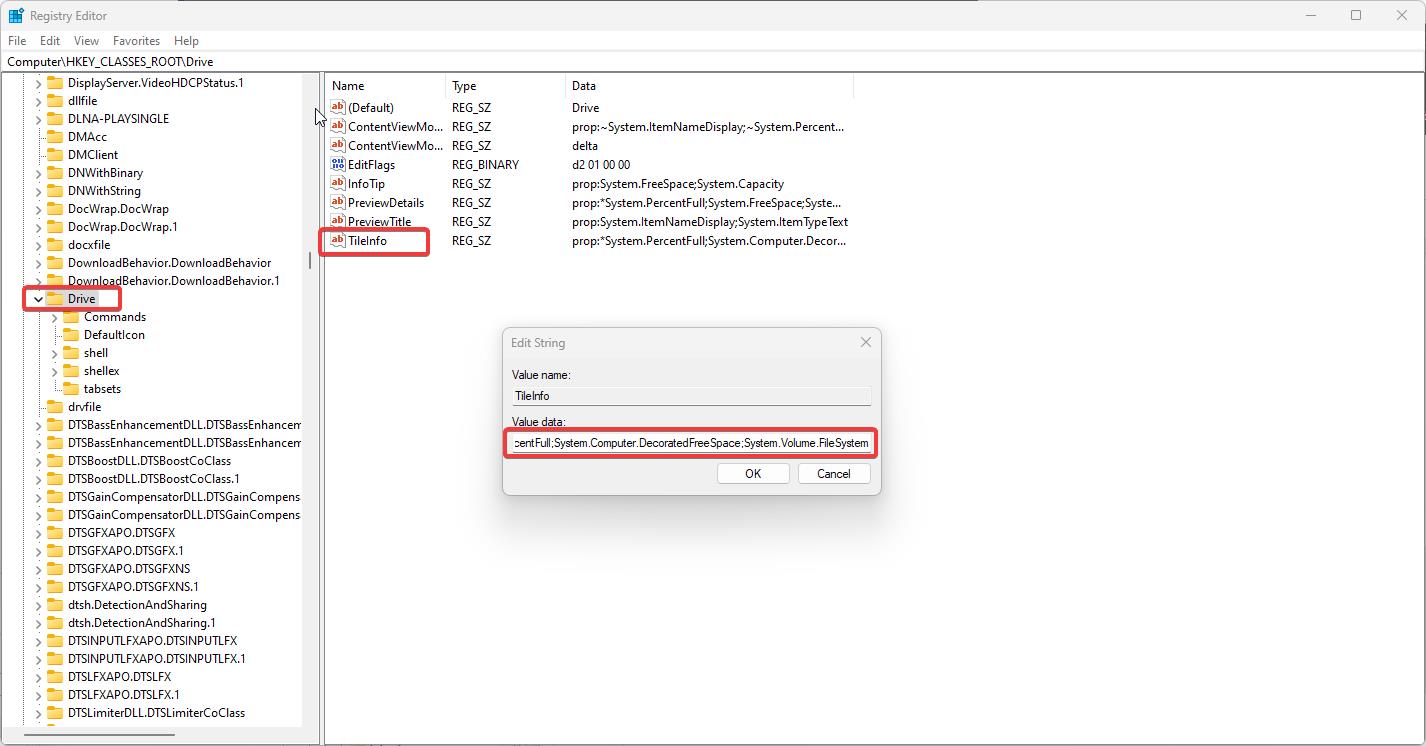
Click on Ok and Close the Registry Editor. Restart the system once and check the This PC folder view. Now you can see the disk space usage bar on This PC.
Read Also:
Fix Windows 11 File Explorer not responding or Slow
How to use File Explorer size filter in Windows 11?

