Nowadays HDMI is the popular audio and video interface. An HDMI cable can transmit both audio and video, most of the devices like computers, laptops, graphics cards, and game consoles are comes with an HDMI interface. There are lot of benefits of HDMI. HDMI is very compact and easy to connect. If you are using HDMI for audio and video interface on your Windows 10 computer, and facing an issue with the audio then this article will guide you to fix HDMI audio not working issue
Fix HDMI audio not working:
If you are facing issue with the HDMI audio on Your Windows 10 computer, then follow the below-mentioned recommended resolution methods one by one. Mostly this will help you to fix this issue.
Check the HDMI cable:
Once you encounter this issue, the First step is to check the HDMI cable, Remove the HDMI cable and Reconnect it back. Then check the audio is working or not. If not, Change the HDMI cable and check the audio is working or not. If you still facing an issue with the audio then proceed with further resolution methods.
Restart Windows Audio Service:
Open Run command by pressing Windows + R and type Service.msc and hit enter. This will open Services Management Console.
Under Service Management Console, Look for Windows Audio Service.
Click on the service and from the left hand side choose Restart. This will restart the audio service.

Update HD Audio Drivers:
Open Run command and type Devmgmt.msc and click on Ok. This command will open Device Manager.
Under Device Manager Click on Audio inputs and outputs device.
Next right-click on the High definition audio driver and click on Update Driver.

After that, click on Search automatically for drivers, once the driver update successfully. Restart your computer.
Set HDMI audio as Default:
If you set different audio device as a default playback device then you may face this issue. So check the default playback device.
Open Run command by pressing Windows + R and type mmsys.cpl and click on Ok.
This will open Sound settings, click on the Playback tab.
Choose the HDMI audio output and right click on it and choose Set as Default Device.
If you are not able to see the HDMI audio output then right click on the Playback tab and check “Show Disabled Devices” and the “Show Disconnected Devices“.

Uninstall Hyper-V:
Open Run command by pressing Windows + R and type optionalfeatures and hit enter. This will open Turn Windows features on or off.
Now you need to search for Hyper-V and uncheck it.

Click on Ok and Restart the PC.
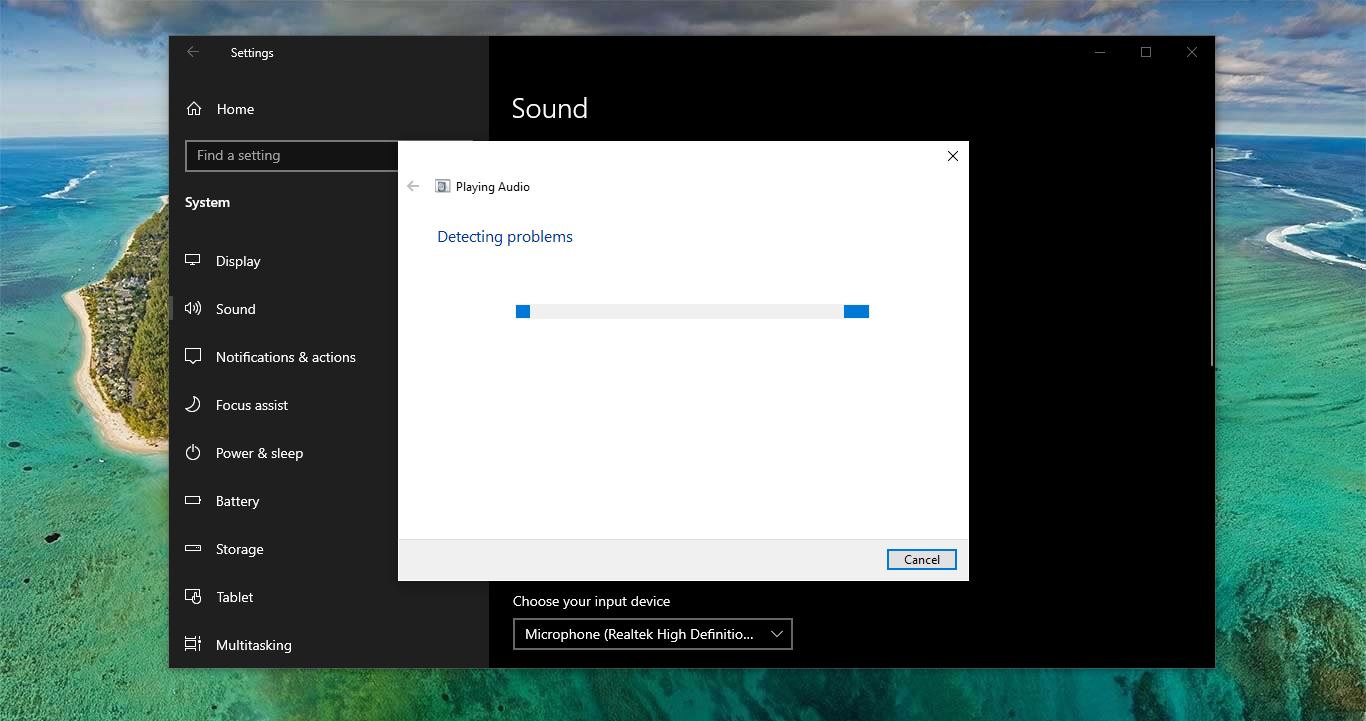
Run the Audio Troubleshooter:
Once you encounter this error then immediately run the Audio Troubleshooter to check and fix the audio-related issue.
Open Windows Settings by pressing Windows + I and click on Update & Security.
Click on Troubleshoot, Under Troubleshoot, look for Playing Audio Troubleshooter.

Click on Playing Audio and Run the troubleshooter. This will find audio related issue and fix the Problem.
Read Also: Fix Can’t open volume for direct access in Windows 10