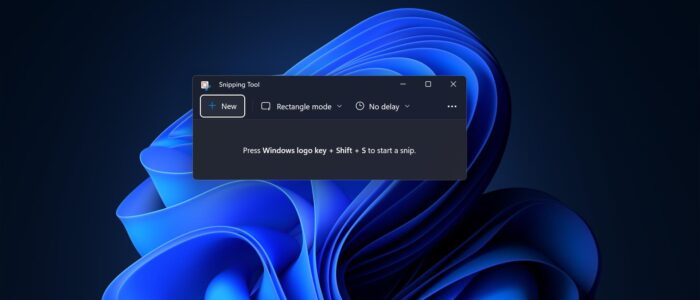
In Windows 11 Snipping Tool got upgraded, the new snipping tool includes a lot of features. The new Snipping tool includes new visuals and updated menus with added functionality. Now you can open the snipping tool by pressing the Windows + Shift + S keyboard shortcut. The snipping tool got Four different modes to capture the screen, Rectangle, Window, Free-Form, and Full-Screen Mode. Also, the Snipping tool provides editing tools for annotations, improved cropping, and more editing tools like a ruler, Ballpoint marker, highlighter, and touch writing. And finally, the Snipping tool now responds to the Windows Theme, it will automatically switch to dark theme if you set your windows theme to dark. You can take a quick snipping by using a Keyboard shortcut Windows + Shift + S, this shortcut key combination opens the snipping tool and you can select the area to snip, the snip will be automatically saved to clipboard, later you can copy the image to any app. Sometimes the snipping tool keyboard shortcut combination won’t work, this article will guide you to fix Snipping tool Keyboard shortcut not working in Windows 11/10.
Snipping tool Keyboard shortcut not working:
This issue may occur due to several reasons, In this article, we’ll see several resolution methods to fix this issue. Before proceeding to the resolution methods, restart your system once and check, find the benefits of restarting your computer.
Solution 1: Check Snipping tool Notification:
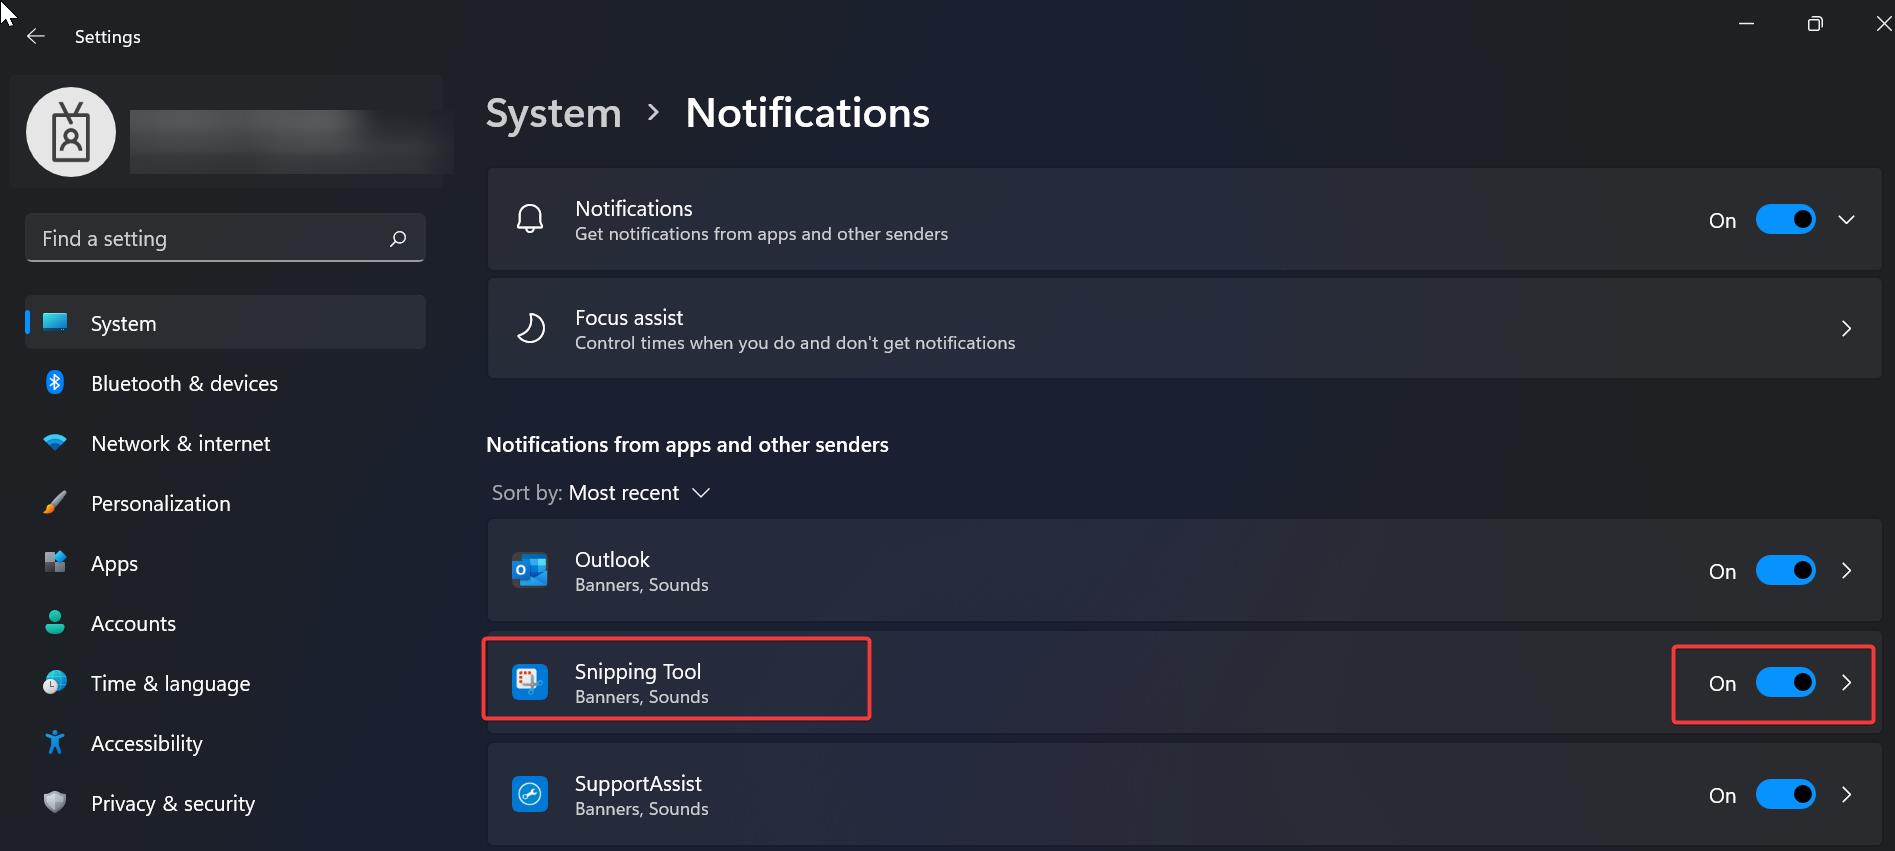
Once you encounter this issue, make sure that your Windows system is not blocking the snipping tool notifications. Normally, once you press the snipping tool keyboard shortcut combination, you’ll get a notification on the bottom right corner. If you didn’t get any notification after pressing the snipping tool keyboard shortcut, then probably the notification might be disabled. Check the snipping tool notification once, follow the steps below to enable the snipping tool notification.
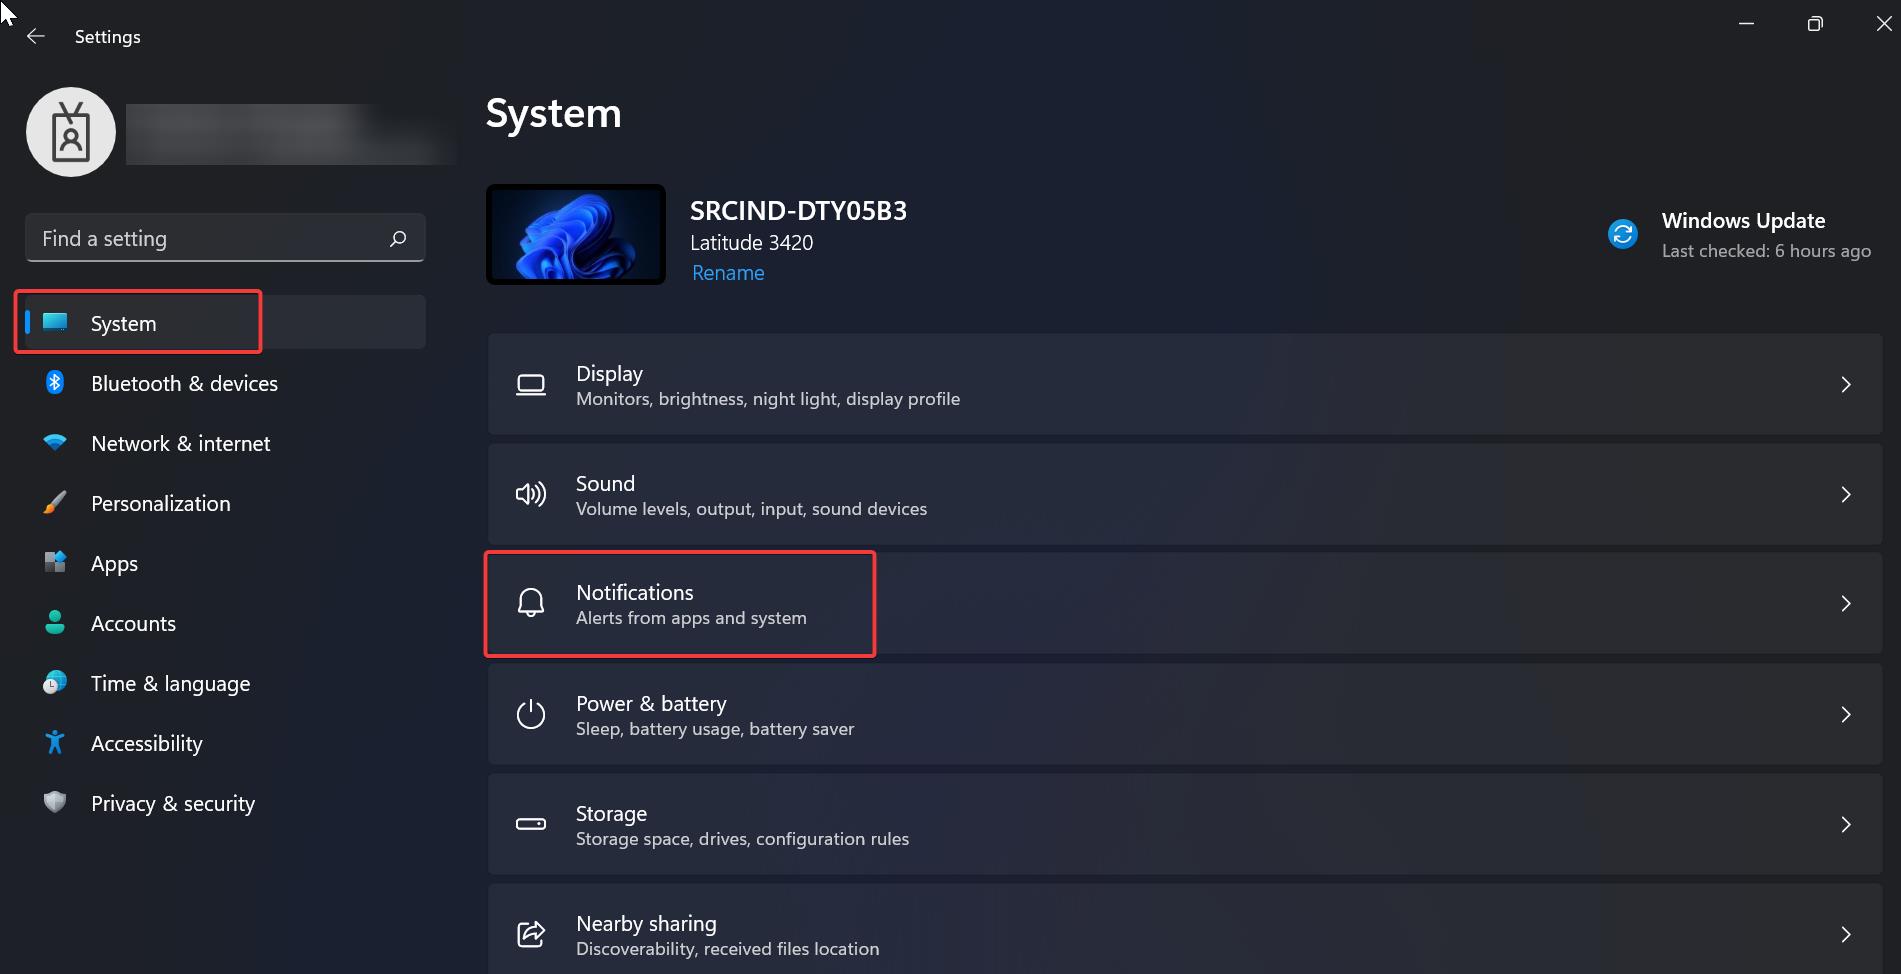
Open Windows Settings by pressing Windows + I and from the left-hand side click on System and from the right-hand side click on Notification. Under Notifications from apps and other senders, look for the Snipping tool app and make sure the notification is enabled.
If you see the snipping tool notification toggle button is turned off, Turn on the notification toggle button.
Now press Windows + Shift + S and check, if you are getting the notification or not. If the problem persists, proceed with further resolution methods.
Solution 2: Disable Game Mode:
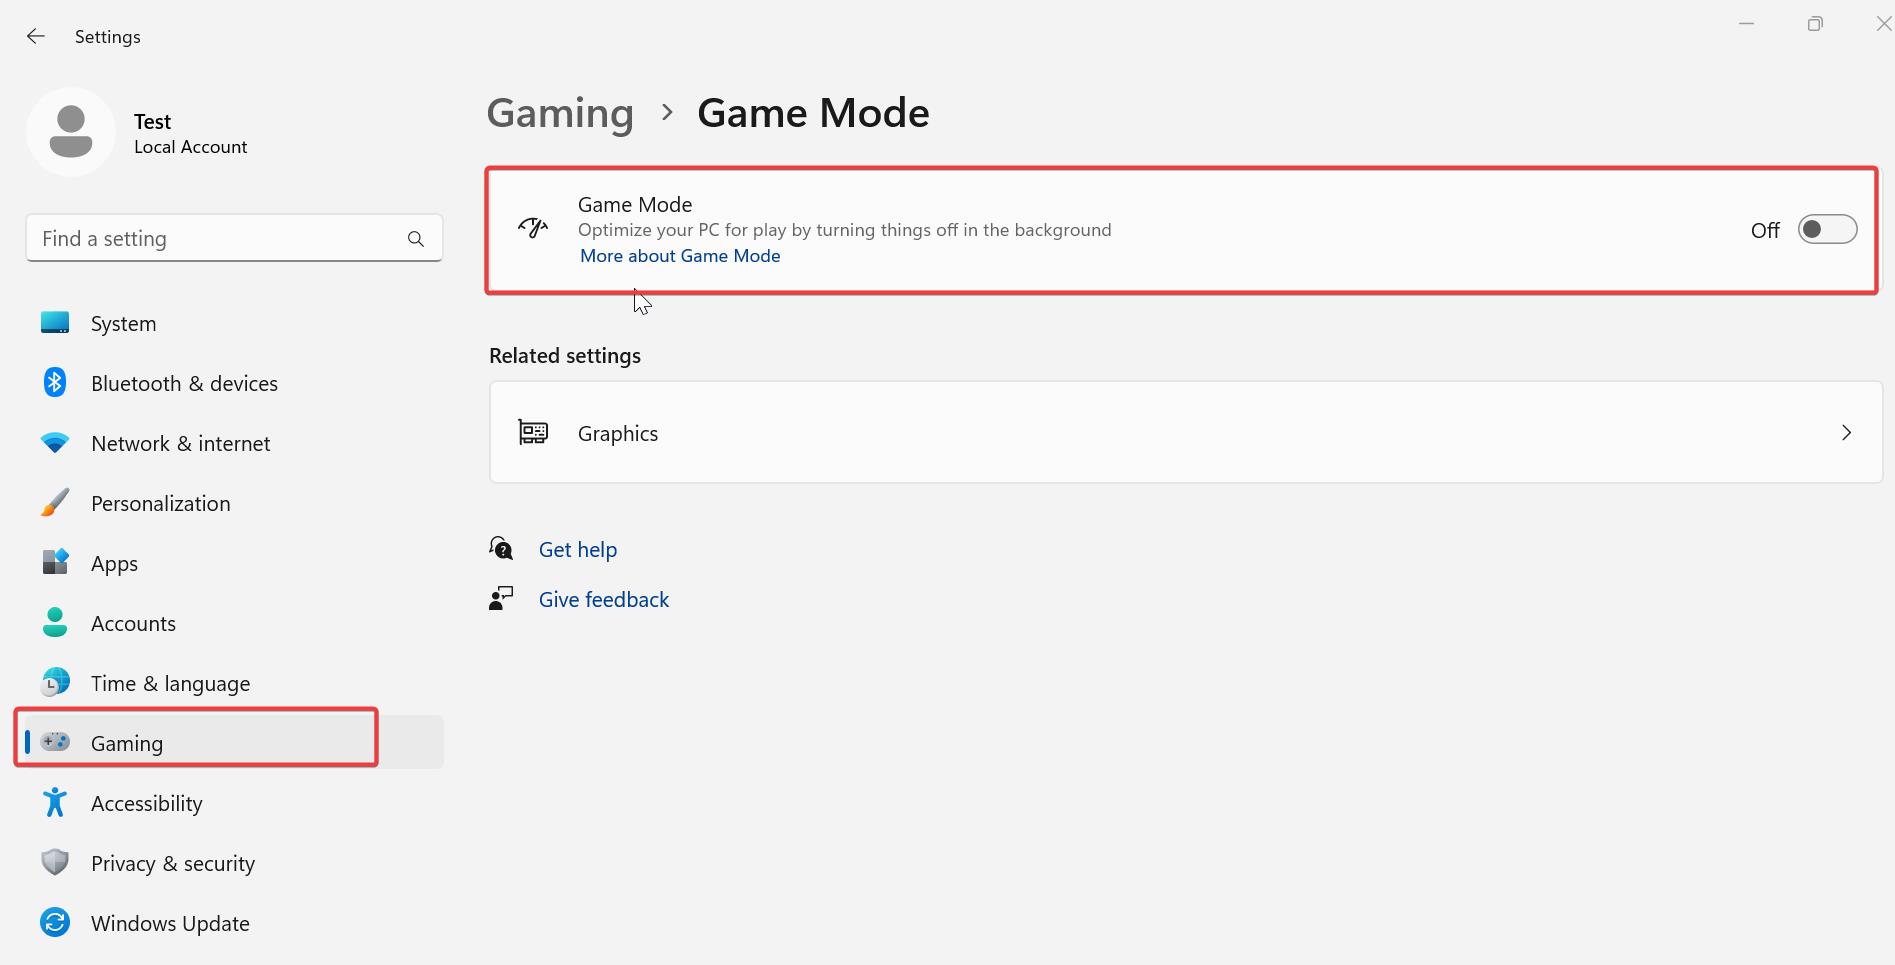
Open Windows Settings by pressing Windows + I and from the left-hand side click on Gaming, and from the right-hand side click on Game Mode.
Under Game Mode, turn off the toggle button for Game Mode.
Now check whether the snipping tool is working or not. If not, proceed with the next resolution.
Solution 3: Restart the Explorer:
Once you pressed the Snipping tool keyboard shortcut, you can see the dark highlight area, then you need to select the area which wants to snip. This dark highlight area is loaded by the Explorer.exe, so restarting the file explorer mostly fix the issue.
Press Ctrl + Shift + Esc and click on the Task Manager.
Click on More Details if the Task Manager is small.
Then locate the Windows Explorer and click on it,
Now at the bottom right corner, you can see the Restart.
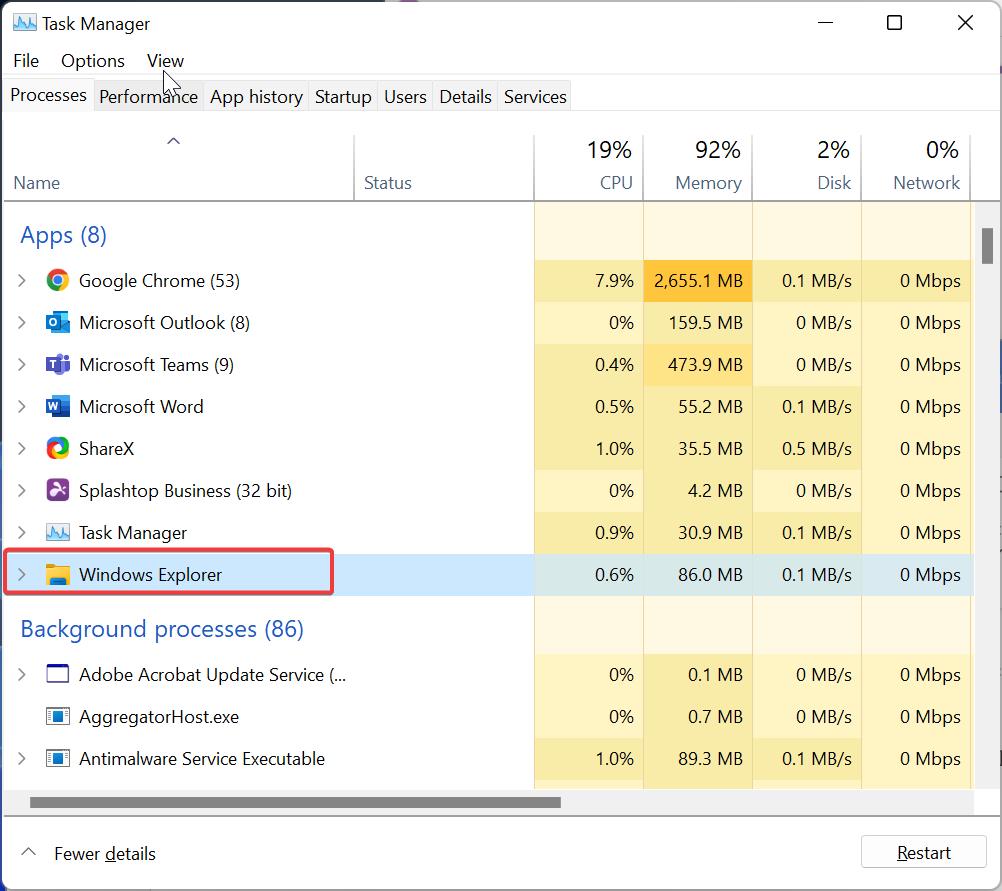
Click on the Restart.
Solution 4: Run Windows Troubleshooter:
Go to the windows setting from the start menu in your case the start menu won’t work so right-click on the taskbar and select Taskbar settings.
From Taskbar settings click on Home and then Update and Security, From the left panel you can find the Troubleshoot, from the right-hand side Click on Additional troubleshooters.
Under Additional troubleshooters look for Windows Store Apps and tap Run the Troubleshooter.
Solution 5: Reset or Repair Snipping tool:
Resetting the snipping tool removes all the changes and restores default settings. It causes the application to clear out the error and start the app in its initial state. Resetting the snipping tool is easy because it won’t store any data, follow the below-mentioned steps to reset the snipping tool.
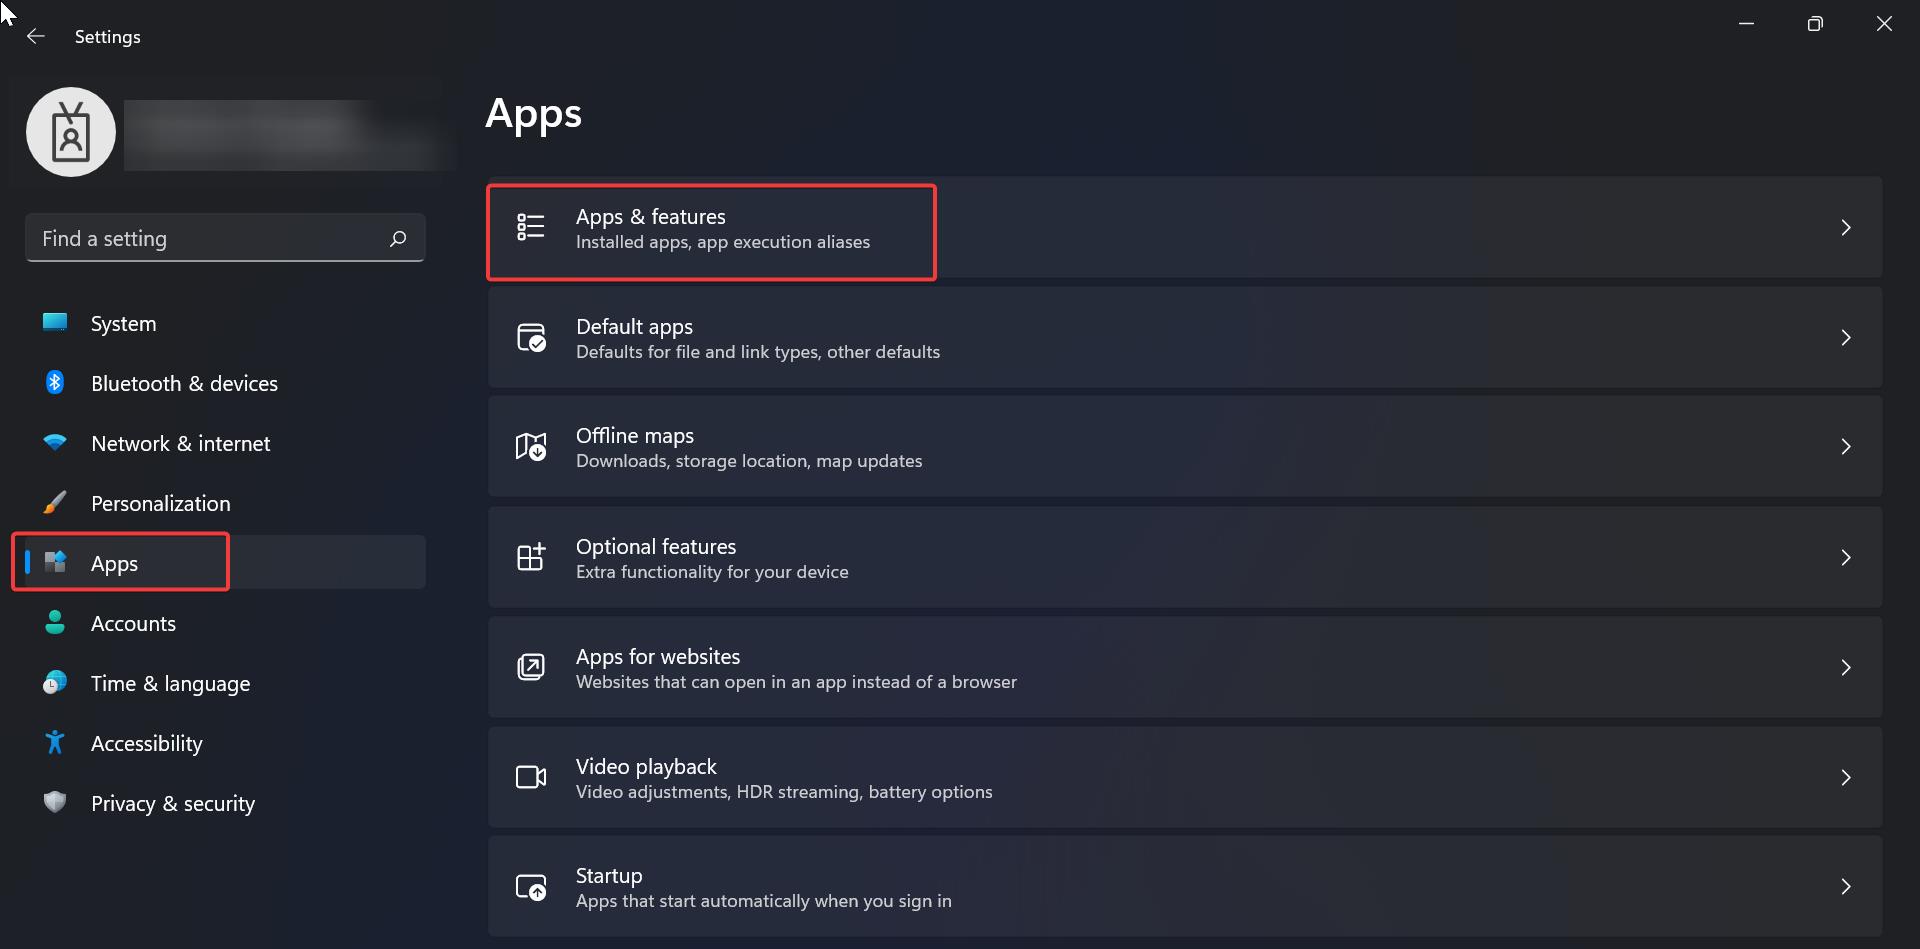
Open Windows Settings by pressing Windows + I and from the left-hand side click on Apps and from the right-hand side Apps & features.
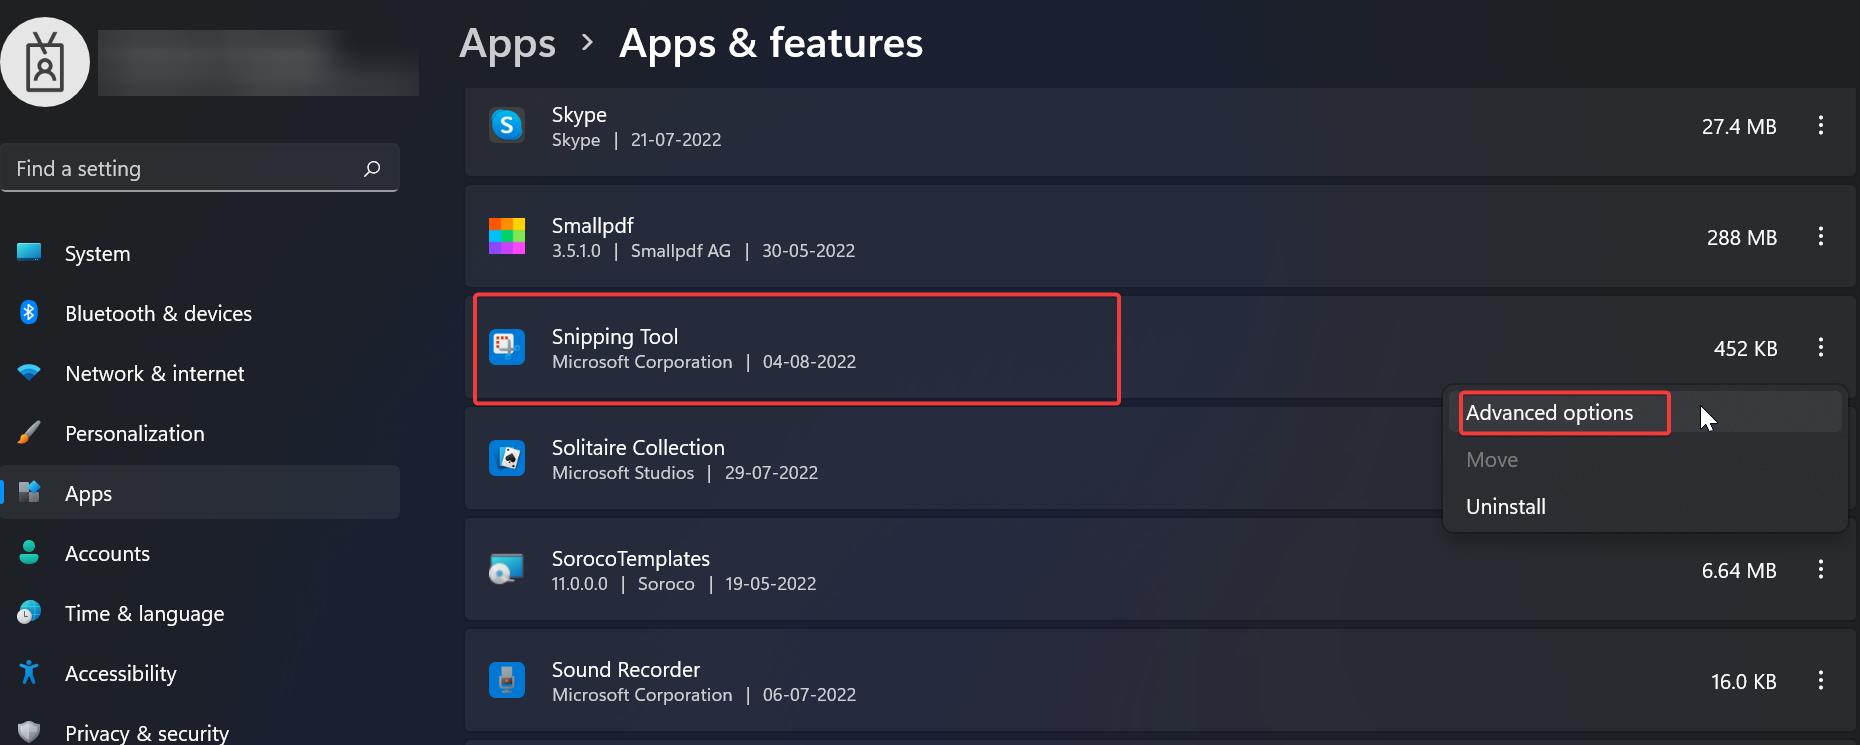
Under Apps & features, look for the snipping tool and click and open the Advanced Options.
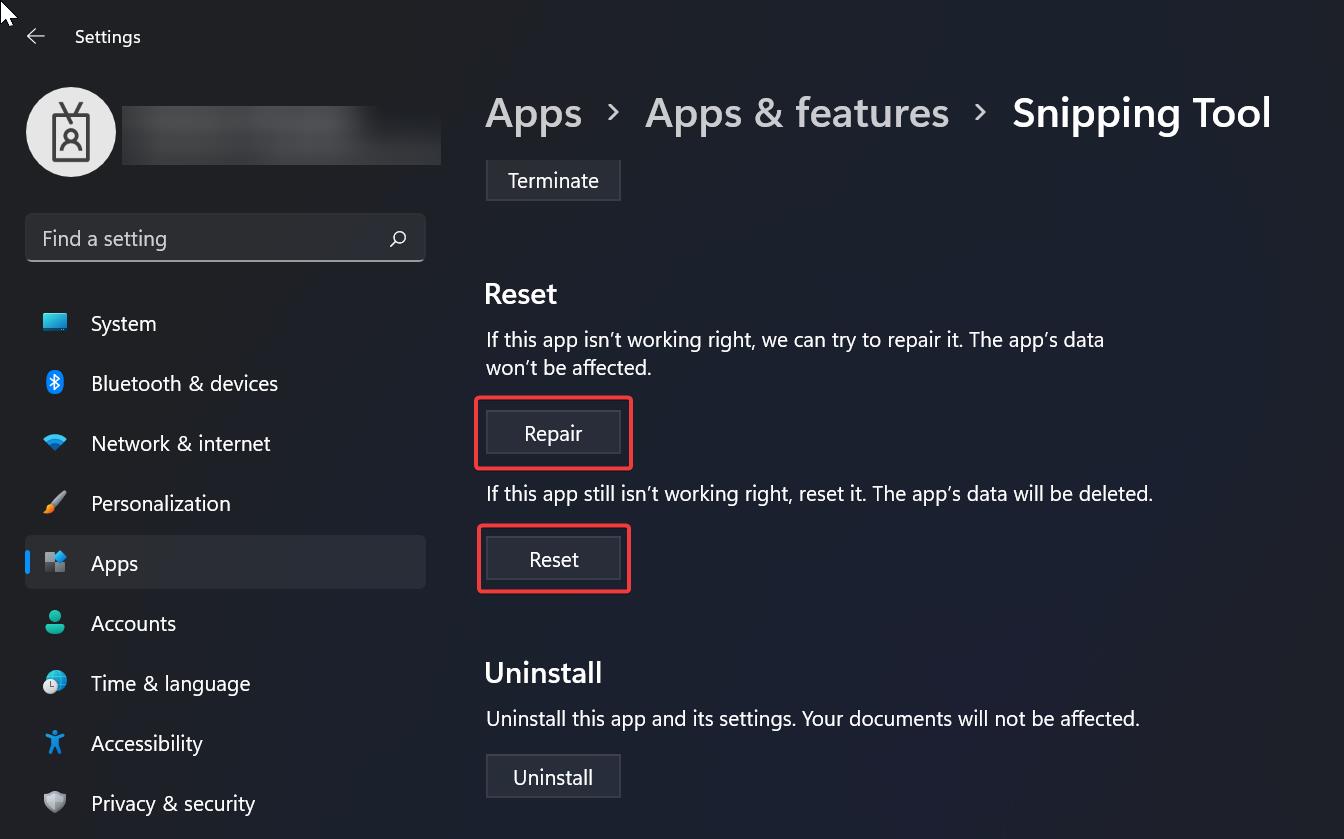
Under Advanced Options Choose Reset.
If the app is not working right, then follow the same steps above and choose Repair.
Solution 6: Reinstall Snipping Tool:
Open Windows Settings by pressing Windows + I and from the left-hand side click on Apps and from the right-hand side Apps & features.
Under Apps & features, look for the snipping tool and click and open the Advanced Options.
Under Advanced Options look for Uninstall section and click on Uninstall.
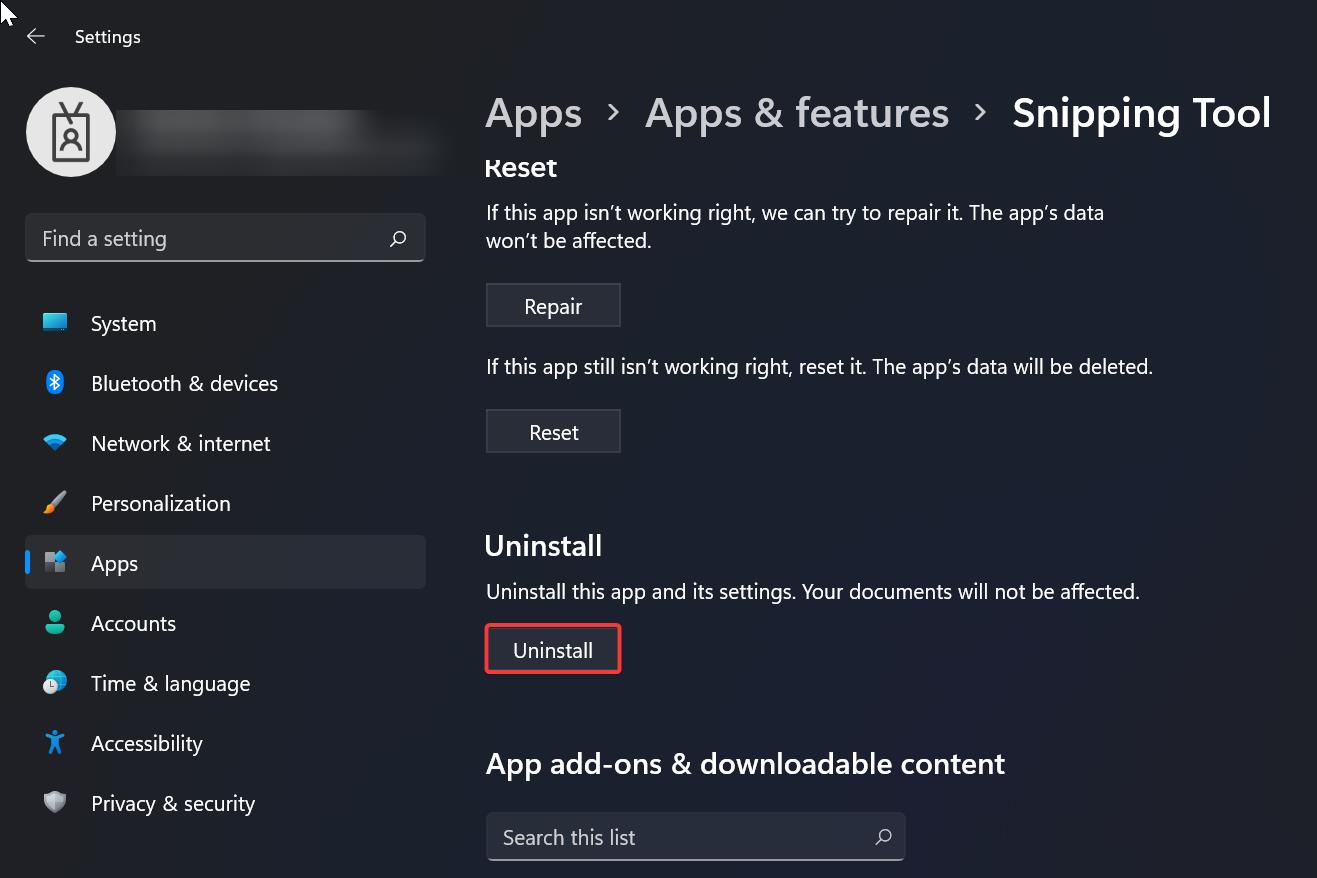
This will remove the app, Download the new version of Snip & Sketch from the Microsoft store and download the new version of the Snipping tool.
Read Also:
Launch Multiple Programs using One Shortcut in Windows 10
How to Change Snipping Tool Save Location in Windows 11?

