Mapping Network drive Means accessing a Particular Shared folder on a network. If you are working in a corporate company then you may familiar with Shared folder and mapping a network drive. Sharing folder means that a particular folder is accessible by another computer over the network, this can be achieved by FTP protocol. Sharing can be applied to any folder or drive. If you want to access any files or folders from another computer you can directly enter the network drive location in the run command and hit enter. In this way, you can access the Network drive. But this is not reliable if you close the drive window then you will lose the data and once again you need to enter the drive location in the run command. There is another method to access a share drive, which is reliable and you can permanently assign a drive letter and make it as separate windows partition. This method is called as Mapping a network drive. This article will show how to map a network drive in different ways.
Map a Network Drive in Windows 7,8 and 10:
Before accessing the network drive there are few things you need to check. First one enable the sharing option.
- Open Settings and navigate to “Network & Internet -> Sharing Options.”
- Under the “Network Discovery” section, select the “Turn on network discovery” option.

- Click “Save Changes.”
Now you are ready to Map a network drive. Press Windows + E to open windows explorer, Right-click on This PC, and choose Map Network Drive.

Now you will get a separate window for Mapping a Network drive.
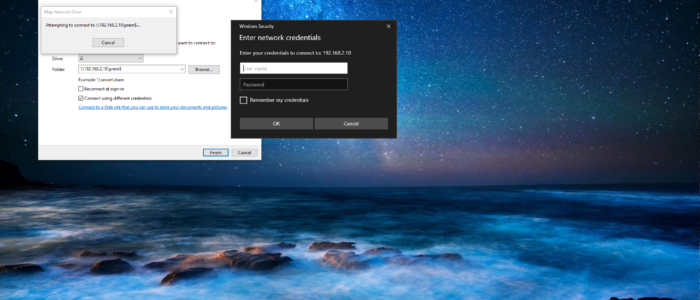
There you can assign a separate Drive letter. Enter folder location from the network drive. Or you can browse it like a other folder, browsing is little difficult. So better to enter the network drive location.

If you want the network drive to be permanent then check the option Reconnect at sign-in. this option will keeps your network drive permanent after the restart also. This will automatically remap after the restart. If you are having access to that particular network drive then you can directly give finish. If you don’t have access then it will ask for user name and password to map a network drive. You also use other ID to Map a Network Drive. This method is applicable for windows 7,8 and windows 10.
Map a Share Drive using Command Prompt:
You can also use the command Prompt to map a network drive in windows, you can apply this method in any version of windows.
- Open Run command by pressing Windows + R and type cmd hit enter. They type the following Dos command to map it.
net use x: \\computer name\sharename Example: C:\>net use x: \\10.168.2.6\upload$

- Here X is the Drive letter you can Choose your drive letter you want to assign to the shared folder.
- If you want to access the network drive with different user credentials, Follow the below format as shown below.
net use x: \\computer name\sharename /user username password
- If you want to map a network drive permanent add /P parameter at the end of the command, follow the below format to map a network drive as permanent.
net use x: \\computer name\sharename /P:Yes Where P = PERSISTENT
- To Delete a mapped network drive follow the below-mentioned command.
net use x: /delete
Where X is the drive letter, type your own drive letter by replacing X and hit enter this command will remove the mapped network drive.
Map a Share Drive using Powershell
Windows PowerShell delivers more power and control over Windows operating system, and we can do lot more stuff using windows Powershell. This topic covers about how to map a network drive using Windows Powershell.
Open Powershell by searching in Cortana or type PowerShell in run command Type the following command in the PowerShell
New-PSDrive –Name “G” –PSProvider FileSystem –Root \\computer name\sharename” –Persist
In this command we introduce the new cmdlet New-PSDrive. The New-PSDrive cmdlet creates temporary and persistent drives that are used to map a network drive or a data stoarage over the network. -name “G”, You can give the drive letter name using this command Just replace the \\computer name\sharename to your network address to map your network drive.
Map a Share Drive in MAC
To map a Network Drive in MAC simply hit Command key + K, This will open the Connect to the server window.
Now enter the Network Drive path eg; smb://networkcomputer/networkshare And click on connect, Now you will get the Prompt for Username and Password Give the username and password and connect to the share drive.