An administrator is someone who can make changes on a computer that will affect other users of the computer. Administrators can change security settings, install software and hardware, access all files on the computer, and make changes to other user accounts. To log on as an administrator, you need to have a user account on the computer with an Administrator account type.
If you are not sure if the account that you have on the computer is an administrator account, you can check the account type after you have logged on. This article shows how to add users to the administrator Groups using several methods.
There are many Types of administrators are there. But we use mostly these two types of account types.
- Domain Administrator--> Windows Domain Administrator Groups
- WorkGroup Administrator-> Local system administrator
Windows Domain Administrator Groups
If the system is connected to the domain and you are logged in with a username and password then this method will help you to add any user name in the admin group. before adding your user name the current user id must be added to the admin group.
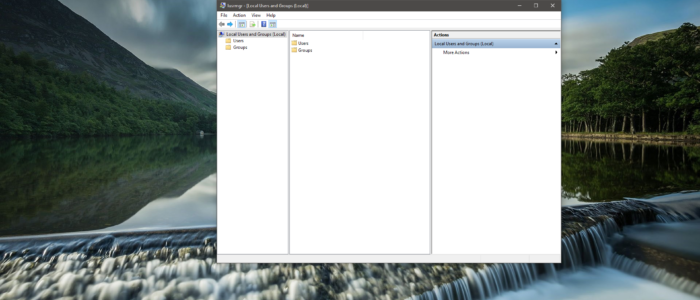
- Go to Run command and type lusrmgr.msc this will open user management console

- Now click on Groups, and select administrator.

- once you click on administrator you can see the add button on the bottom of that TAB
- click on ADD and give your user ID like example@example.com

- click on check name and verify it,
- click on apply and ok. Restart the PC to make it effective.
Local system administrator
Method 1: Via Computer Management
Method 2: Using Command Prompt
Generally, standard users have no rights to perform most common tasks such as installing and launching software on the computer. Only as an administrator can you have full rights to do any operation on Windows. If you are a standard user without admin rights on your computer, it may bring so much convenience and trouble for you. But never mind. You can add anyone existing standard user in your Windows to local administrator group to grand it administrator privileges.
Method 1: Add user to local administrator group in Windows Computer Management
Step 1: Right-click on Computer/My Computer, and select Manage.
Step 2: Expand Local User and Groups. And select Users folder.
Step 3: It lists all existing users on your Windows. Right-click on the user you want to add to the local administrator group, and select Properties.

Step 4: The Properties dialog opens. Select the Member Of tab. You can see which group the user belongs to. Then click on the Add button.

Step 5: The Select Groups dialog opens. Click the Advanced button.

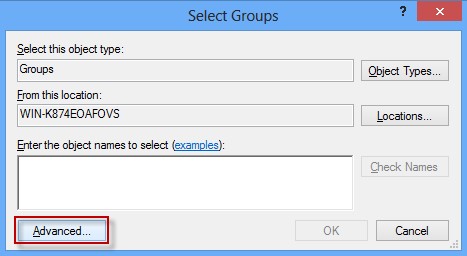
Step 6: Click on the Find Now button. Then it displays all groups. Select your target local administrator group name, and click on OK.

Step 7: Click on OK to add this user to the local administrator group.
Method 2: Add user to local administrator group using Command Prompt
Step 1: Open Command Prompt in elevated Mode.
Step 2: View all local groups
In the Command Prompt dialog, run the command: net localgroup. It will list all your local groups.

Step 3: Now Add User to Local Administrator Group
Run the command: net localgroup Administrators [username] /add. Replace [username] with your user you want to add to local admin group, and replace “Administrators” with your local administrator group name.

Add Local Administrator in Windows 11:
In Windows 11 you can add a Local Administrator without using a Microsoft account using two different methods.
Using Windows settings:
Open Windows Settings by pressing Windows + I and from the left-hand side click on Accounts and from the right-hand side choose Other users.

Under Other users click on Add account.

Once you click on Add account, you'll get a Microsoft account Prompt, click on "I don't have this person's sign-in information".

Next click on "Add a user without a Microsoft account".

On the next screen, you'll get Create a user for this PC. Type User name and Password.

Fill in the security Question, this will help you in case if you forgot your password. Click on Next.
By default, once you created any Local user account using this method, Windows will create a Standard account, to change the account type, follow the below-mentioned steps.
Click on the newly created account under other users and click on Change account type.

Under Change account type click on the Account type drop-down menu and choose Administrator and click on OK.

Using Local Users and Groups:
Open Run command by pressing Windows + R and type lusrmgr.msc and hit enter, this command will open the Local users and groups console.
Next, click on Users, Right-click on User, and choose New User.

Fill in the User name and Password and other required details then click on Create.

Read Also:
Delete Built-in Administrator Account in Windows 10
Built-in Administrator account error
Fix you need to sing in as an administrator to continue
Join Windows 10 Insider Program without Microsoft Account
How to Enable Built-in Administrator Account in Windows 11?