Wi-Fi is a technology that allows users to connect to the internet wireless. It uses high-frequency radio waves to connect to the internet and network connections. Wi-Fi adapter can be embedded in your device’s motherboard or you can install the Wi-Fi module separately and connect to any PC to access network connection. Click on the network symbol from the taskbar and choose the wireless network which you want to connect and click on connect. Then Windows 10 will automatically create a wifi network profile, you can edit or modify this profile whenever you want. If you are facing any issue to connect to the wifi network, then deleting and adding it again will fix the issue. In this article, we are going to see how to delete or Forget Wifi Network Profile in different methods.
Delete or Forget Wifi Network Profile in Windows 10:
To delete or forget the wifi network profile you can use any of these methods mentioned below.
Forget Wifi Network Profile from System Tray:
This is one of the easiest method to forget wifi network profile. To get started, first click on the wifi symbol from the taskbar and make sure the WiFi SSID is visible.
Choose the SSID which you want to delete, then right-click on the WiFi SSID and click on Forget.
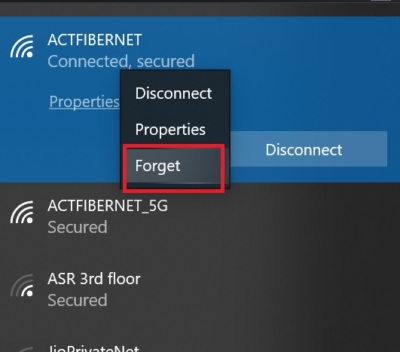
Now Enable the airplane mode and disable it again, now again click on the wifi symbol and connect to it. This time it will ask for a Password.
Using the Windows Settings:
Open Windows settings by pressing Windows + I, and click on Network & Internet.
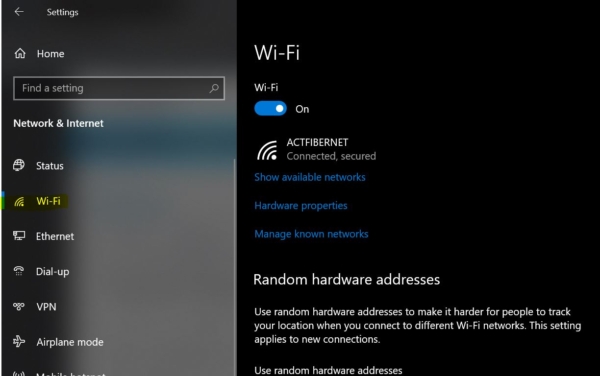
Click on the Wi-Fi tab and Manage Known Network, Under Wi-Fi choose the SSID name and click on Forget.
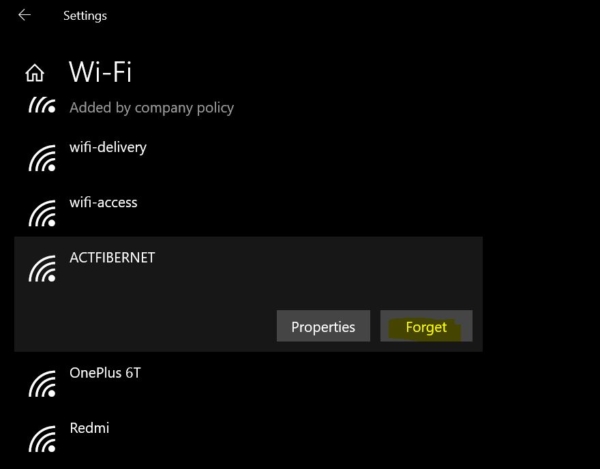
Now the WiFi network should not be visible in the Known network list.
Using Command Prompt:
Open Command Prompt in administrative Mode and enter the following command.
Netsh wlan show profiles
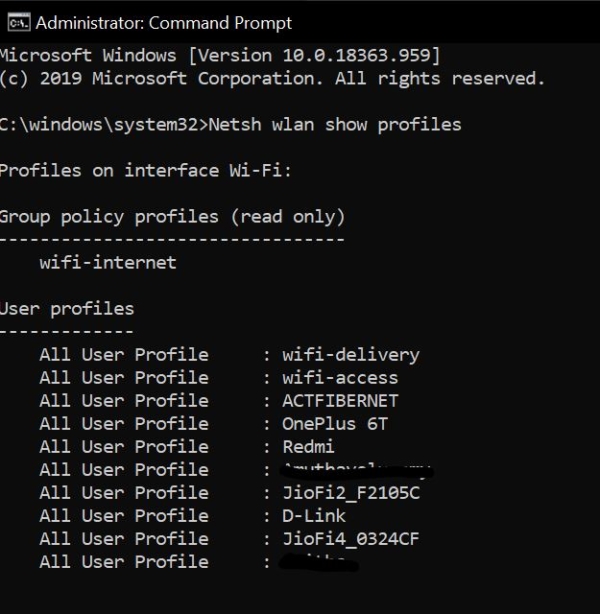
This command will show all the wifi network profiles which you previously connected. From here you have to note down the wifi network name which you want to delete.
If you already know the wifi network name then type the following command.
Netsh wlan delete profile name=”wifi network name”

This command will delete the wifi profile.
Using Registry Editor:
Note: Modifying the Registry is risky, and it causes irreversible damage to your OS Installation Follow the steps correctly. Friendly advice Before Modifying Registry Creating Restore Point is recommended.
Open Run command by pressing Windows + R and type Regedit and hit enter. This will open the Registry Editor.
Now Navigate to the following path
HKEY_LOCAL_MACHINE\SOFTWARE\Microsoft\Windows NT\CurrentVersion\NetworkList\Profiles
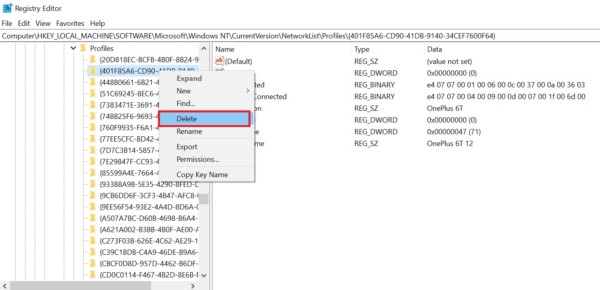
Under Profiles, you can see sub-keys. You need to click on each key to find out the correct ProfileName. Then right-click on the Profile and choose Delete.
Using PowerShell:
Open PowerShell in administrative Mode and enter the following command.
Netsh wlan show profiles
This command will show all the wifi network profiles which you previously connected. From here you have to note down the wifi network name which you want to delete.
If you already know the wifi network name then type the following command.
Netsh wlan delete profile name=”wifi network name”
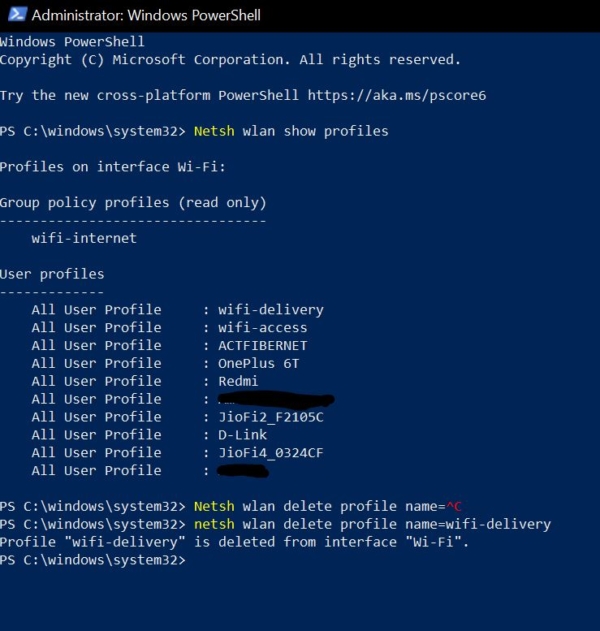
This command will delete the wifi profile.
Read Also:
How to Export all Saved Wi-Fi Passwords in Windows 11?
How to Troubleshoot and Fix Wi-Fi Not Connecting Automatically?


