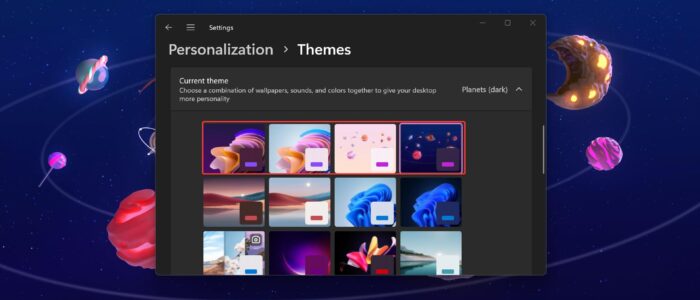
A Windows Theme is a collection of modifications to the interface which changes the way Windows looks and feels. A theme may alter the standard Windows icons, mouse cursor, and desktop background. It may also include new icons for My Computer, My Documents, My Network Place, Recycle Bin, and other standard Windows programs. Windows Themes are oftentimes developed and made available as free downloads, but some are also sold for a small fee. Each theme can be related to specific sports teams (or a general sport), cartoon characters, movies, celebrities, nature, vehicles, and just about any other imaginable interest. In Windows 11 you can change themes from Windows Settings > Personalization > themes, by default Windows 11 comes with Six default themes. You can also download more themes from the Microsoft store, In addition to default themes, Windows 11 introduces a few new hidden themes with the recent build updates. If you are updated to the recent version of Windows 11, then you can enable the hidden themes using the following method. This article will guide you to Enable Hidden Themes in Windows 11.
Enable Hidden Themes in Windows 11:
Unlike default themes in Windows 11, these hidden themes are specifically designed for students, the new theme includes colourful planetary and abstract wallpapers. Follow the below steps to enable Hidden Themes in Windows 11.
Note: Modifying the Registry is risky, and it causes irreversible damage to your OS Installation Follow the steps correctly. Friendly advice Before Modifying Registry Creating Restore Point is recommended.
Open Run command by pressing Windows + R and type regedit and hit enter, this command will open the Registry Editor console.
Now navigate to the following path.
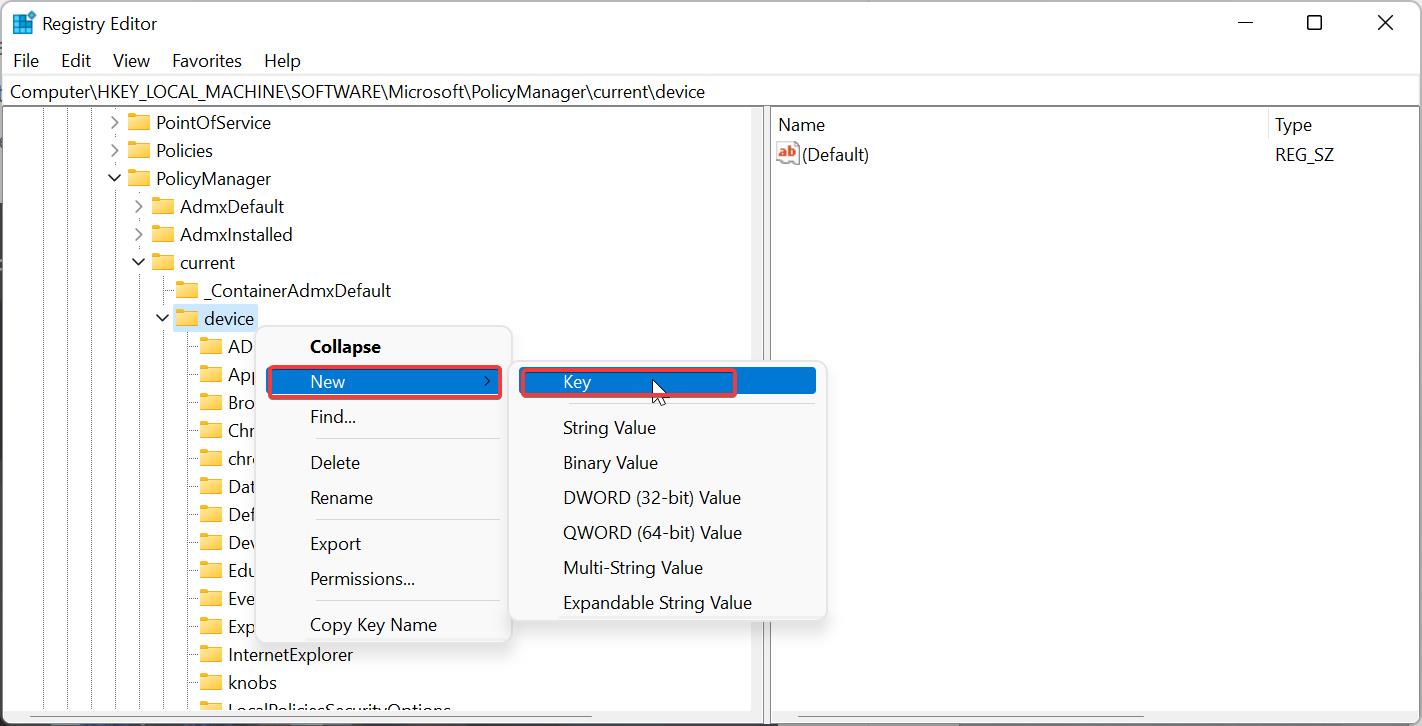
HKEY_LOCAL_MACHINE\SOFTWARE\Microsoft\PolicyManager\current\deviceFrom the left-hand pane look for the Device registry key, right-click on it and choose New > Key and name the Key as Education.
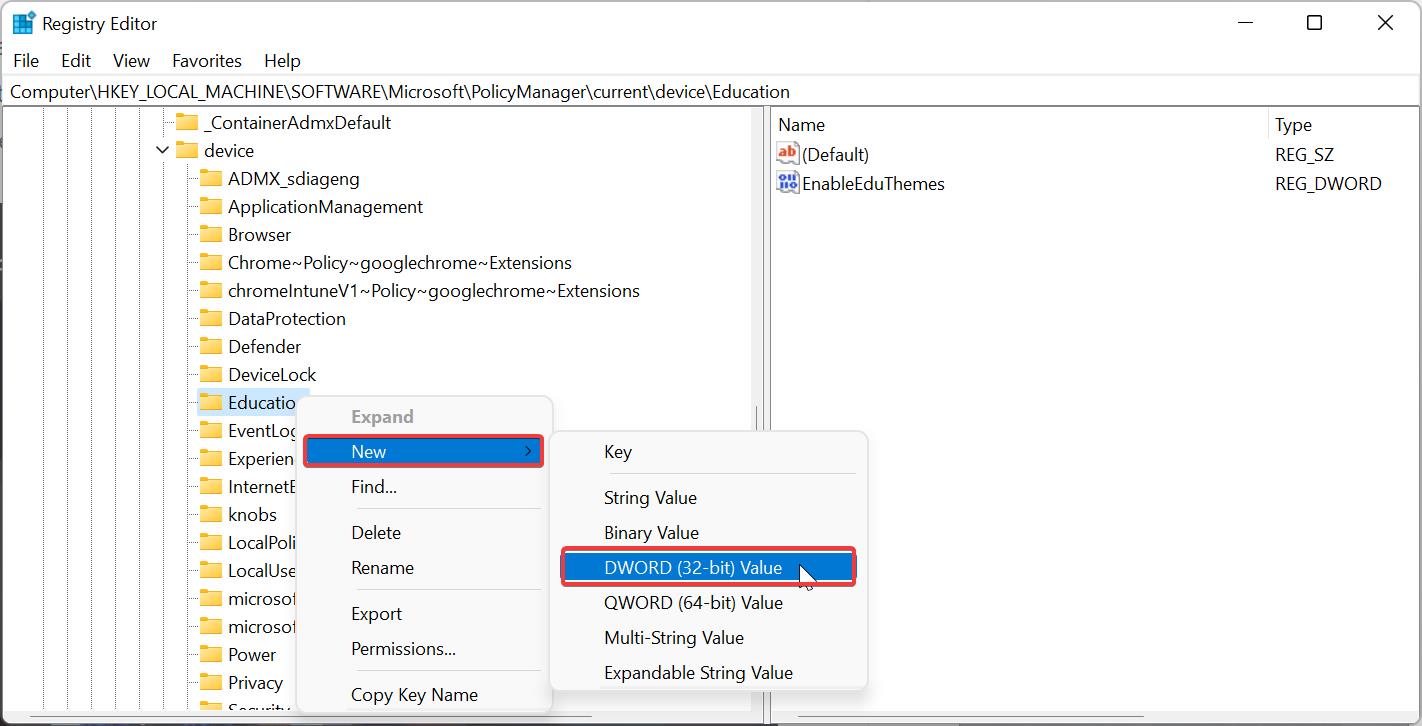
Right-click on the Education registry key and choose New > DWORD (32-bit) Value, and name the DWORD as EnableEduThemes.
Double-click on EnableEduThemes DWORD and set the Value data as 1 and click on OK.
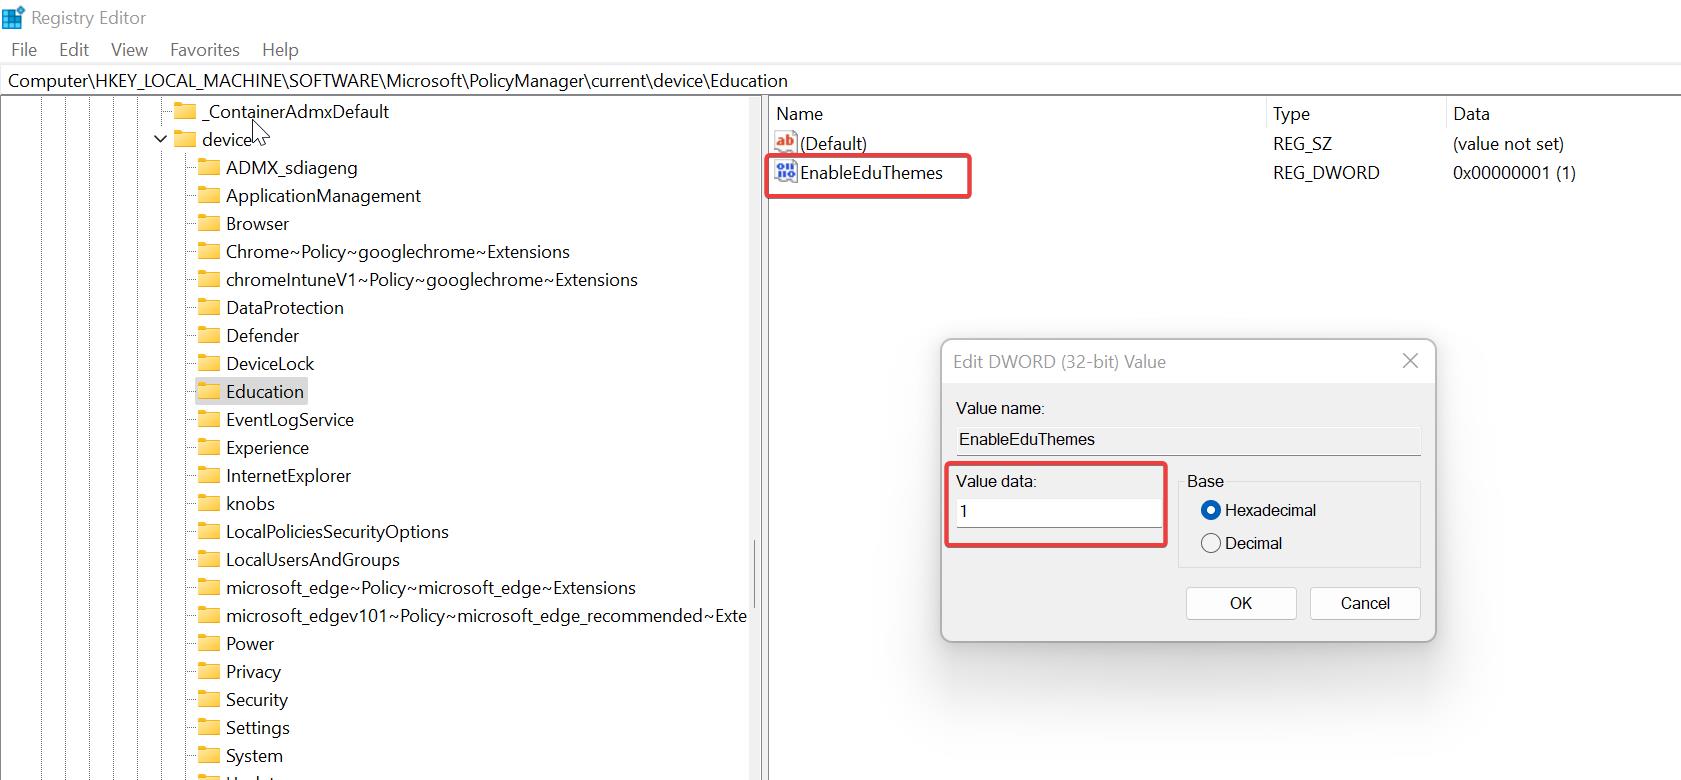
Close the Registry Editor and restart the system once.
After the System restart, the Education theme will automatically download and get enabled, you can see the new themes on the Personalization > Themes page.
Note: If you are unable to see the Education post the modification, then your system is not up to date, update your PC to the recent version and check.
Read Also:
How to Install Google Chrome Themes in Microsoft Edge?
How to Enable Spotlight Desktop Theme in Windows 11?
How to Change Windows Terminal Theme in Windows 10?

