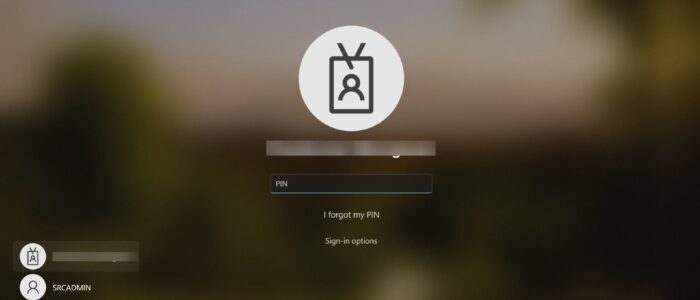
Once you boot your Windows system the first thing you see is Login Screen. The login screen often referred to as the Sign-in screen, this screen appears after the lock screen. Windows 10/11 login screen allows users to click on the user profile and then log in. You can see the list of signed users from the bottom left corner of the login screen. By clicking on the screen, you can easily switch users from one user account to another user account. By default, windows will show only active users’ profiles on the login screen, you can easily identify which person signed in recently by seeing the login screen. If you want to display all signed-in users on the login screen, then you follow the steps from this article. This article will guide you to Show all users on Login Screen in Windows 11.
Show all users on Login Screen in Windows 11:
To disable all Signed users and local users, you need to modify a few Policies on your Windows System. Follow the below-mentioned steps, once you modified all the mentioned policies you can see all the Signed-in users and local user profiles on the login screen.
Open the Run command by pressing Windows + R and type gpedit.msc and hit enter, this command will open the Group Policy Editor.
Now navigate to the following path.
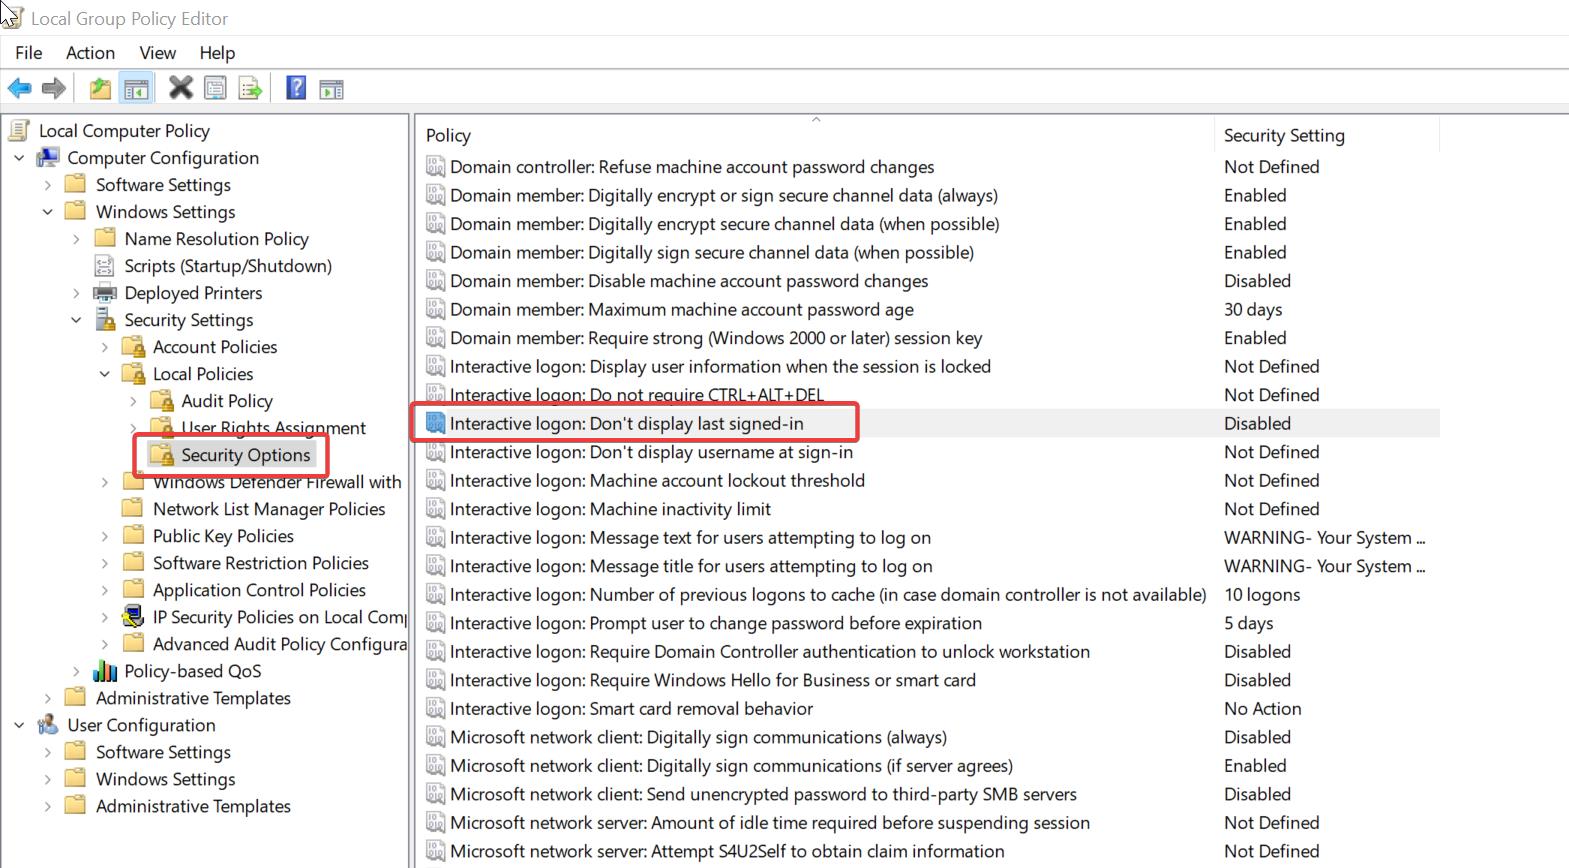
Computer Configuration -> Windows Settings -> Security Settings -> Local Policies -> Security OptionsFrom the left-hand side click on Security Options and from the right-hand pane look for the policy named “Interactive logon: Don’t display last signed-in”.
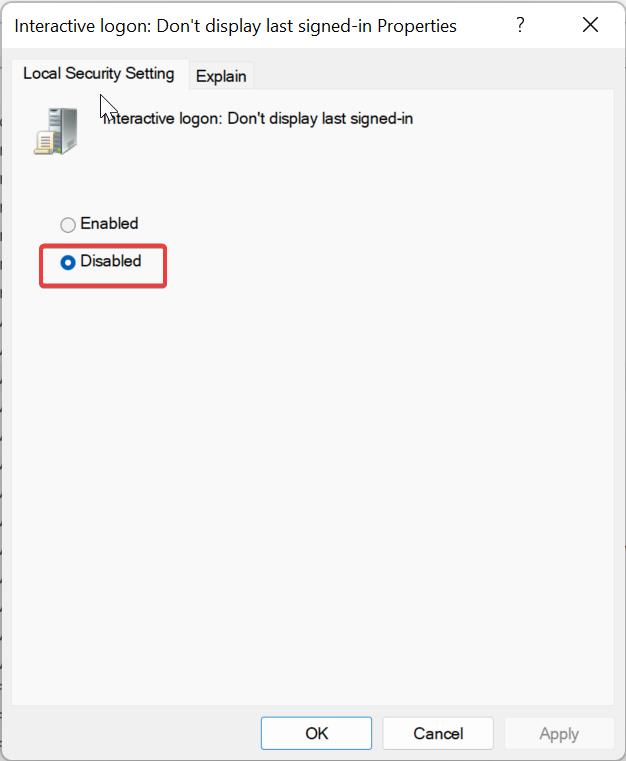
Double-click on the policy and open the policy settings, click on the Local Security setting tab. Make sure the policy is in the Disabled state, if not choose Disabled and click on Apply and OK.
Next, navigate to the following path in Group Policy Editor.
Computer Configuration -> Administrative Templates -> System -> LogonFrom the left-hand pane click on Logon and from the right-hand pane look for the policy “Do not enumerate connected users on domain-joined computer”.
Make sure the policy is in a Disabled or Not-Configured state. If it’s in Enabled State, change it to Disabled or Not Configured.
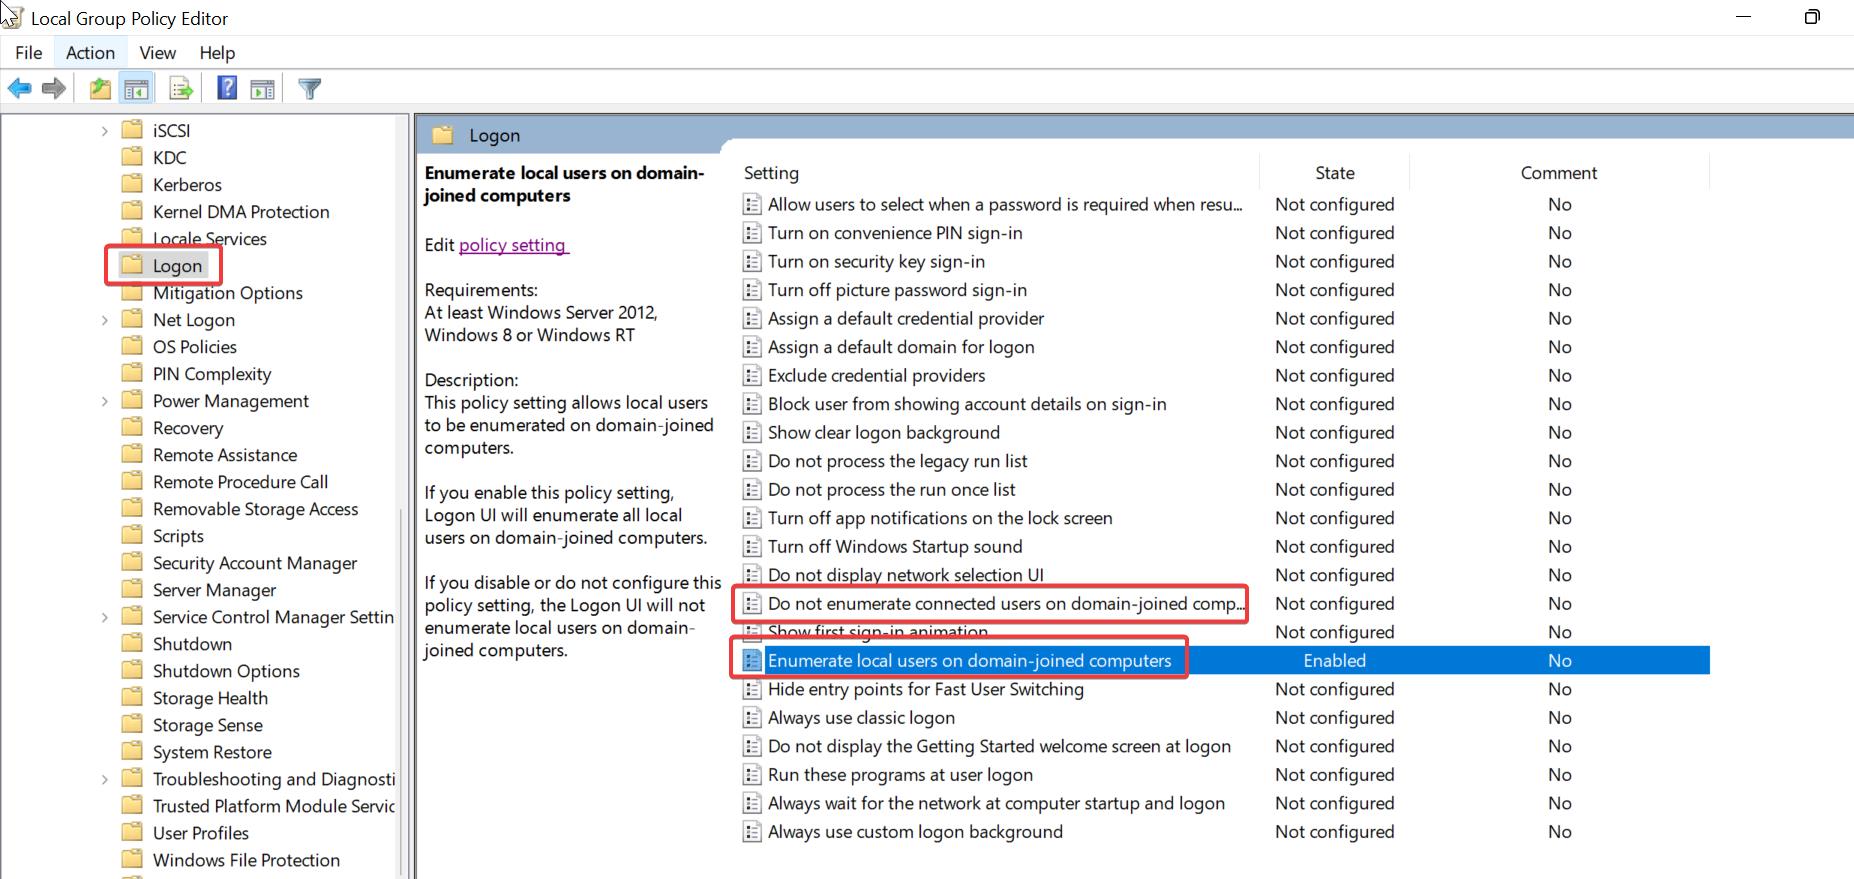
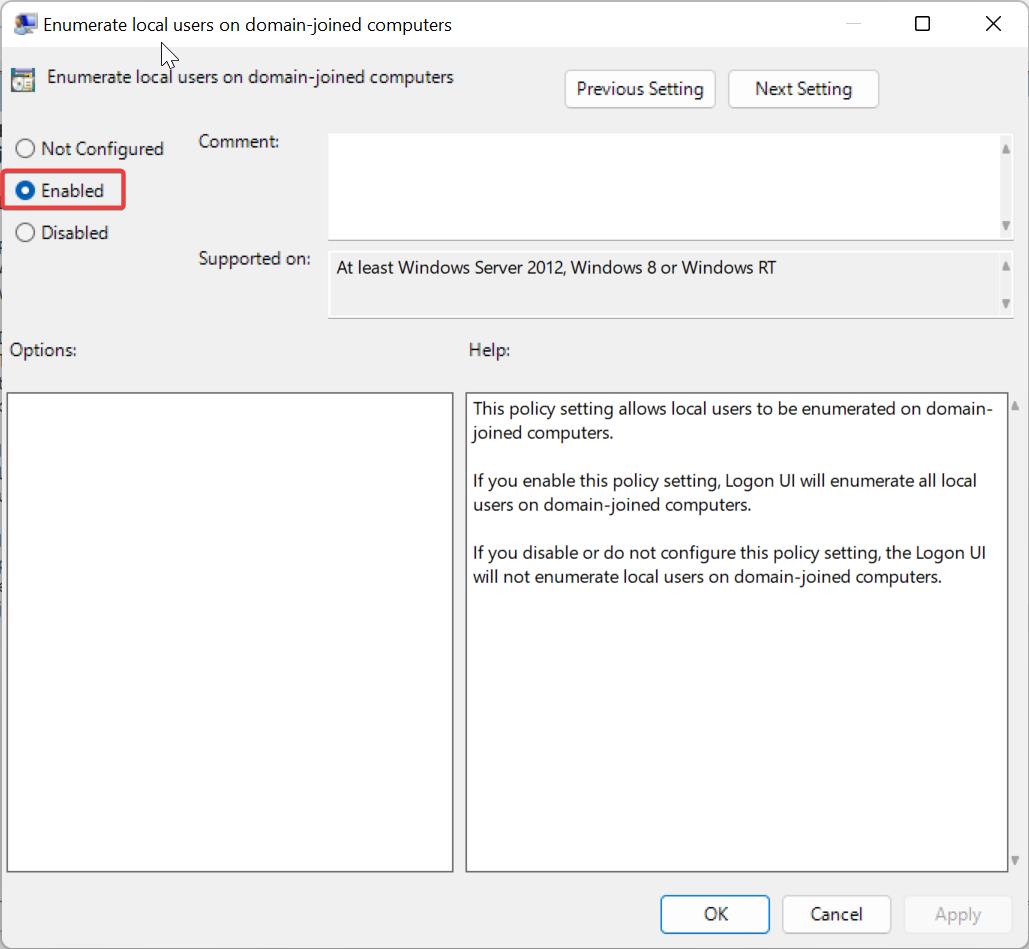
Next look for the “Enumerate local users on domain-joined computers” policy in the same path. Double-click and open the policy settings.
Choose Enabled and click on Apply and OK.
Open Command Prompt and type Gpupdate /force to apply the computer and user policies. Restart the system once, now you can see all users on the login screen.
Read Also:
How to Disable Network icon on Login Screen in Windows 11?
How to Hide Power Button on login screen in Windows 11?
How to Prevent users from Changing Lock Screen Background in Windows 11?
How to Create Sign-in Message Using Registry Editor in Windows 10?
How to Hide Power button on Login Screen in Windows 11?

