In windows 10 we may experience many different types of errors, most of the errors are basically comes with the error code. Using error code, we can easily determine the nature of an error and why its occurred. And using error code we can find out the solution easily. But this Black screen issue which we are going to discuss in this article won’t show any error code. Many users already experience this black screen issue, while booting windows 10 Desktop or Laptop the system won’t show any error, it just shows black screen with mouse pointer. You can see the movement of the mouse pointer. You can’t log in, even Ctrl + Alt + Del won’t work in this scenario. This article will guide you to Fix Black Screen Issue Before Login in windows 10.
Table of Contents:
Solution 1: Force Shutdown
Solution 2: Check the Display Connection
Solution 3: Check the Graphics or Video Card
Solution 4: Disconnect Non-essential Devices
Solution 5: Try Booting Safe Mode
Solution 6: Run Automatic Startup Repair
Since there is no error code for this black screen issue, so you must try troubleshooting from the scratch. Follow the solution one by one, you may get luck at any Solution.
Solution 1: Force Shutdown
Once you face this error while booting your Windows 10 PC or Laptop, Try to Force shutdown the computer or laptop by pressing the power button. Leave the system for 2 mins and start it again and check. If you are able to see the loading anime of the windows, then your issue is fixed. Or follow the other solutions to fix the black screen issue.
Solution 2: Check the Display Connections to Fix Black Screen Issue
First, check the Monitor Power LED is glowing or not, If the monitor LED is glowing constantly and showing black screen then your monitor is getting a signal from the system, and there is a connectivity issue between your PC and Monitor. Disconnect all the Display connections from your PC and recheck the cable once. Reconnect the cable and check once. If you are using a Dual monitor setup then remove one monitor and check the other monitor.
Recently we noticed one user is using a dual monitor setup one monitor is connected with the VGA cable and the 2nd monitor is connected with DisplayPort by VGA to DisplayPort adapter. We removed the 2nd monitor from the system then the first monitor starts to work suddenly. After we replaced the DisplayPort adapter then both the display starts to work. If you are using multiple video outputs, try to switch the connections and try.
Solution 3: Check the Graphics or Video Card
If you are using any graphics card or Video card, Just remove and reconnect it back. Now start the system and check for the issue.
Solution 4: Disconnect Non-essential Devices to Fix Black Screen Issue
Devices connected to your computer or laptop could be the reason for the black screen issue while startup. Usually, desktop users connect more devices to their PC like printers, cameras, removable drives, Bluetooth, and other USB devices. Remove all extra Peripherals from your computer and restart the system once and check. Mostly this will fix the black screen issue. As I mentioned above after disconnecting DisplayPort Video Adapter the system start to work normally. After removing all the Peripherals if your system works fine then there is an issue with some devices which is corrupted badly. Connect the devices one by one to check which devices causing the issue. Once you found the corrupted device search a way to fix the device accordingly or contact your device manufacturer.
Solution 5: Fix Black Screen Issue by Booting Safe Mode
Booting into safe mode is the best solution to check the system-critical problems, The purpose of Safe Mode is to allow you to troubleshoot Windows and try to determine what is causing it to not function correctly.
Once you have corrected the problem, then you can reboot and Windows will load normally. There are many ways to boot into safe mode, but in this scenario Restart the system and continuously press F8 to open advanced boot options, If it not work restart and try with Shift + F8 just before windows 10 start loading so that you can make it to launch the recovery mode. The other way is to interrupt the normal boot process, If Windows 10 fails to boot normally three times over, the fourth time it enters by default in an Automatic Repair mode. Using this mode, you can boot into Safe Mode. To trigger the Automatic Repair mode, you must interrupt the normal boot process three consecutive times: use the Reset or the Power button on your Windows 10 PC to stop it during boot, before it finishes loading Windows 10. If you use the Power button, you might have to keep it pressed for at least 4 seconds to force the power off. When Windows 10 enters the Automatic Repair mode, the first thing you see is a screen that tells you that the operating system is “Preparing Automatic Repair.” Once you reach the automatic Repair screen then press the “Advanced options” button Then, choose Troubleshoot, then “Advanced options -> Startup Settings -> Restart.” Then, press the 4 or the F4 key on your keyboard boot into minimal Safe Mode, press 5 or F5 to boot into “Safe Mode with Networking,” or press 6 or F6 to go into “Safe Mode with Command Prompt.”
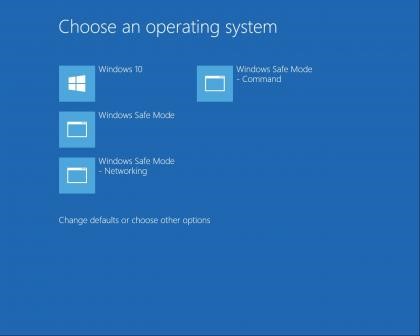
Once you successfully booted into safe mode try to uninstall recently installed software’s or Device drivers and restart the PC and start with normal startup. Mostly this solution will fix the issue.
Solution 6: Run Automatic Startup Repair
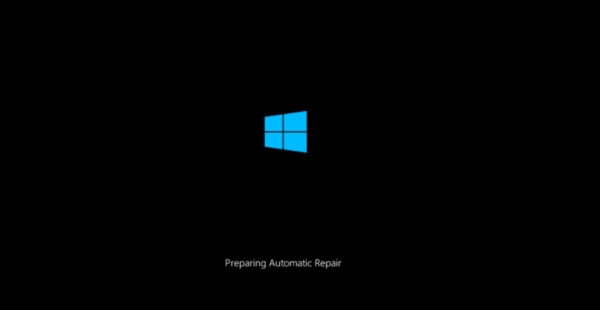
Interrupt the normal boot process, If Windows 10 fails to boot normally three times over, the fourth time it enters by default in an Automatic Repair mode. Using this mode, you can boot into Safe Mode. To trigger the Automatic Repair mode, you must interrupt the normal boot process three consecutive times: use the Reset or the Power button on your Windows 10 PC to stop it during boot, before it finishes loading Windows 10. If you use the Power button, you might have to keep it pressed for at least 4 seconds to force the power off. When Windows 10 enters the Automatic Repair mode, the first thing you see is a screen that tells you that the operating system is “Preparing Automatic Repair.” Run the Automatic Startup Repair and let the process complete. Check this fixes the issue or not.
Read Also:
How to Show all users on Login Screen in Windows 11?



Pingback: Windows 10 Won’T Show Screen Logga In – Sweden Logga In
Pingback: Windows 10 Black Screen Before Logga In – Sweden Logga In
Pingback: Windows 10 Won’T Show Screen Logga In - SwVast
Pingback: windows server black screen after login – european-borderlands.org
Pingback: windows desktop black screen after login - playsquare.tv