A desktop shortcut, usually represented by an icon, is a small file that points to a program, folder, document, or Internet location. Clicking on a shortcut icon takes you directly to the object to which the shortcut points. Shortcut icons contain a small arrow in their lower-left corner. This Small arrow makes the difference between the actual file and Shortcut. But from a UX point of View More Shortcuts on Desktop Doesn’t look good, for example, if you want to make a good presentation of your desktop with all the gadgets and desktop icons, Then Removing this Shortcut arrow from Desktop Shortcuts would improve the look. This article will guide you to remove the Arrow from Desktop Shortcuts.
Table of Contents:
In Two methods we can remove the Shortcut Arrow in Windows 10. Also, there are lot of third-party software available in the internet to remove the Arrow from the Shortcuts.
- Use ICO icon file to hide the Arrow
- Remove the Arrow from Shortcuts using Registry Editor
Let’s see the Topics in detail
Use ICO image file to hide the Arrow:
In this method we are going to use two important process to remove the Arrow from the Shortcuts.
- Create an empty ICO (icon) File
- Remove the Arrow using ICO file
Create an empty ICO (icon) File:
In this Method, First we are going to create an empty icon image in the PNG format, for this we recommend to use Paint.net, It’s a free software which is available in it official site.
Click here to download the software. Install the Paint.NET software first, once the installation is completed, launch the Paint.NET, and click on File.
Click on File or Press Ctrl + N to create a new file. Now you will get the separate New Window. Under Pixel Size, Modify the Width and Height Pixels.
Width: 32 Pixels
Height: 32 Pixels
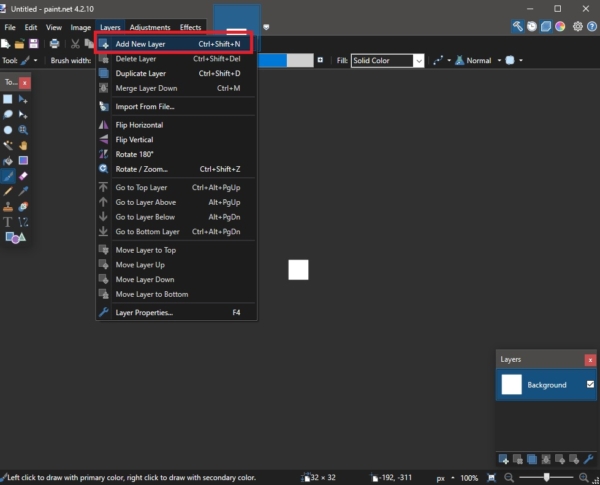
And click on OK. Now You will get a new file under 32 * 32 ratio, Next Create a New layer by pressing Layers > Add New Layer or Simply press Ctrl + Shift + N. you can see the layer under the layers window at the bottom Right corner.
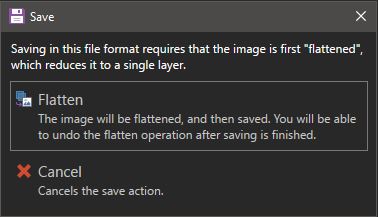
While saving you will get one message stating “Saving in this file format requires that the image is first “Flattened”, which reduces it to a single layer” click on Flatten.
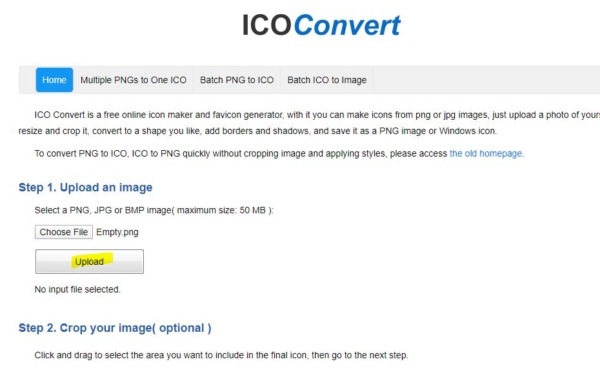
Next convert that PNG image file to ICO file. ICO file format is the image file format for computer icons in Microsoft Windows. There are number of online image converters are there, Choose it as per your wish, We recommend using IcoConvert.com
Navigate to the site and upload the Empty.PNG file which is saved on your Desktop.
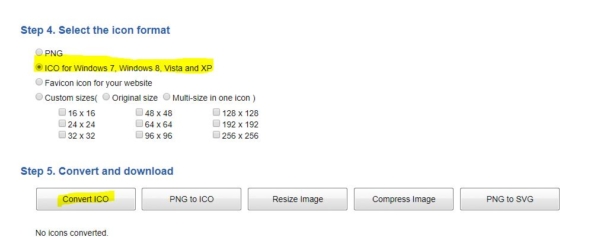
Once the image file uploaded, no need to change any settings, directly come to the Convert and Download and Click on Convert ICO.
After the conversion download your icon file. That’s it you have successfully created ICO file.
Remove the Arrow using ICO file:
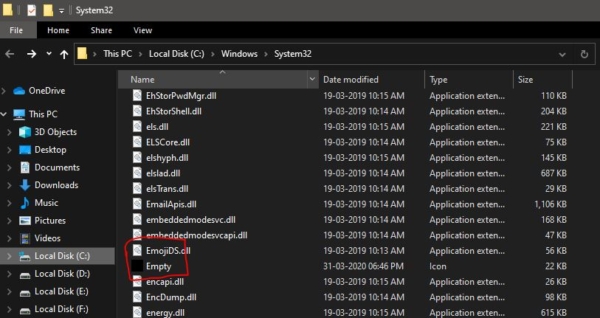
Move the Downloaded ICO file to the Desktop and name it as Empty, Now Navigate to the below-mentioned location.
C:\Windows\System32
Copy that Empty ICO file from desktop to the System32 Location, it requires admin rights.
Note: Modifying the Registry is risky, and it causes irreversible damage to your OS Installation Follow the steps correctly. Friendly advice Before Modifying Registry Creating Restore Point is recommended.
Open run command by pressing windows + R and type regedit and hit enter this will open the Registry editor.
Now Navigate to the following path
HKEY_LOCAL_MACHINE\SOFTWARE\Microsoft\Windows\CurrentVersion\Explorer\Shell Icons
In Most of the systems you can’t find Shell Icons, In that case, Create it. Navigate to the following path
HKEY_LOCAL_MACHINE\SOFTWARE\Microsoft\Windows\CurrentVersion\Explorer
Right click on the Explorer from the left-hand side and Choose New > Key from the context menu and Name it as Shell Icons.
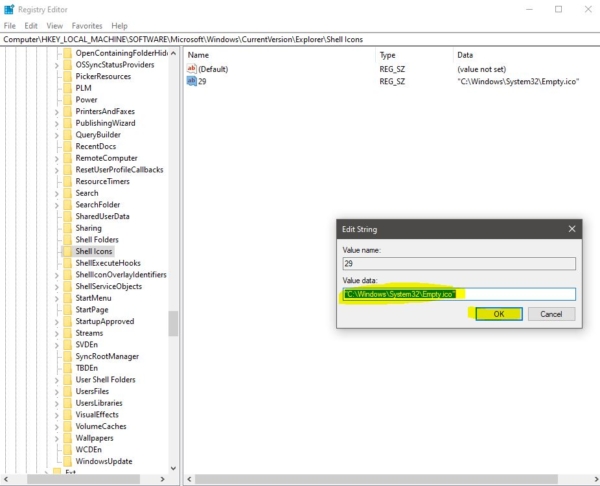
Click on the newly created Shell Icons registry key and from the right-hand side right-click on the empty area and choose New > String Value from the Context Menu and name it as 29.
Double click on the 29 String Value and under the Value data field enter the below-mentioned path and give OK.
“C:\Windows\System32\Empty.ico”
Now restart the system once to make it effective. Or Open Task Manager and restart the File Explorer. Now you can see the changes, This will remove the arrow from all the shortcuts.
Remove the Arrow from Shortcuts using Registry Editor
Open run command by pressing Windows + R and type regedit and hit enter this will open the Registry editor.
Now navigate to the following path
HKEY_LOCAL_MACHINE\SOFTWARE\Microsoft\Windows\CurrentVersion\Explorer\Shell Icons
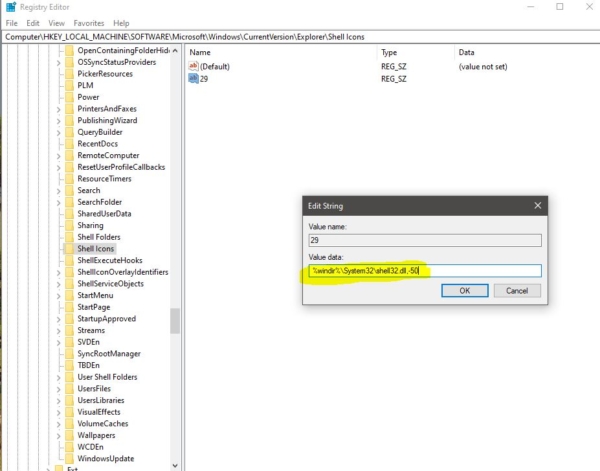
If you can’t find the Shell Icons Create it, follow the above-mentioned method. Once the Shell Icons Created double click on the 29 Registry String and modify the value. Copy-paste the below-mentioned value under Value data and click OK.
%windir%\System32\shell32.dll,-50
Now restart the system once to make it effective. Or Open Task Manager and restart the File Explorer. Now you can see the changes, This will remove arrow from all the shortcuts.


