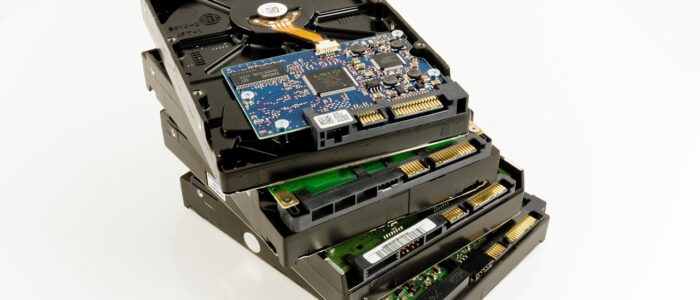
Nowadays Using multiple HDD in a single system is casual, and it is very helpful to store a lot of data in different partition. Connecting the HDD to the system is easy just open the system and connect the HDD in any of the SATA slots, check here to how to install a new hard drive in the system, but recently some users reported Second Hard Drive Not Detected in Windows 10. Here in this post, we will see the possible ways to fix this issue.
There are few parameters to check before installing the second hard drive.
- First, check for any physical Damage on the HDD or check if there is any sound while shaking the HDD
- After the Physical check if you have to check the HDD logically by connecting to the system.
- If you are having SATA HDD then connect it to any SATA port in the motherboard properly, double-check the connection is fine and make sure the HDD is Running or Not. (Keep the hand on the HDD and you can feel the small vibration from the HDD due to the spinning DISK)
- And sometimes the SATA cable might be the problem, change the SATA cable once and check.
If everything is connected right, but you’re still facing the issue with detecting your second hard disk drive, try the following solutions.
Solution 1: Check the settings in BIOS.
After connecting the HDD to the SATA port we must check the SATA setting in BIOS, because modern motherboard BIOS comes with the option to disable the secondary HDD. To enable the hard drive in BIOS and make the second hard drive show up in Windows 10 correctly, do as follows.
Step 1. Restart PC. Hold and press F2 to enter BIOS environment.
Step 2. In the Setup section, check whether the second hard drive is turned off in the system setup. If yes, turn it on.
Step 3. Reboot PC again. See if the second hard drive showing up normally this time. Proceed to the Next step if the issue still persists.
Solution 2: Check the Device Manager.
The Device Manager is the centralized console to organize and gives the central view of the windows recognized hardware attached to a computer. This includes devices like keyboards, hard disk drives, USB devices, etc. It sorts out all hardware, listing them on the basis of various criteria and when a device malfunctions or stops working altogether, it immediately notifies the user. Thus, it can be used to control devices, enable or disable them, configure them, identify conflicts between devices, and much more. So in our case, if the HDD is connected and if it’s still not detected we have to check in the device manager.
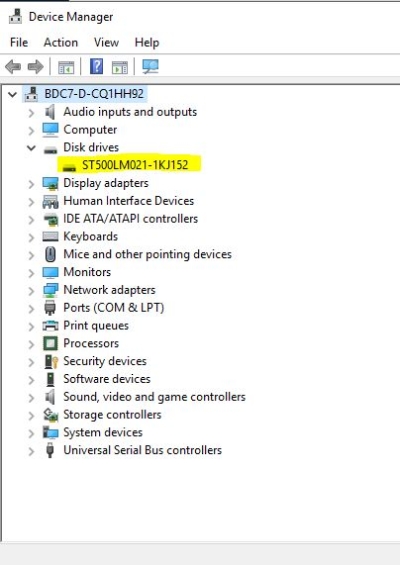
How to check the HDD is detected or not from the Device Manager?
Step 1: Open Run command by pressing Windows + R and type devmgmt.msc
Step 2: It will open the device manager. Then Right-click on the disk drivers and select scan for hardware changes.
Step 3: The scan will detect the HDD and if there is any issue with the drivers it will show the error message with the prompt.
Step 4: If you are able to find the driver for the external drive.
Step 5: Then again right-click on the driver and click on Properties.
Step 6: Check the device status of the disk. If you are using a windows 10 machine you can follow the next solution.
Solution 3: Use Hardware Troubleshooter.
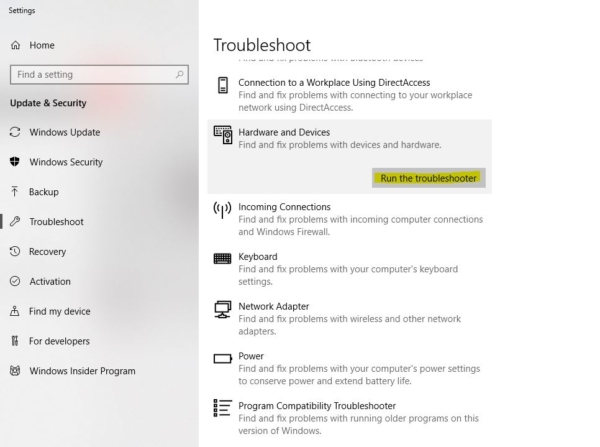
Troubleshoot is one of the best tool in windows 10 which is used to find any common problems and to fix it. In troubleshooter, you can find the hardware and device Troubleshooter option to find and fix problems with devices and hardware.
Step 1: Go to the Search bar in windows 10 and type Troubleshoot and click it.
Step 2: Find the Hardware and device Option
Step 3: Click on it and run the troubleshooter, now troubleshooter check all the hardware connected to your PC and it find if there is any problem related to that.
Step 4: Click on Next and follow the instructions. If this doesn’t fix the issue proceed to the next solution.
Solution 4: Change the Drive Letter.
Sometimes if you connected your hard drive properly and the device driver also working fine, but if it doesn’t have the driver letter assigned, then it will not shown on This PC/My computer. Try the following steps to fix this issue.
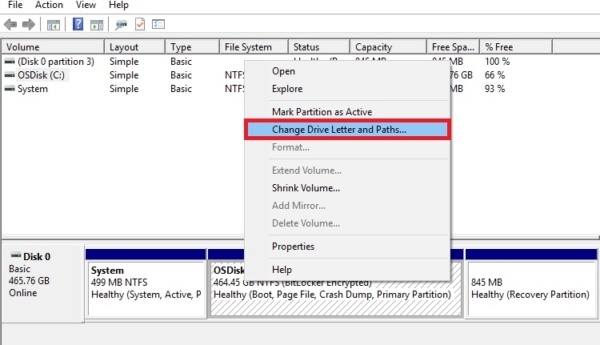
Step 1: In Windows 10, right-click on the Start button and click on Disk Management.
Step 2: Find your second hard drive and right-click on it
Step 3: Go to ‘Change drive letter and path’ and click on Change
Step 4: Choose a letter for your partition from the list and confirm
Step 5: Then restart your computer.
Solution 5: Initialize a hard drive or SSD using disk management
Step 1: In Windows 10, right-click on the Start button and click on Disk Management.
Step 2: Find and right-click the hard drive or SSD you want to initialize, and then click “Initialize Disk”. If the disk is listed as Offline, first right-click it and select Online.
Step 3: In the Initialize Disk dialog box, select the correct disk to initialize. And then click OK to accept the default partition style, or you can change the partition style (GPT or MBR) as you want.

