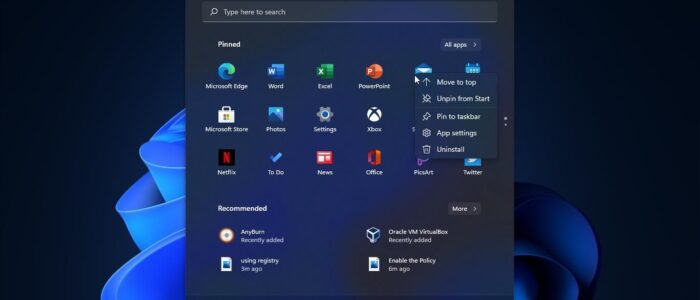
Windows 11 includes a new Start menu, an updated Start button, and a new taskbar. Start Menu in Windows is like the master control panel of your PC. In Windows 11, Microsoft made some big changes to the start menu. The layout has changed and the features that are included have been streamlined for a cleaner, hopefully, more intuitive, user experience. And moreover, the start menu is moved to the central location, instead of having a static position in the lower-left corner of the screen, Microsoft moved the Start button and the other icons to the middle portion of the taskbar. You can also change the orientation of the Stat menu position to left or to the Centre. Windows 11 offers a lot of customization options for the Start Menu and Taskbar. The New Windows 11 Start menu display pinned apps at the top and recent items at the bottom of the menu in the Recommended section. Like Windows 10 you can customize the Pinned apps in the Start menu, you can drag, move, or remove the pinned apps in the start menu. And, you can lock the items and layout of the Start menu in Windows 11, so other users can’t change the layout of the Start menu. This article will guide you to Lock Windows 11 Start Menu Layout using different methods.
Related: Remove Recent Files from Start Menu in Windows 11
Lock Windows 11 Start Menu Layout:
You can lock or unlock the Start Menu Layout in Windows 11 using two different methods. There is no direct option given in Windows 11 Settings to Lock or unlock the windows 11 start menu layout.
Using Group Policy Editor:
Open Run command by pressing Windows + R and type gpedit.msc and hit enter. This command will take you to the Group Policy Editor.
Now navigate to the following path.
User Configuration > Administrative Templates > Start Menu and Taskbar > Start Layout
From the left-hand side, you’ll see the Start Menu and Taskbar click on it, and from the right-hand side look for the Policy named Start Layout.

Double click on the Start Layout policy and Choose Enabled. And click on Apply and OK.

This will Lock the Start Menu layout, next open command prompt and type gpupdate /force and hit enter, once the policies are updated. Restart your system once.
Using Registry Editor:
Open Run command by pressing Windows + R and type regedit and hit enter. This command will open the registry editor console.
If you want to lock the Start Menu layout for all users, then navigate to the following path.
HKEY_LOCAL_MACHINE\Software\Policies\Microsoft\Windows\Explorer
If you want to lock the Start Menu Layout for the current user then navigate to the following path.
HKEY_CURRENT_USER\Software\Policies\Microsoft\Windows\Explorer
If you are not able to find the Explorer key, then right-click on the Windows Registry key and choose New > Key and name it as Explorer.
From the left-hand side click on the Explorer key and from the right-hand side look for the LockedStartLayout DWORD. If you are not able to find the LockedStartLayout DWORD then right-click on the Explorer key and choose New > DWORD (32-bit) value, and name it as LockedStartLayout.
Double click on the LockedStartLayout DWORD and set the value as 1, then click on OK.

Restart the system once. That’s it you have successfully locked the start menu layout.
Related: Add System Folders to the Start Menu Next to the Power button