In this article we’ll show you how to Modify Boot Menu timeout, before proceeding let’s see what is Boot Menu Timeout. Boot Menu timeout refers to the amount of time that a computer’s boot menu will be displayed before the operating system starts to load. During this time, user can select different boot options, such as booting from a USB drive or choosing to boot into safe mode. If you installed more than one operating system along with Windows 11/10, then the boot menu will show installed Operating systems, and it won’t load any of the operating systems immediately. Instead, it displays the available operating systems for 30 seconds by default. This time is known as boot menu timeout. Boot menu timeout determines how long the boot menu should display, so within that time, you can select the Operating system. If you didn’t select any Operating system within 30 sec then, the system will automatically load the first operating system. By default, in Windows boot menu timeout is 30 secs, and if you want you can increase or decrease the timeout value between 0 and 999 seconds.
Modify Boot Menu Timeout in Windows 11/10:
In Windows, you can change the boot menu timeout using the following methods. Let’s see the methods in detail.
Method 1: Modify Boot Menu Timeout using Boot Options
Restart your system and when the boot menu appears, click on the Change defaults or choose other options.
Then select the Change the timer option from there.
Next, you can select any of the available timeout values, you can see the timeout values from 5 seconds to 5 minutes.
Choose the appropriate timings and press the back arrow button and select an operating system to load.
Next time when you turn on your PC/Laptop, the system will wait till the timeout value you set before the Operating system loads.
Method 2: Using MSConfig
We can also change the boot menu timeout value using System Configuration Utility, this utility also known as msconfig, which is included with the Windows operating system that allows users to manage the configuration of their system startup.
Open Run command by pressing Windows + R and type msconfig and hit enter, this command will open the System Configuration.
Click on the Boot tab and under the Timeout section enter the value between 3 to 999.
And check the option to Make all boot settings permanent.
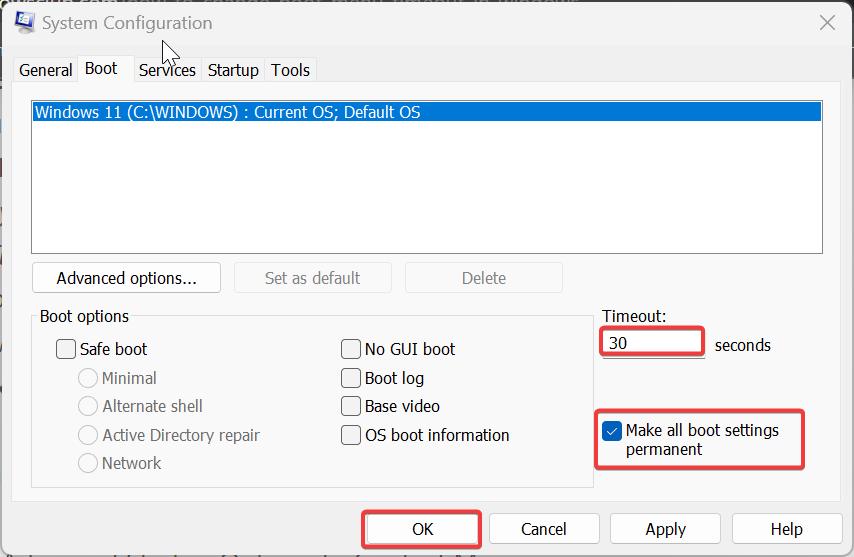
Click on Apply and OK.
A System Configuration confirmation box will open, click on Yes and press the OK button.
Next system will ask for restart, Restart your system once. After the restart, the system boot menu timeout changes will be applied.
Method 3: Using System Properties Window
System Properties Window Properties provides information about the computer’s hardware and software configuration, it allows you to view and change the computer name, domain, or workgroup settings. You can also create and restore the System restore points via System Protection. And using system properties you can change the system boot menu timeout value.
Open Run command by pressing Windows + R and type sysdm.cpl, this command will open the System Properties window.
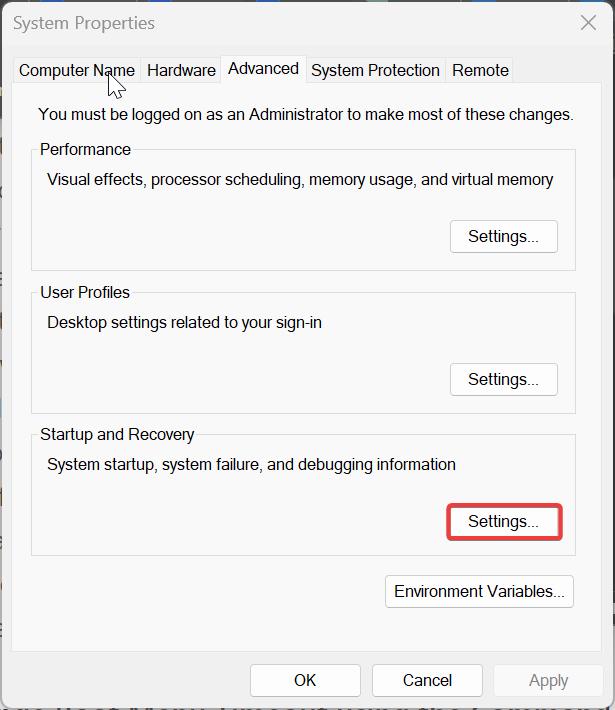
Click on the Advanced tab and under Startup and Recovery choose Settings.
Under System startup, check the Time to display list of operating systems, set the value from 0 to 999.
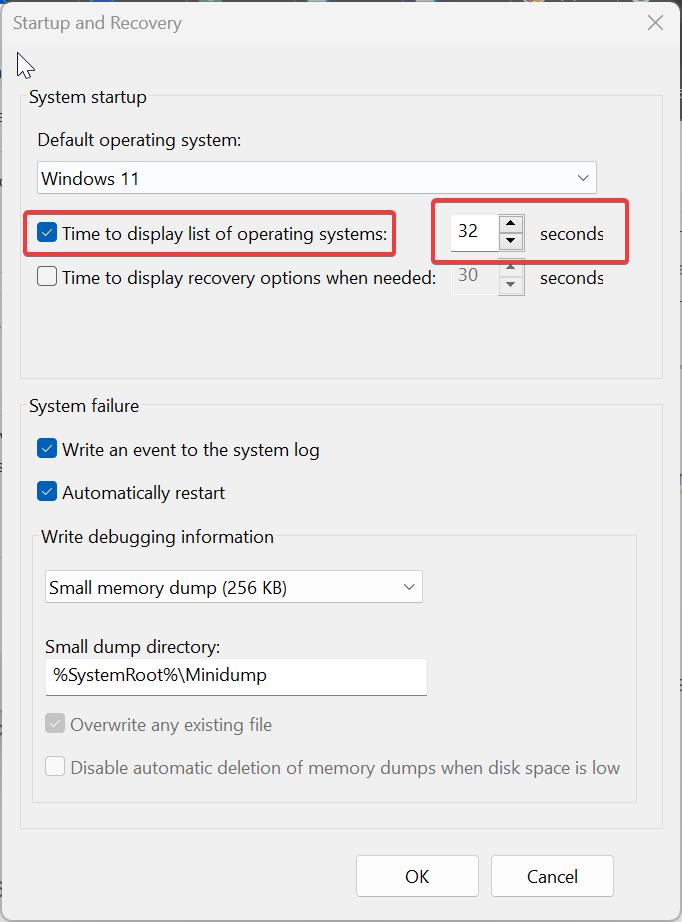
Click on OK. This will load the default operating system based on your system boot timeout value.
Method 4: Using Command Prompt
Open the Command Prompt in elevated mode, click on the start menu and search for command prompt and right click on it and choose Run as administrator.
Type the following command to change the boot menu timeout value.
Bcdedit /timeout 60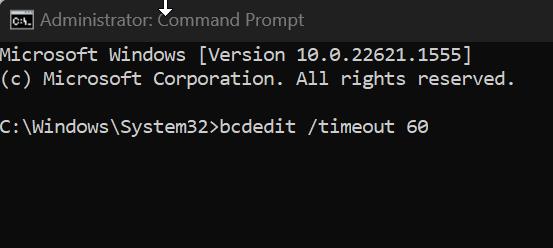
You can enter any timeout value from 0 to 999 and hit enter, this command will change the timeout value to 60 sec.
Read Also:
How to Bring back the Old Boot animation in Windows 11?
How to Add Safe Mode to Windows 11 Boot Menu?


