Lock Screen is a feature which is introduced in Windows 8 and got developed in Windows 10 and Windows 11. The improved Windows 11 Lock screen displays an image, time, and date, and it show preferred apps, such as your calendar, messages, and mail, you can see the notification while your computer is locked. You can see the lock screen before signing in to your account, you can customize the Lock screen by showcasing your favorite background images, personal pictures, and beautiful images from Bing using Windows spotlight. This retains the familiar look and feels as the classic experience found on Windows 10, apart from these Windows 11 Lock screen comes with new visual changes and iconography to match the new design language. By default, in Windows 11 you can see the Windows Spotlight on the login screen, the same spotlight will be enabled for lock screen. If you haven’t configured the Windows Spotlight, the Windows 11 sign-in screen will appear with some solid color. In this article, we’ll see how to show the lock screen background picture on the sign-in screen.
Show the lock screen background picture on the sign-in screen:
In Windows 11 you can use the following two methods to enable lock screen background images on the sign-in screen. Windows 11 will show the lock screen first and by pressing any key you can see the login screen.
Using Windows Settings:
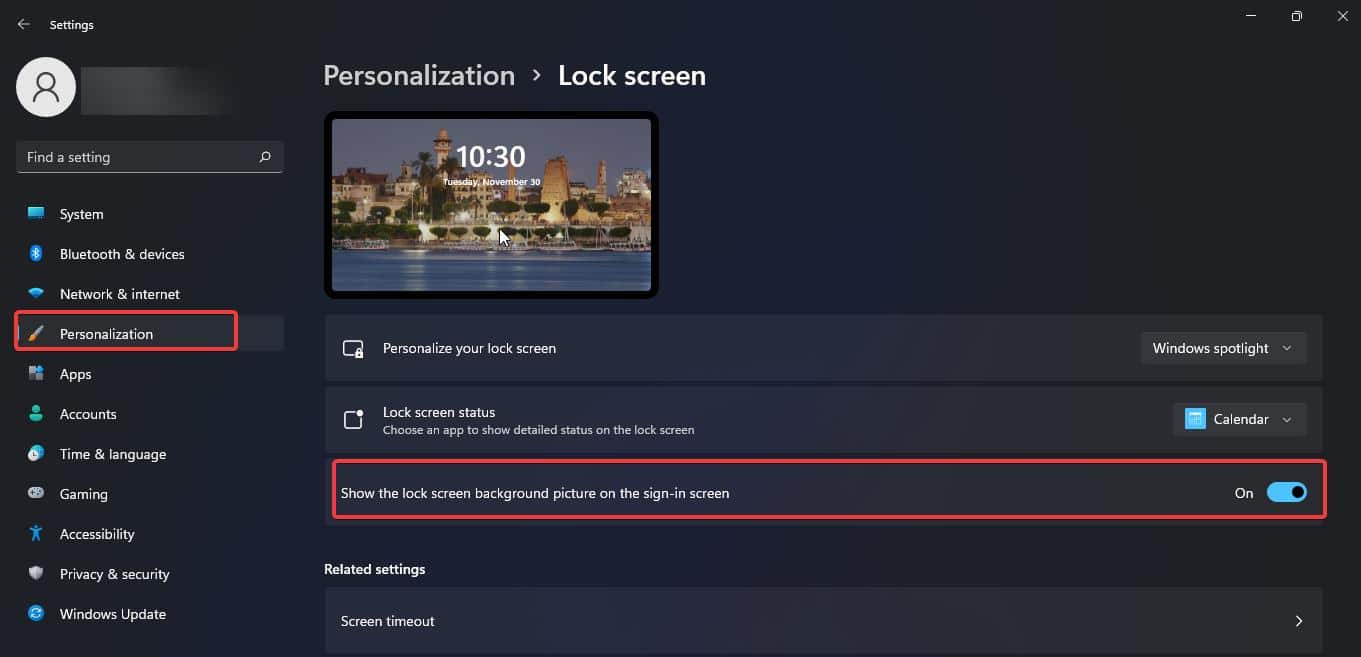
Open Windows Settings by pressing Windows + I and from the left-hand side click on the Personalization.
From the right-hand side click on the Lock Screen.
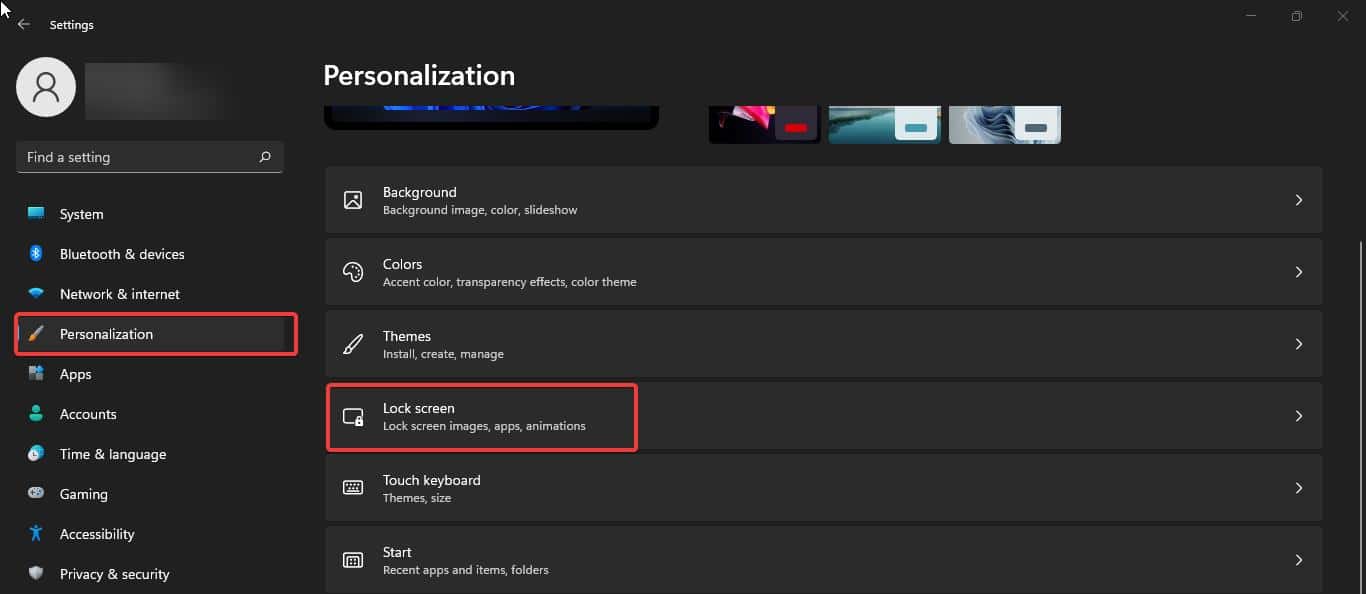
Under Lock Screen, you can see the Personalize your lock screen, click on the drop-down menu and choose the Windows Spotlight.
Look for the option “Show the lock screen background picture on the sign-in screen”, turn on the toggle button this will enable the Windows Spotlight on the Login screen.
That’s it close the settings app.
Using Registry Editor:
Open the Run command by pressing Windows + R and type Regedit and hit enter, this command will open the Registry editor.
Now navigate to the following Registry path.
HKEY_LOCAL_MACHINE\SOFTWARE\Microsoft\Windows\CurrentVersion\SystemProtectedUserData
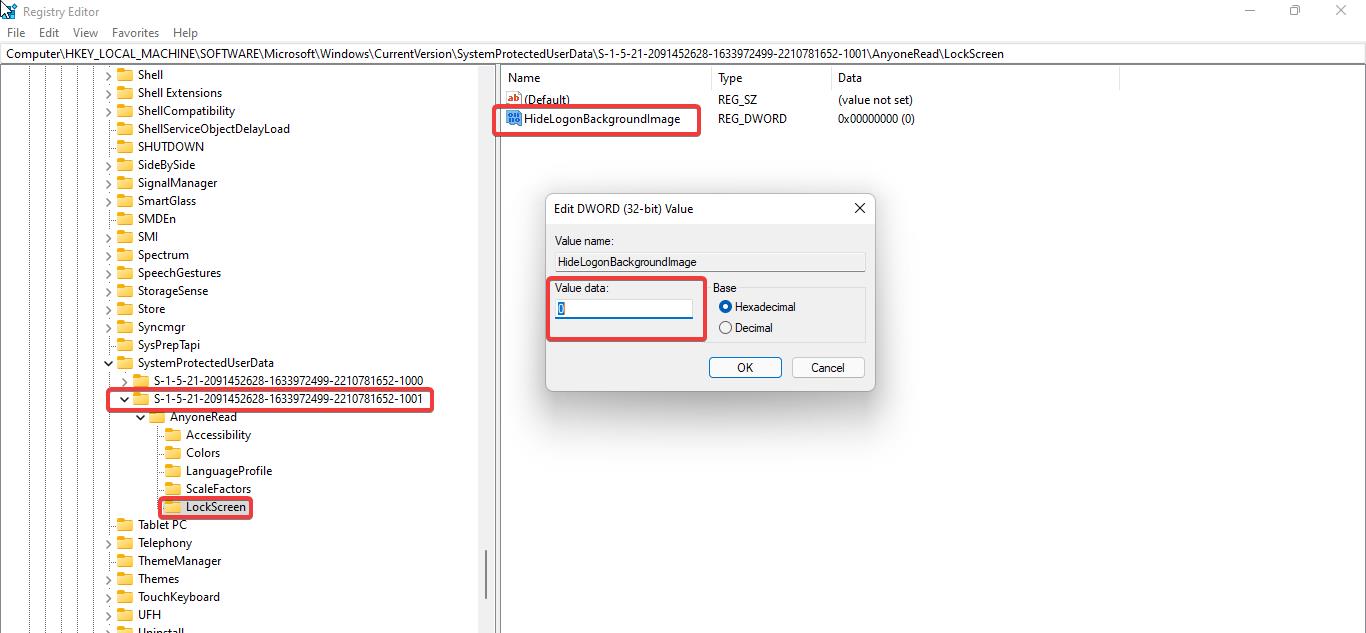
From the Left-hand side expand the SystemProtectedData, now you can see the list of SID IDs, you need to find the correct SID ID of your user account. To find your user account SID ID, open the command prompt and type whoami/user. This will command will show your user account SID ID.
Now in the Registry editor expand the correct SID ID of your user account and navigate to AnyoneRead > LockScreen. If you are not able to find those registry keys then you have to create it manually.
From the left-hand side click on the LockScreen and from the right-hand side look for the DWORD named HideLogonBackgroundImage. If you are not able to find that DWORD then right-click and choose New > DWORD (32-bit value) and name it as HideLogonBackgroundImage.
Next, double click on the DWORD and set the value 0 and click on OK and close the registry editor.
Restart the system once to make it effective.
Read Also:
Enable or Disable Lock Screen in Windows 10
How to Disable acrylic blur effect on Log-in Screen in Windows 11?
How to Show all users on Login Screen in Windows 11?
How to Create Sign-in Message Using Registry Editor in Windows 10?


