Windows 11/10 is built to respond to closing the lid by putting the computer into four different states (Do nothing, Sleep, Hibernate, and Shutdown). You can choose any option to set the response. Most of the users choose the sleep or hibernate option, so whenever you close the laptop lid, the system will automatically get to that particular mode. While opening the laptop lid, you will be prompted for the password screen. It’s a windows security feature that makes sure the account is locked while opening the laptop lid. If someone tries to access your laptop, they will get a prompt for a password screen. It’s an additional layer of security to protect your laptop, if you prefer going straight to the desktop, and want to skip the login page. Then this article will guide you to Skip sign-in page after resuming from sleep in Windows 11.
Skip sign-in page after resuming from sleep in Windows 11:
In Windows 11 you can skip the password prompt from sleep using three different methods. We can achieve this by using Windows Settings, Group Policy, and Command Prompt.
Method 1: Skip sign-in page after resuming from sleep using Windows Settings:
Open Windows Settings by pressing Windows + I and navigate to Accounts > Sign-in options.
Under Sign-in options, look for Require sign-in section, click on the drop-down menu and choose Never.
That’s it, Going forward you no need to enter the password after waking up Windows 11 from sleep.
Using Group Policy Editor:
Using Method 1 you can easily disable the Password requirement after resuming from sleep, but the setting app has limitations, you don’t have the option to control the feature when your laptop is running on battery or plugged into Charger. If you are using Windows Pro edition, then you can use the following steps to skip the password prompt from sleep when your laptop is running on battery or plugged into the Charger.
Open Run command by pressing Windows + R and type gpedit.msc and hit enter, this command will open the Group Policy Editor.
Now navigate to the following path.
Computer Configuration > Administrative Templates > System > Power Management > Sleep SettingsFrom the left-hand side click on Sleep Settings policy folder, and from the right-hand pane look for the following policies.
- Require a password when a computer wakes (plugged in)
- Require a password when a computer wakes (On battery)
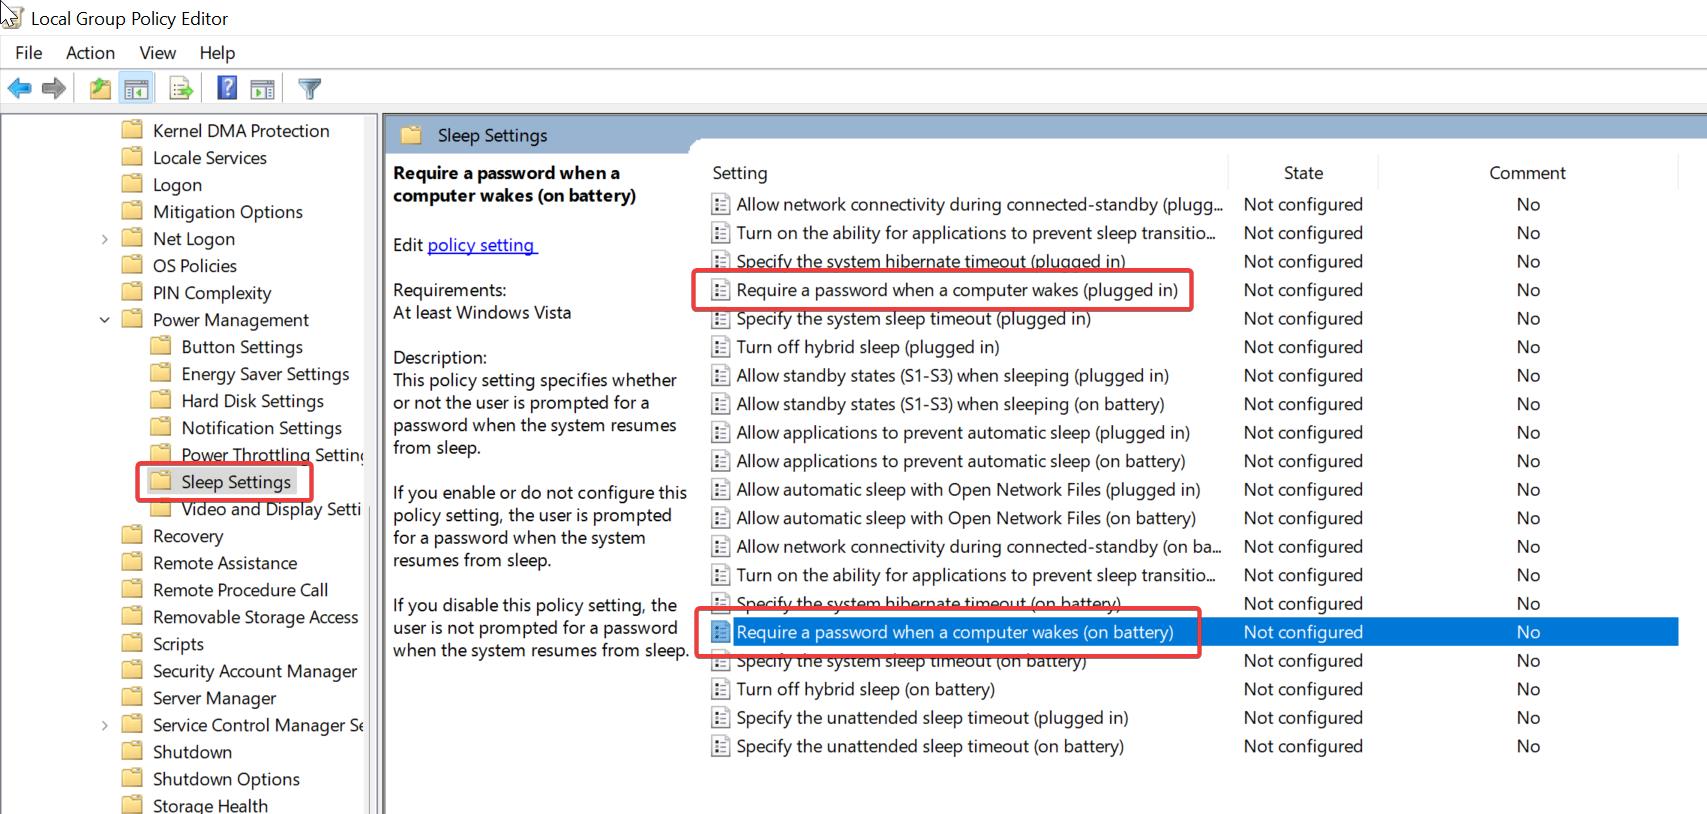
Choose the mode for which you want to configure, double-click on the policy, and open the policy settings.
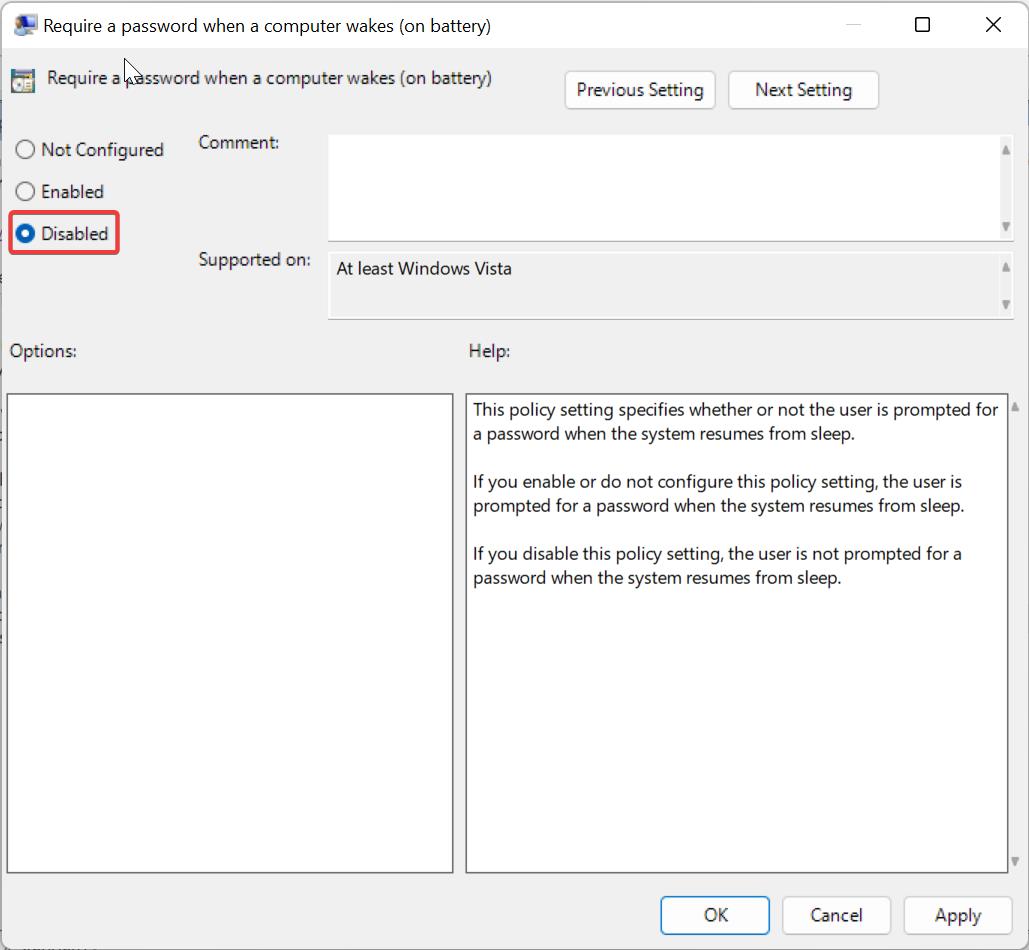
Choose Disabled and click on Apply and OK. Disabling this policy setting, will skip the sign-in page, so the user is not prompted for a password when the system resumes from sleep.
Close the Registry editor and restart the system once.
Method 3: Using Command Prompt:
In this method, we are going to use the Powercfg command to disable ask for password on Screen wakeup.
Open Command Prompt in elevated mode, then type the following command.
To Disable the password prompt on laptop running on battery, use the following command.
powercfg /SETDCVALUEINDEX SCHEME_CURRENT SUB_NONE CONSOLELOCK 0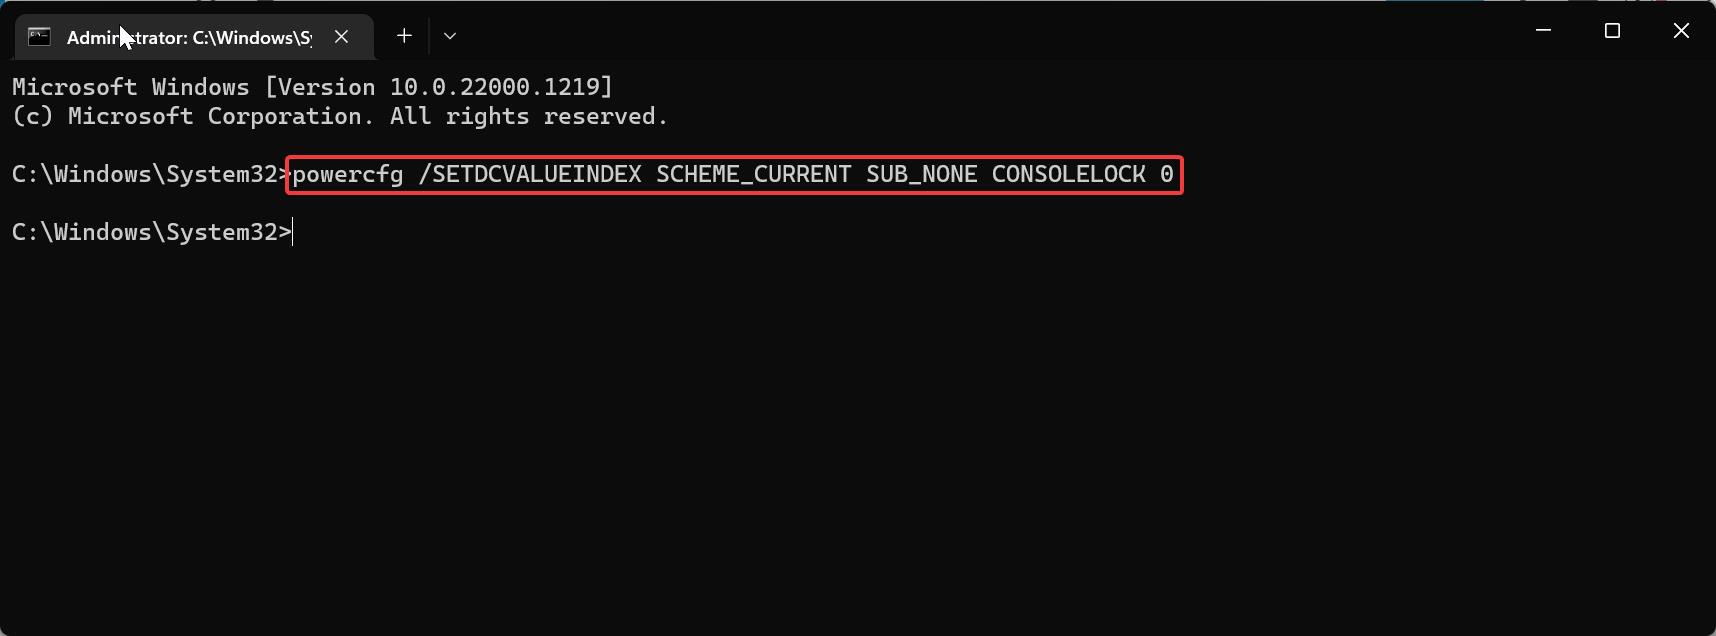
To Disable the password prompt when the laptop is plugged in, use the following command.
powercfg /SETACVALUEINDEX SCHEME_CURRENT SUB_NONE CONSOLELOCK 0In this command use 0 to disable the Password Prompt, if you want to enable it back, replace it with 1.
Once you executed the command, restart the system once, after the restart you’ll not be prompted to sign in after the device resumes from sleep.
Read Also:
How to Set Default Sign-in Option in Windows 11?


