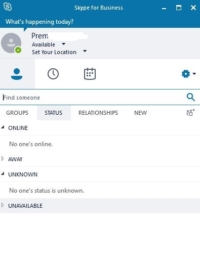
Skype for Business is an instant messaging application that is very popular in the corporate world, this enterprise software replaces Microsoft Lync in 2015, and in future, the Skype for Business will be replaced by Microsoft Teams. And most of the Corporate companies already migrated to Microsoft Teams. Skype for Business includes some features like IM, Audio Call, Video Call. But teams got more features to compare to this. Recently one of the users reported that he can’t able to stop the skype for business from starting, whenever he restarts the system both the Teams and Skype for business are starting at the same time, This causes the system slowness because of the More RAM utilization by the Skype. And user already tried some basic troubleshooting by unchecking the option (Auto start when I log on to Windows) from Skype. But the issue persists again after a week. So, in this post, we will see how to stop “Skype for Business” from starting completely.
Method 1: stop “Skype for Business” from starting Automatically using the Skype Program.
This is the First step when you decided to stop the “Skype for Business” from starting Automatically, this can be achieved using the Skype Program itself.
- Launch Skype for business from the Start.
- From the Home page of Skype, you can see the setting icon, Click and open the skype for business options menu.
- Now you can get a separate window, Look for Personal options from the left-hand side.
- From the right-hand side of the window, You can see the option Automatically start the app when I log on to Windows.
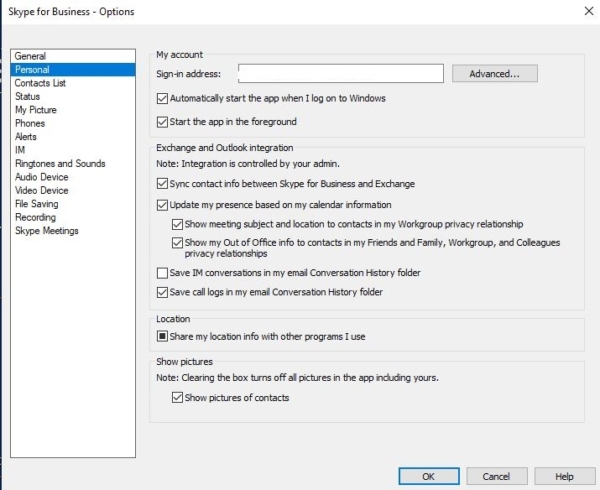
- Uncheck it and give Ok.
- Now restart the machine and check.
Method 2: Remove Skype for Business from the Startup Menu.
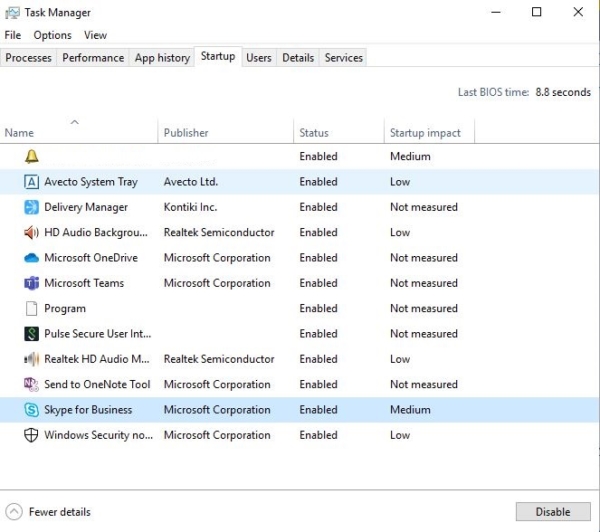
If any Program is starting automatically then that Program is included in the windows startup folder. The startup folder is a feature available in the windows operating system that enables a user to automatically start any application after the System Boots. In this case, if Skype for Business is starting automatically then we have to check the Program is included in the Startup Program. If You are using Windows 8 and above, follow the below-mentioned method
- Open Task Manager by pressing Ctrl + Alt + Delete.
- Click on the Startup tab.
- Find the Skype for Business application, Right-click on it, and choose Disable.
- Now restart the machine and check once.
 If you are using windows 7
- Then open the run command by pressing Windows + R and type msconfig and hit enter.
- This will open the System Configuration Utility. From there you can able to see the startup folder. Click on the startup tab and disable the Skype for Business.
Method 3: Use Registry Editor to Disable the Skype
Note: Modifying the Registry is risky, and it causes irreversible damage to your OS Installation Follow the steps correctly. Friendly advice Before Modifying Registry Creating Restore Point is recommended.
- Open Run command by pressing Windows + R and type regedit and hit enter.
- After launching the registry editor navigate to the following path.
HKEY LOCAL MACHINE > SOFTWARE > Microsoft> Windows > CurrentVersion
- From the left-hand side, you can see the Current version Folder. Expand that folder and find the Run Sub key.
- Click on the Run sub key, From the left-hand side panel you can see the List of all Programs that are configured to be launch at startup. Locate the Skype registry key and delete it.
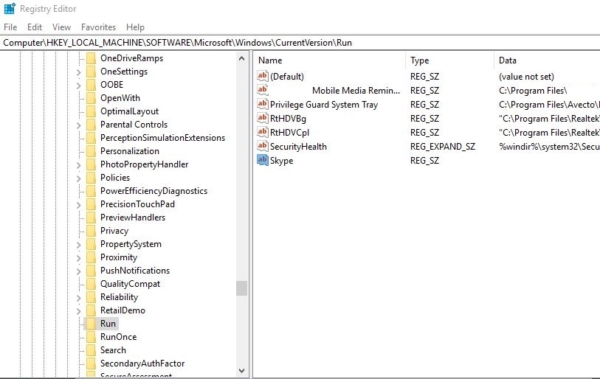
Now close the registry editor and restart the PC once.