In Windows, Activity History helps you to keep track of your activity on your Windows devices, such as the apps and services you use, websites you browse or the game you play, etc. Windows will store these activity histories on your local device, and if you signed up using a Microsoft account and give permission for the Activity history feature, windows will send all the data to Microsoft. Microsoft uses this activity history data to provide you with personalized experiences and relevant suggestions. In Windows various activities including Voice, Search, Media, Location, Browse, and Apps & Services uses Activity history. You can view, clear, or delete all the activity history using Windows settings. If you don’t want windows to track your activities then you can turn off Activity History in Windows 10/11.
Turn Off Activity History in Windows 11:
In Windows 11 you can turn off the Activity History in two different methods, follow the below mentioned methods to disable the activity history.
Using Windows Settings:
Open Windows Settings by pressing Windows + I and from the left-hand side click on Privacy & Security.
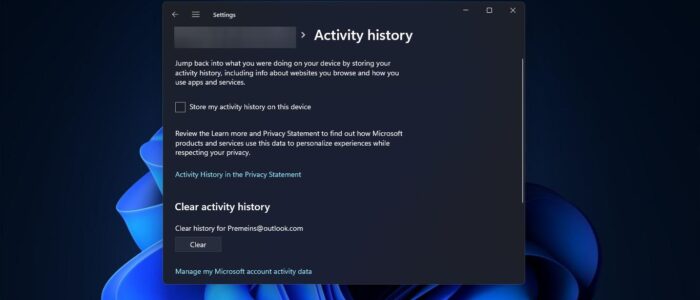
And from the right-hand side, under Windows permissions click on Activity History and uncheck Store my activity history on this device.
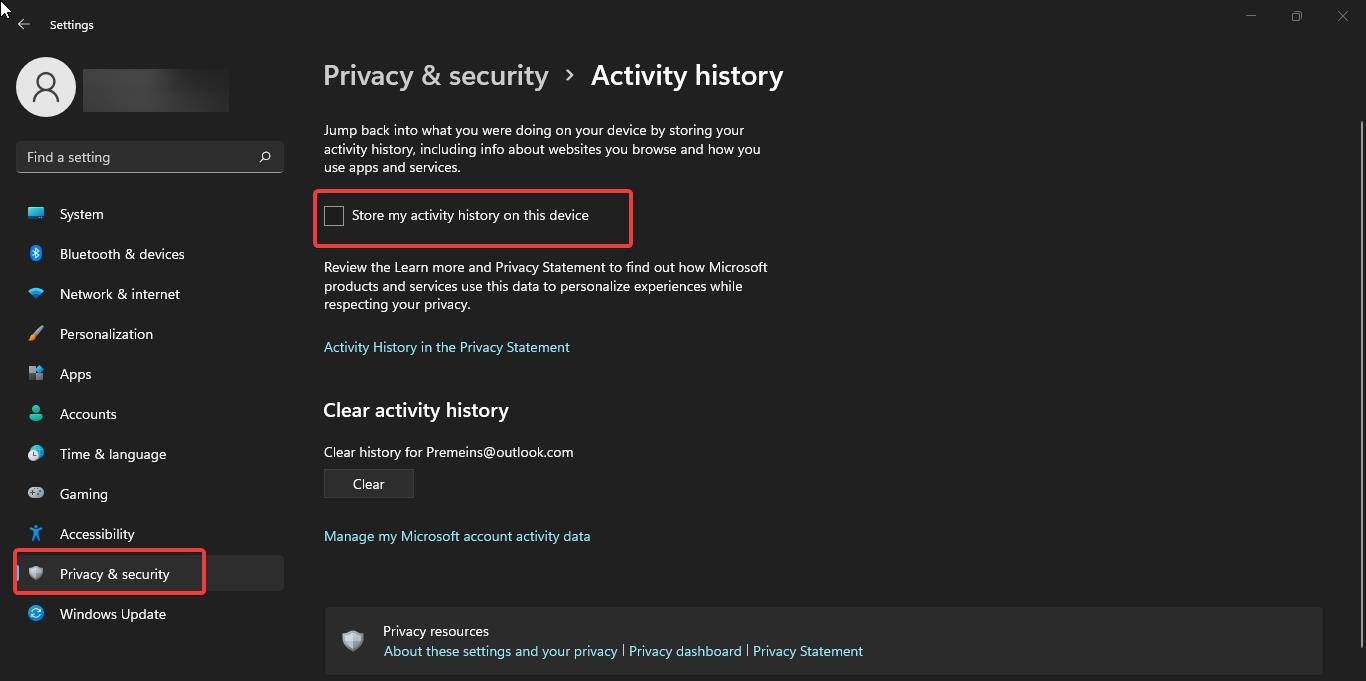
This will disable the Activity History and restrict Windows to store your past activities on your PC.
Disable Activity History using Group Policy Editor:
Open Run command by pressing Windows + R and gpedit and hit enter. This command will open the Group Policy Editor.
Now navigate to the following path.
Computer>Configuration>Administrative Templates>System>OS Policies
From the left-hand side click on the OS Policies, from the right-hand side look for the policy Allow publishing of User Activities.
Double click on Allow publishing of User Activities to open Policy Settings and choose Disabled.
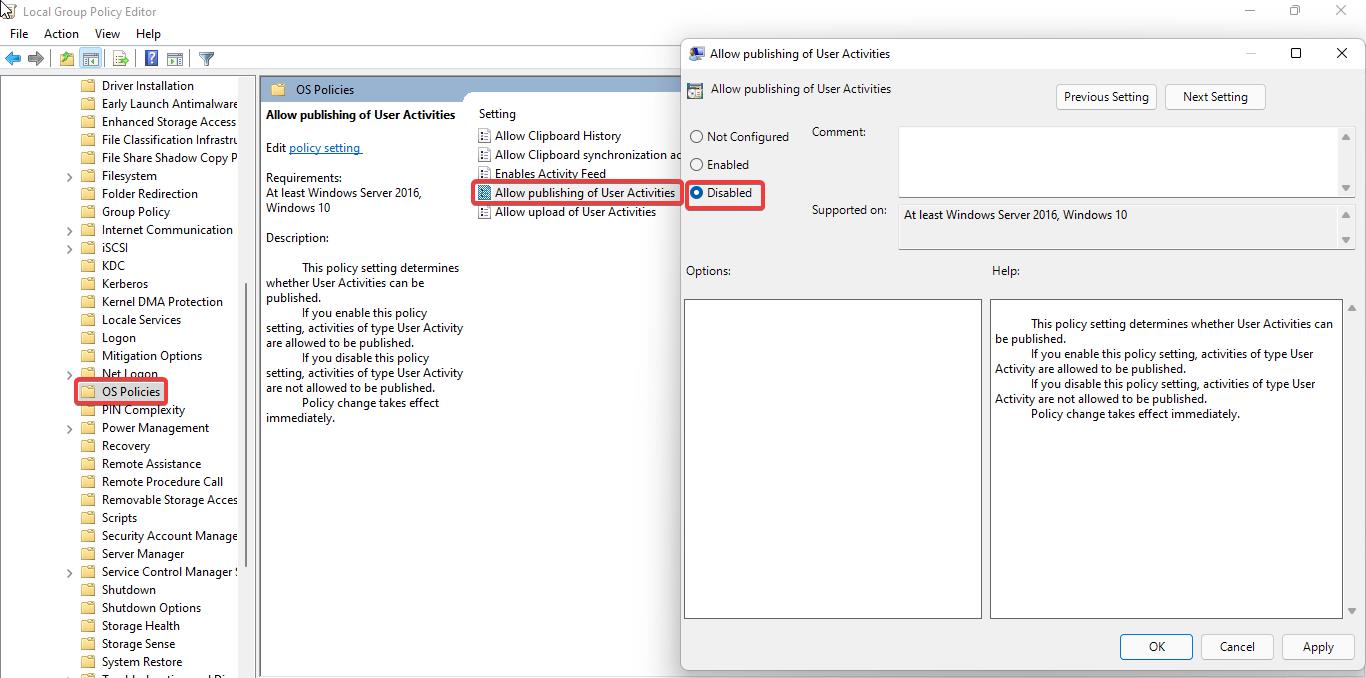
Click on Apply and OK. Disabling this policy setting, will not publish the user activity.
Using Registry Editor:
Note: Modifying the Registry is risky, and it causes irreversible damage to your OS Installation Follow the steps correctly. Friendly advice Before Modifying Registry Creating Restore Point is recommended.
Open Run command by pressing Windows + R and type regedit and hit enter, this command will open the Registry editor console.
Now navigate to the following Registry path.
Computer\HKEY_LOCAL_MACHINE\SOFTWARE\Policies\Microsoft\Windows\System
From the left-hand side click on the System registry key and from the right-hand side right click on an empty area and choose New > DWORD (32-bit) value and name it as PublishUserActivities.
Double click on the PublishUserActivities DWORD and modify the value data as 1 and click on OK.
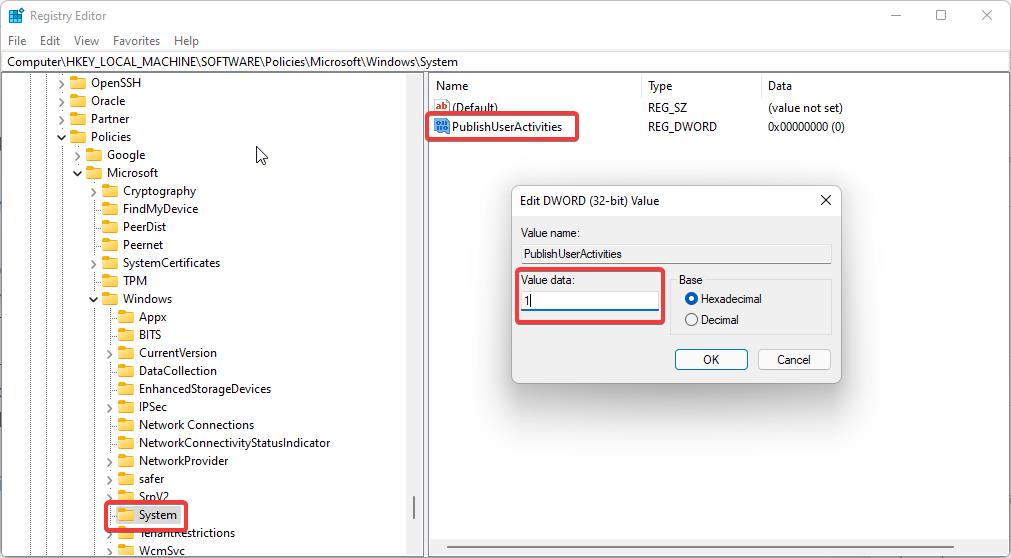
This will disable the Activity History in Windows 10/11.
Read Also:
Turn on or Off SafeSearch Filter in Windows 11
How to Clear Activity History in Windows 11?

