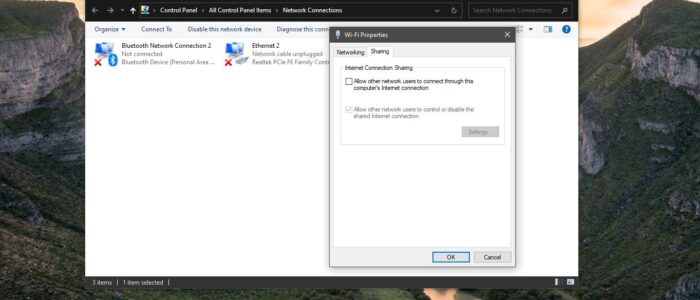
Internet Connection Sharing Also Known as ICS, is a built-in Windows feature that allows multiple computers to connect to the internet using a single Internet connection on one computer. If you are using multiple computers for your small business then you can use ICS to connect all the computers to the internet. It is very cost-effective. ICS is basically a Windows service that helps you to share the Internet connection from your Primary computer to the other computer via Local Area Connection (LAN). Instead of Switch or Router here your Primary computer act like a Default gateway. All your network traffic transfers over that Primary computer. Basically, ICS uses NAT technologies to achieve this and works with most connection technologies, including DSL, cable, ISDN, dial-up, and satellite. The device with the modem or broadband interface that establishes the connection to the Internet is called the ICS host, or gateway while the other devices that connect to the Internet via the network and the ICS host are called ICS clients. If the ICS host fails, then all of the ICS clients lose their Internet connection. If the ICS Service fails then you can’t share the internet connection. This article will guide you to fix Internet Connection Sharing Not Working in Windows 10.
Internet Connection Sharing Not Working
Once you encounter any error while connecting to ICS then check the service of the ICS is set to automatic.
Using Service Management Console:
Open the Run command by pressing Windows + R and type Services.msc and hit enter. This will open the Services management console.
Now Look for the Service name Internet Connection Sharing service.
Make sure the service is started and the service is set to automatic mode. If not Right-click on the ICS service and choose Properties. Click on the General Tab and under Startup type set to Automatic. And Start the service.

Click on Apply and OK.
Using Registry Editor:
Note: Modifying the Registry is risky, and it causes irreversible damage to your OS Installation Follow the steps correctly. Friendly advice Before Modifying Registry Creating Restore Point is recommended.
Open the Run command by pressing Windows + R and type Regedit and hit enter. This will open the Registry Editor.
Now Navigate to the following Path.
HKEY_LOCAL_MACHINE\Software\Microsoft\Windows\CurrentVersion\SharedAccess
From the Left-hand side click on the SharedAccess Registry key and right-click on the empty area on the right-hand side and choose New > DWORD (32-bit) Value. And Name it as EnableRebootPersistConnection.
Double click on the EnableRebootPersistConnection DWORD and set the value to 1.

Click on OK and close the Registry Editor and Restart the system once. Mostly this will fix the issue with the ICS.
Read Also:
How to Disable Password Protected Sharing in Windows 11/10?