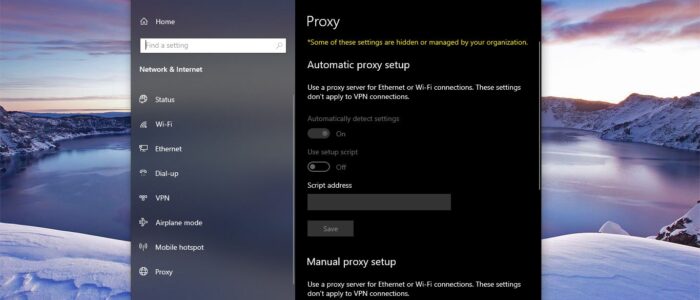
In computer networks, a proxy server is a server (a computer system or an application) that acts as an intermediary for requests from clients seeking resources from other servers. A client connects to the proxy server, requesting some service, such as a file, connection, web page, or other resources available from a different server and the proxy server evaluates the request as a way to simplify and control its complexity. Proxies were invented to add structure and encapsulation to distributed systems. Today, most proxies are web proxies, facilitating access to content on the World Wide Web, providing anonymity, and may be used to bypass IP address blocking. Proxies are useful in many ways but using Proxy settings is restricted in many corporate companies. If you don’t want this setting, then you can use the following methods to Permanently Disable Proxy Settings in Windows 10.
Table of Contents
TogglePermanently Disable Proxy Settings:
You can disable Proxy settings in two different ways.
- Using Group Policy Editor
- Using Registry Editor
Follow the below-mentioned method, group policy method is the easiest and quickest way to disable it.
Using Group Policy Editor:
Open Run command by pressing Windows + R and type Gpedit.msc and hit enter. This command will open Group Policy Editor.
Now Navigate to the following Path.
User Configuration → Administrative Templates → Windows Components → Internet Explorer
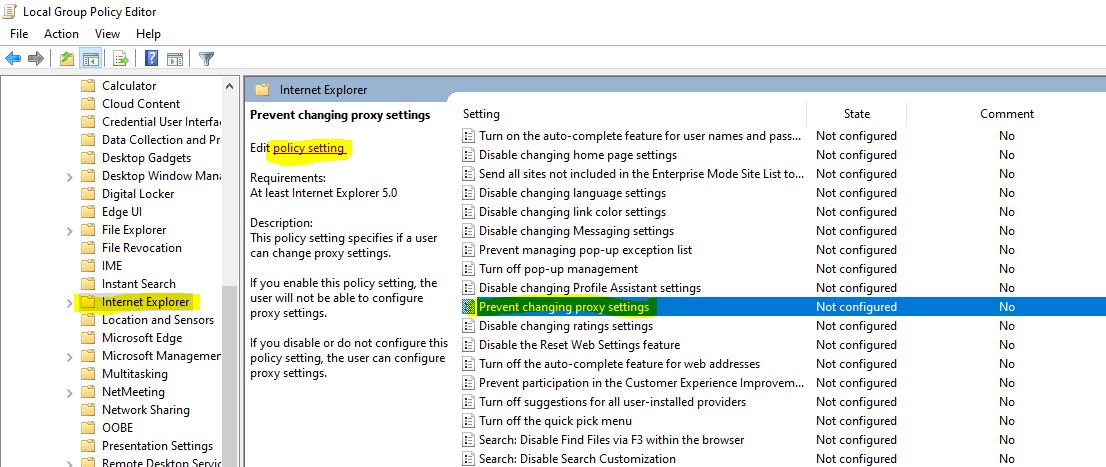
From the Left-hand side click on Internet Explorer and from the right-hand side look for Prevent Changing Proxy Settings.
Double click on the Prevent Changing Proxy Settings to open the Policy setting.
Under Policy setting choose Enabled, and click on Apply and OK.
That’s it you have successfully disabled the Proxy setting, if you want to enable it back, then follow the same steps above and enable the Policy back.
Using Registry Editor:
Note: Modifying the Registry is risky, and it causes irreversible damage to your Operating system. Friendly advice Before Modifying Registry, Creating Restore Point is recommended.
Open Run Command by pressing Windows + R and type Regedit and hit enter. This command will open Registry Editor.
Now navigate to the following path.
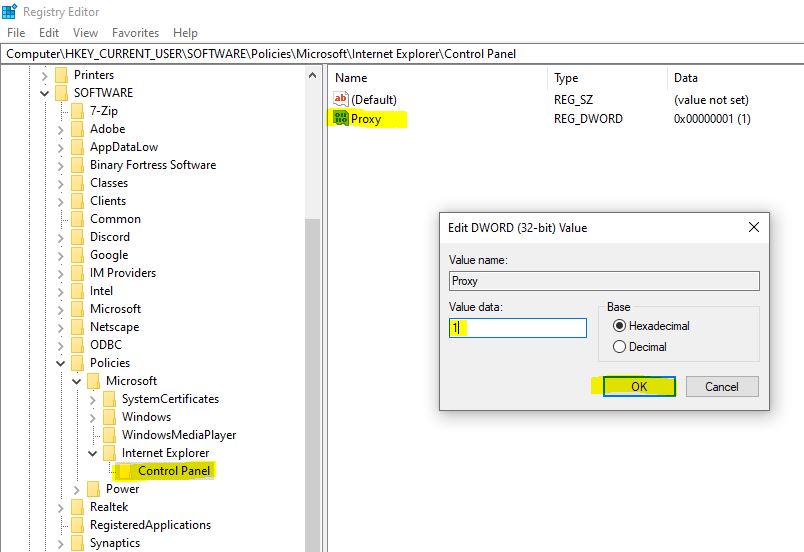
Computer\HKEY_CURRENT_USER\SOFTWARE\Policies\Microsoft
From the Left-hand side right-click on the Microsoft Registry Key and choose New > Key, and name the Key as Internet Explorer.
Then again right-click on the Internet Explorer and choose New > Key and name it as Control Panel.
Then click on the Control Panel and from the right-hand side, right-click on an empty area and choose New > DWORD (32-bit value).
Name the DWORD as Proxy. Double click on the Proxy and modify the value. Set the Value to 1 and click on OK.
Close the Registry Editor and Restart the system once.

