The Start Menu has always been a central part of the Windows operating system, allowing users to easily access their applications and files. However, with the release of Windows 11, Microsoft made some changes to the default layout of the Start Menu, which might not be suitable for everyone. In this article, we will guide you on how to customize the Start Menu to show all apps by default.
Understanding the Changes in Windows 11 Start Menu
Before we dive into the steps to show all apps by default in the Start Menu, let’s first understand the changes that were made in Windows 11. Unlike previous versions of Windows, where the Start Menu displayed a list of all installed applications by default, Windows 11 introduces a more simplified and personalized approach.
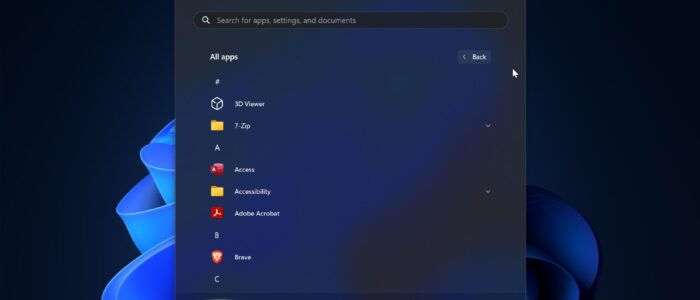
The new Start Menu in Windows 11 consists of a centered app grid that displays a selection of recommended and recently accessed apps. This design aims to provide a more streamlined and focused experience for users. And you can pin your favorite apps to the start menu for easy access. To access all the apps in Windows you have to click on Start menu > All apps. While many users may find this new layout convenient, others may prefer the traditional approach of displaying all apps.
Show All Apps by Default in Start Menu:
If you prefer to see all the installed apps in the Start Menu like in previous versions of Windows, follow the steps below, there’s no native option in Windows 11 to show all apps by default, So in this method, we are going to use a free program called ExploterPatcher. It’s a free utility that gives you a lot of control over the taskbar, system tray, file explorer, start menu, and others.
First Download the Explorer Patcher from the GitHub page. Click on the latest release and expand the Assets section and download the ep_setup.exe file.

Now right-click on the exe file choose Run as Administrator and install the software, once you install the Explorer patcher, it will automatically restore the entire taskbar and start menu to Windows 10 style.
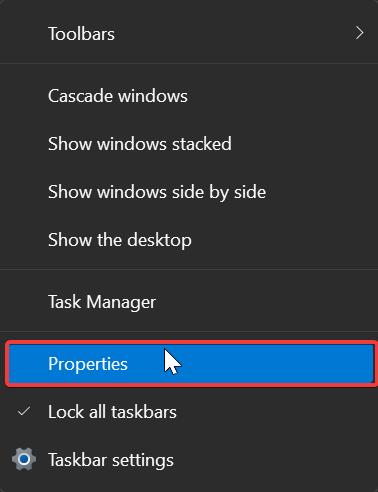
Right-click on an empty area on the Taskbar and select the Properties option from the Context menu.
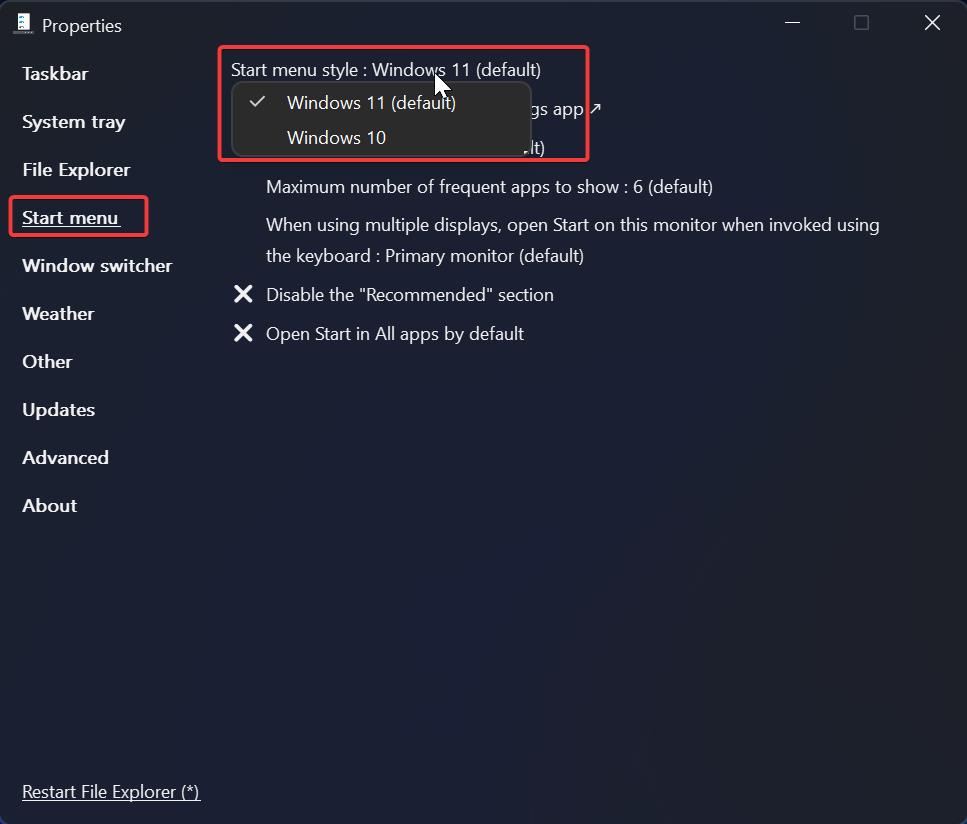
Under Properties click on the Start menu section and change the Start menu style to Windows 10 or Windows 11 (default) based on your requirements.
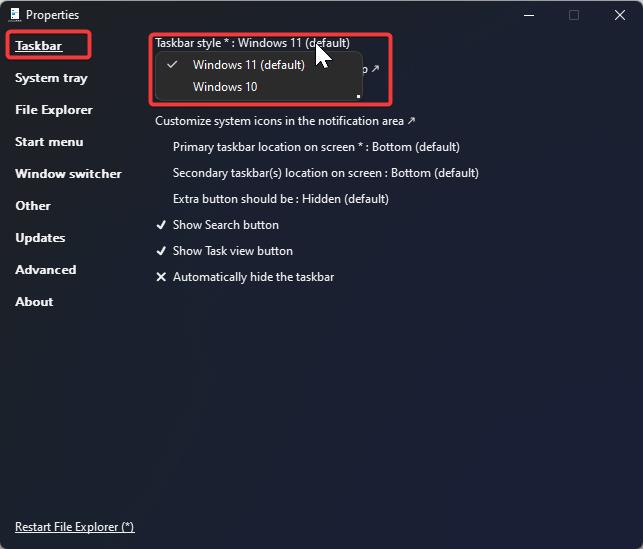
Also, click on the Taskbar and change the Taskbar style to Windows 11 (default). Then click on Restart File Explorer, That’s it now you can see the Windows 11 start menu and Taskbar.
Next, Click on the Start Menu on the Sidebar and Select the “Open Start in All app by default” option to enable it.

Once you have enabled the option to show all apps in the Start Menu, close the Settings window and click on the Start button to open the Start Menu. You will now see a list of all installed applications, along with the recommended and recently accessed apps.
Using this tool, You can also modify other settings for Taskbar, System tray, File Explorer, Start Menu, and others.
That’s it! You have successfully set up your Windows 11 Start Menu to display all apps by default.
Read Also:
How to Move the Taskbar to Right in Windows 11?

