Steam Launcher is a standalone software client that is developed by Steam. Steam is a video game digital distribution service. Steam offers DRM (Digital Rights Management), Server hosting, Video streaming, and Social networking services. And it expanded into an online web-based and mobile digital storefront. The main role of the steam launcher is it provides the user with installation and automatic updating of games, and community features such as friends list and groups, cloud storage, and in-game voice and chat functionality. Steam is initially developed for the Windows Operating system, later it was released for Mac OS and Linux. Then it was released for iOS, Android, and Windows Phone. Also steam offers design software, hardware, game soundtracks, anime, and films. You can download steam software from the official website. Many users use steam to launch Games, if you are a steam user then you may definitely encounter this issue at least one time. While launching Steam games, steam will be stuck in the Preparing to launch loop. There is no clear fix for this issue. So, you have to follow the below-mentioned resolutions one by one. This article will guide you to fix Stuck on Preparing to Launch in Steam.
Stuck on Preparing to Launch in Steam:
If Steam is stuck on preparing to launch while opening any game, then follow the below-mentioned resolution methods one by one.
Check Game Requirements:
First before launching any game you have to check the game requirements. Each and every game have its own software and hardware requirements. Check your machine is matching to the minimum requirements of that particular game before launching.
Update Graphics Driver:
Make sure your graphics, audio, video drivers are up-to-date. Also, check DirectX Driver is updated. To update all the drivers automatically you can use the DriverFix. It is used to download and install the latest drivers for Windows operating systems, such as drivers for display, network adapters, and other controllers. If you want to download the graphics driver on your own then you need to know the Graphics card model number and the current driver installed on your machine. To get those details follow the below-mentioned steps.
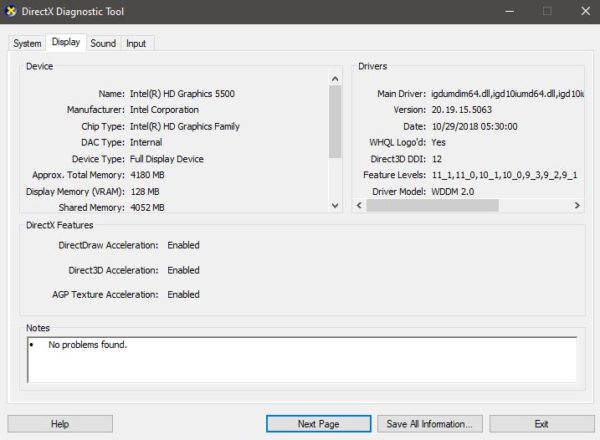
Open run command by pressing Windows + R and type Dxdiag and hit enter. This command will open the DirectX diagnostic tool.
DirectX diagnostic tool will list all the available hardware that is installed on your PC along with the versions of the software. Click on the Display tab and note the Graphics card driver name and download the latest driver from the official website.
Check for Windows Update:
Sometimes games require the latest version of the .net framework, if your windows is not updated then you may have the older version of the framework. Fix this issue by updating Windows to the latest version.
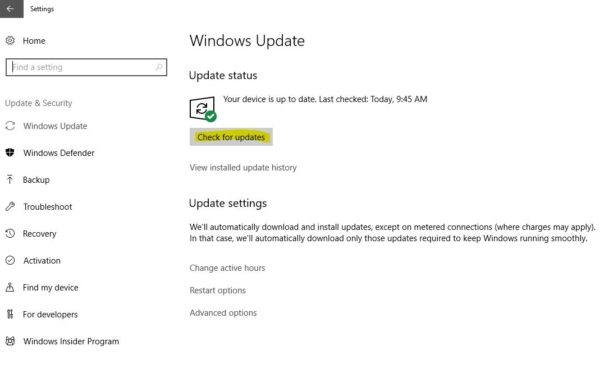
- Open Settings from your start menu.
- Click on Updates & Security.
- Click on the Check for updates button, now your computer will check for any new updates are then and it will install automatically.
Verify Integrity of games:
If there is any problem with the steam game, then first check the integrity of the games. It compares the game files you have on installed your computer with those of the latest version on the Steam servers. If there is any issue with the local cache then it will replace or adds those game files.
- Restart your computer and launch Steam
- From the Library section, right-click on the game and select Properties from the menu.
- Select the Local files tab and click the Verify integrity of game files… button.
- Steam will verify the game’s files – this process may take several minutes.
Delete App Cache:
Sometimes steams will cache game configurations to the local app cache. This will decrease loading times and provide a better experience. If the local app cache got corrupted it will interfere with certain elements of the application. Deleting the App cache will load the new configuration files automatically. Follow the below-mentioned steps to delete the app cache.
- First, close the Steam application from the Task Manager, Launch the Task Manager and under the performance tab, look for the steam application and close it.
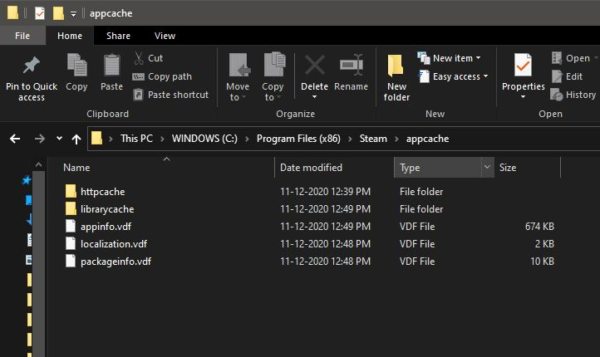
- Now Navigate to the Steam installation folder. By default, the steam installation directory is C:/Program Files (x86)/Steam and open the AppCache folder. Delete this folder permanently by pressing Shift + Del.
- Now launch the steam application in elevated mode. Check if the issue persists.
Check in Clean Boot mode:
clean boot is performed to start Windows 10 by using a minimal set of drivers and start-up programs. This helps eliminate software conflicts that occur when you install a program or an update or when you run a program in Windows 10, Windows 8.1, Windows 8, Windows 7, or Windows Vista. You may also troubleshoot or determine what conflict is causing the problem by performing a clean boot.
Reinstall Steam Application:
If you are still facing the same issue then Reinstall the steam application once and check. While reinstalling steam make sure the game data is safe. Follow the below-mentioned steps to reinstall steam.
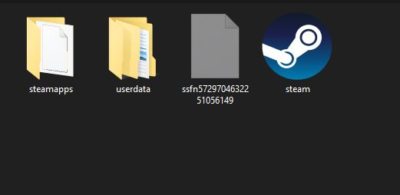
Locate the Steam default installation directory C:/Program Files (x86)/Steam.
Once you navigate to the above-mentioned directory, Locate the following files/folders and Delete them all.
Now Restart the system once and relaunch the steam application. It will start to update, after the update, there won’t be any problem with the steam client.


