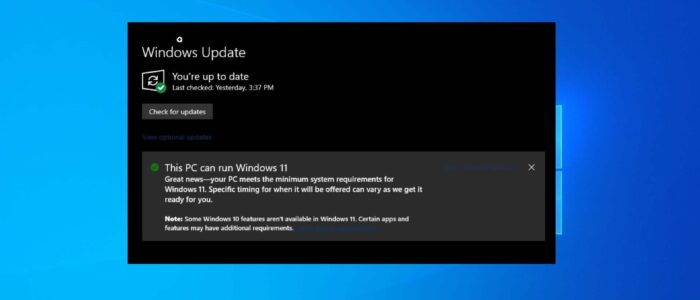
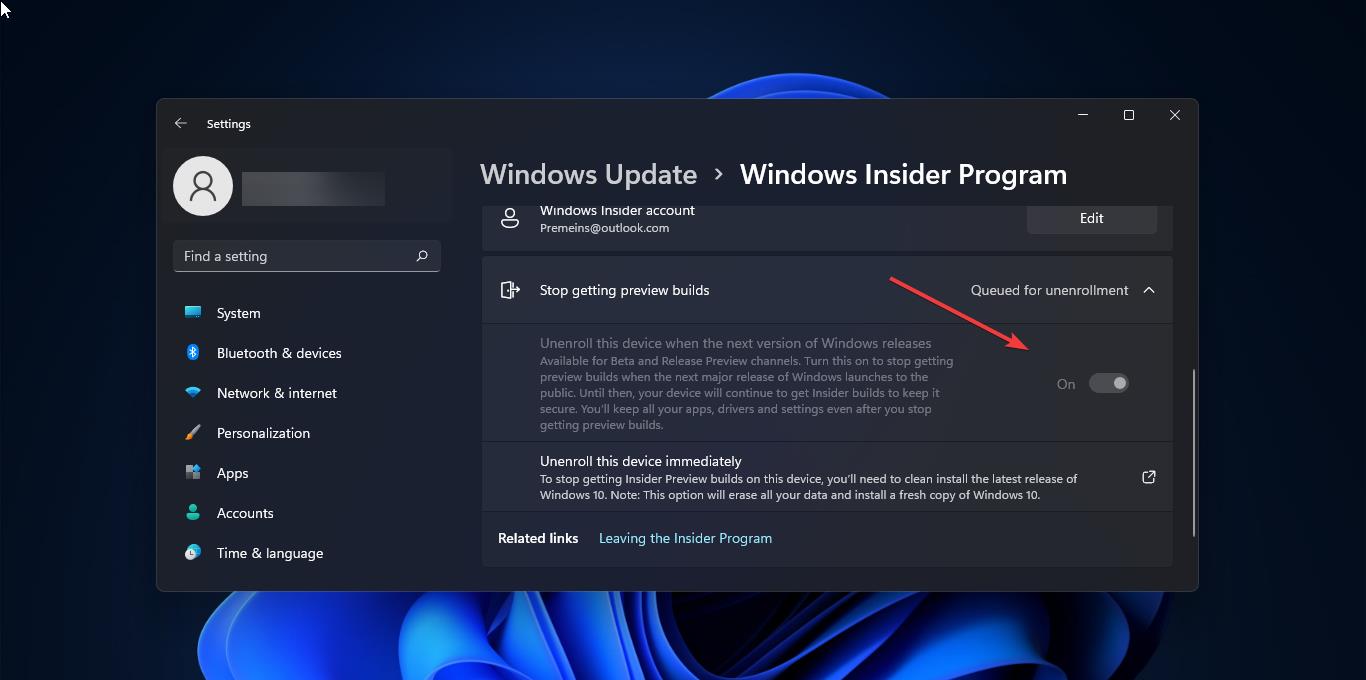
Microsoft released its major Operating System Windows 11 after 6 years, Windows 11 is rolled out on October 5, 2021. Microsoft announced that Windows 11 is free to Upgrade for existing Windows users. But to upgrade to Windows 11, the system has to meet the minimum system requirements. This rules out millions of existing Windows 10 devices from upgrading to Windows 11 with full support. The minimum system requirements include TPM, Secure Boot, and Processor. Most of the systems got ruled out due to the Processor requirements. Even though you fulfill all the Minimum system requirements, like boot mode and the TPM, still most of the users are facing the hardware isn’t compatible error from the PC Health Checkup tool (Your Processor isn’t supported for Windows 11). Because Microsoft has altered its minimum hardware requirements, and the most surprising thing is the CPU changes. Microsoft announces that Windows 11 will officially support 8th Gen and newer Intel core processors, alongside Apollo Lake and newer Pentium and Celeron Processors. Many users already tried out Windows 11 and reported many issues, why because, Windows 11 is not developed fully, at least for now. Upgrading to Windows 11 is not a good idea as for now, but if your system is eligible for Windows 11 upgradation, then Microsoft will automatically push the Windows 11 update to your system. This Windows 11 update will download and install automatically. If you don’t want your system to update automatically to Windows 11, then you can stop it with just a few clicks. This article will guide you to Stop the Windows 11 Update in Windows 10.
Related: How to stop windows update with a single click on windows 10/8/7?
Stop the Windows 11 Update in Windows 10:
In Windows 10 you can stop the Windows 11 update in two different methods, follow the below-mentioned methods to stop the update.
Using Group Policy Editor:
Open Run command by pressing Windows + R and type gpedit.msc and hit enter, this command will open the Group Policy Editor.
Now navigate to the following path.
Computer Configuration > Administrative Templates > Windows Components > Windows Update > Windows Update for Business
From the left-hand side click on the Windows Update for Business and from the right-hand side click on the “Select the target feature update version” policy.
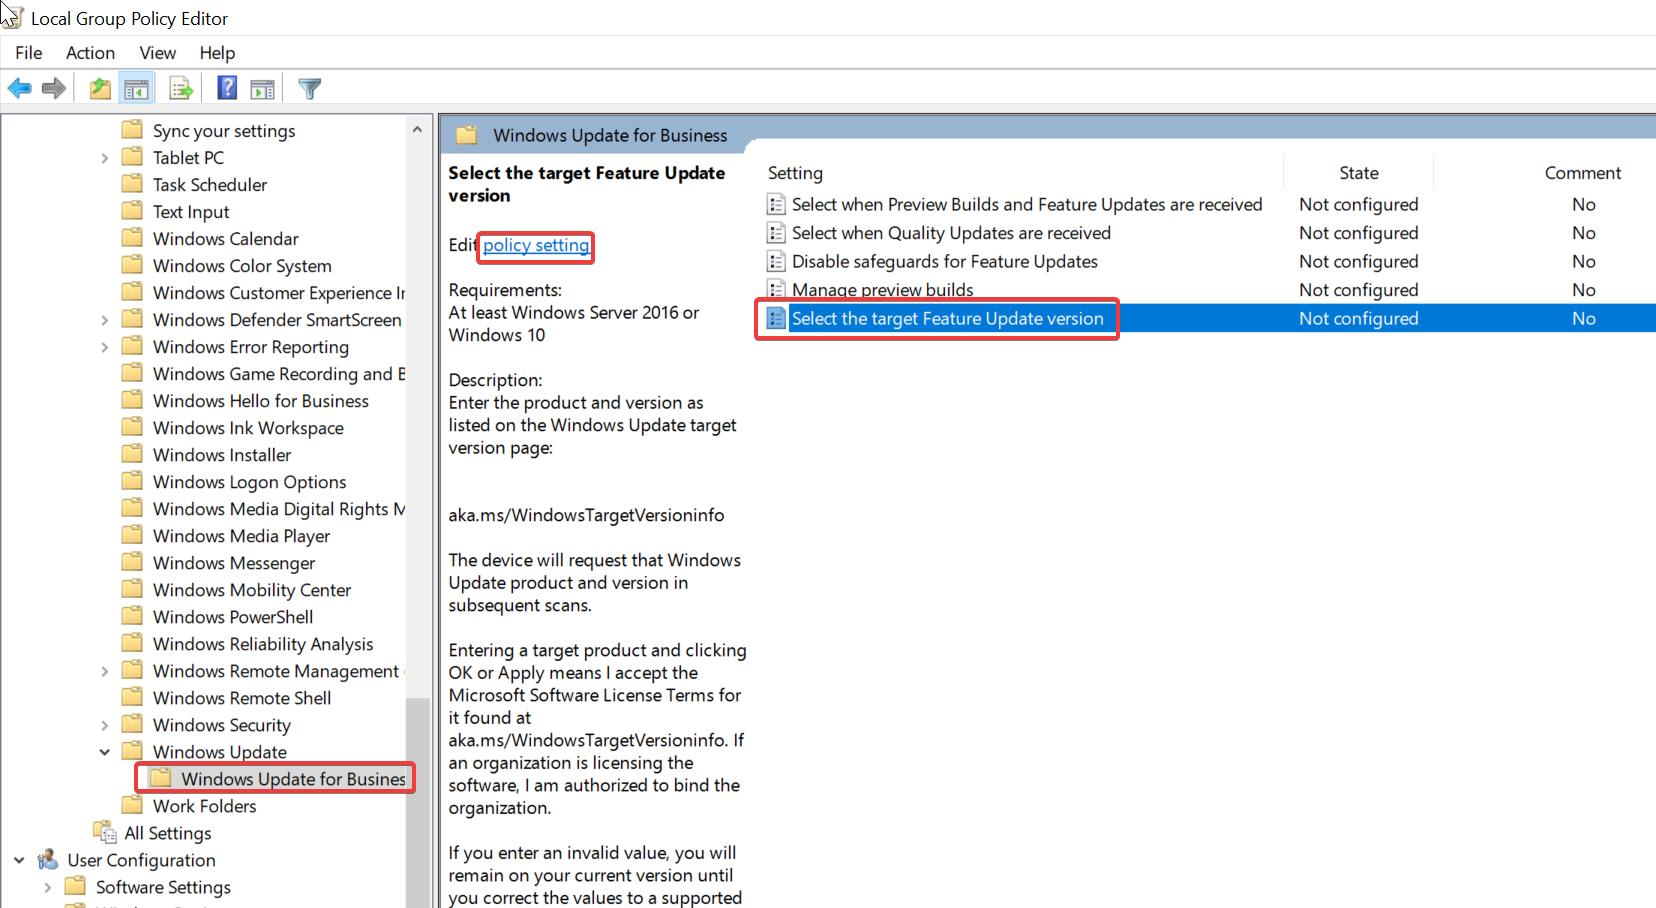
Double click on the policy to open the policy settings. Select Enabled.
Under Options, type 21H2 in the Target Version for Feature updates field and click on Apply and OK.
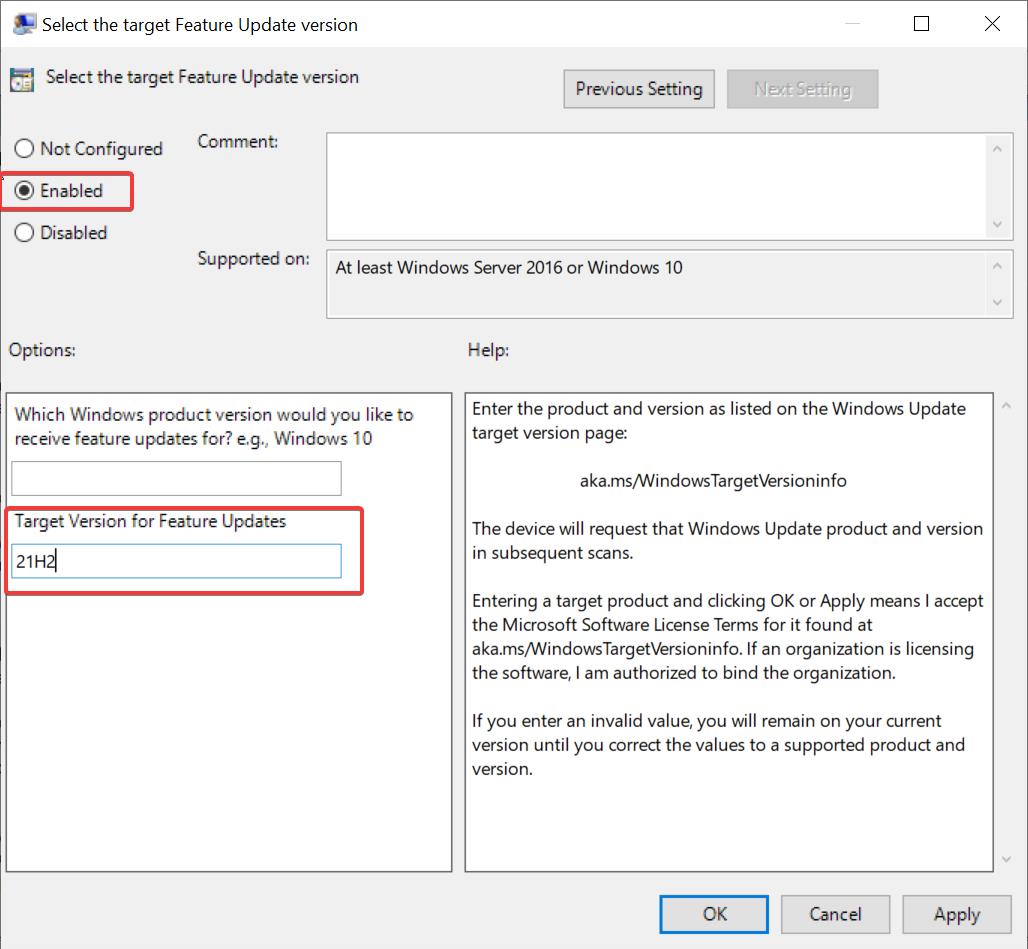
Close the Group Policy Editor and restart the system once. After the Restart, Windows 10 will no longer receive the Windows 11 update. That’s it we have successfully blocked the Windows 11 update.
Using Registry Editor:
Note: Modifying the Registry is risky, and it causes irreversible damage to your OS Installation Follow the steps correctly. Friendly advice Before Modifying Registry Creating Restore Point is recommended.
Open the Run command by pressing Windows + R and type Regedit and hit enter, this command will open the Registry Editor Console.
Now navigate to the following registry path.
HKEY_LOCAL_MACHINE\SOFTWARE\Policies\Microsoft\Windows\WindowsUpdate
If you are not able to find the WindowsUpdate registry key, then you need to create it, right-click on the Windows Registry key and choose New > Key and name it as WindowsUpdate.
Next right click on the WindowsUpdate registry key and choose New > DWORD (32-bit) value and name it as TargetReleaseVersion.
Double click on the TargetReleaseVersion DWORD and set the value data as 1, and click on OK.
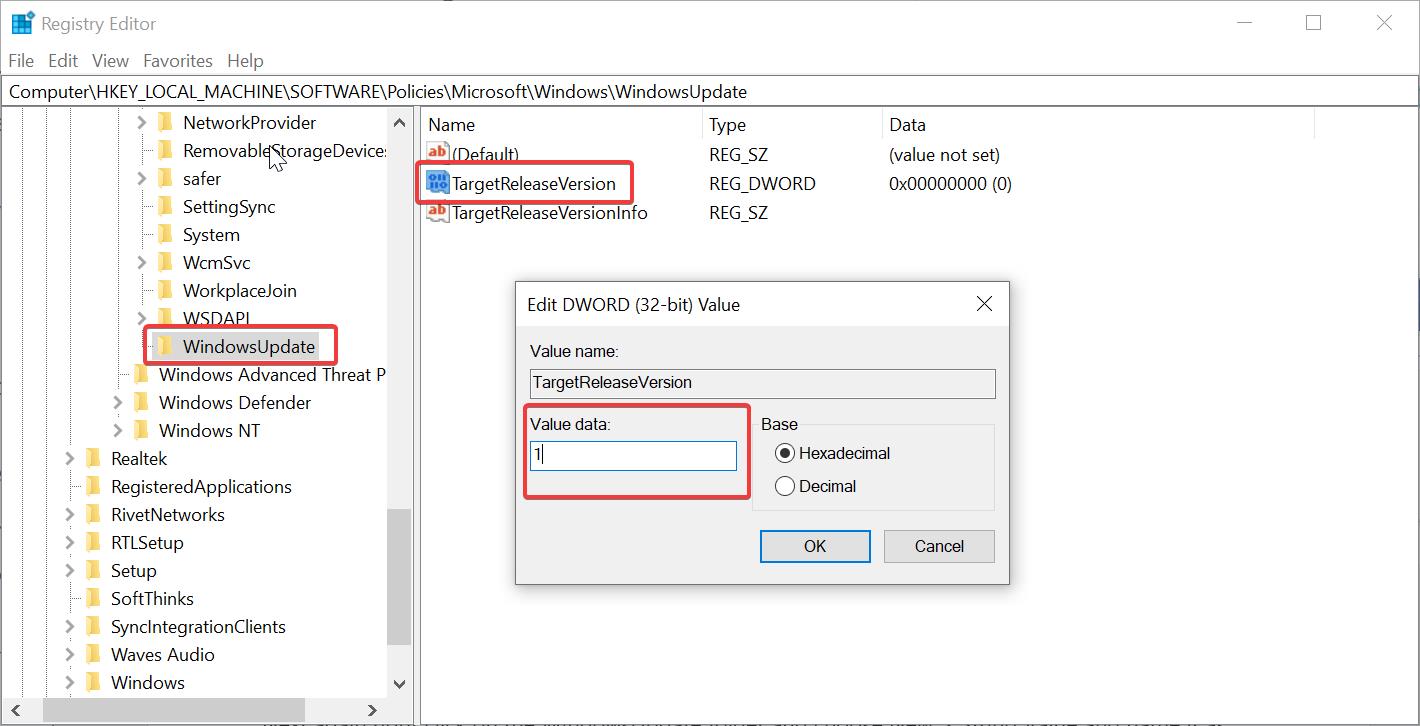
Next again right-click on the WindowsUpdate folder and choose New > String Value and name it as TargetReleaseVersionInfo.
Double click on the TargetReleaseVersionInfo string value and set the value data as 21H2 and click on OK.
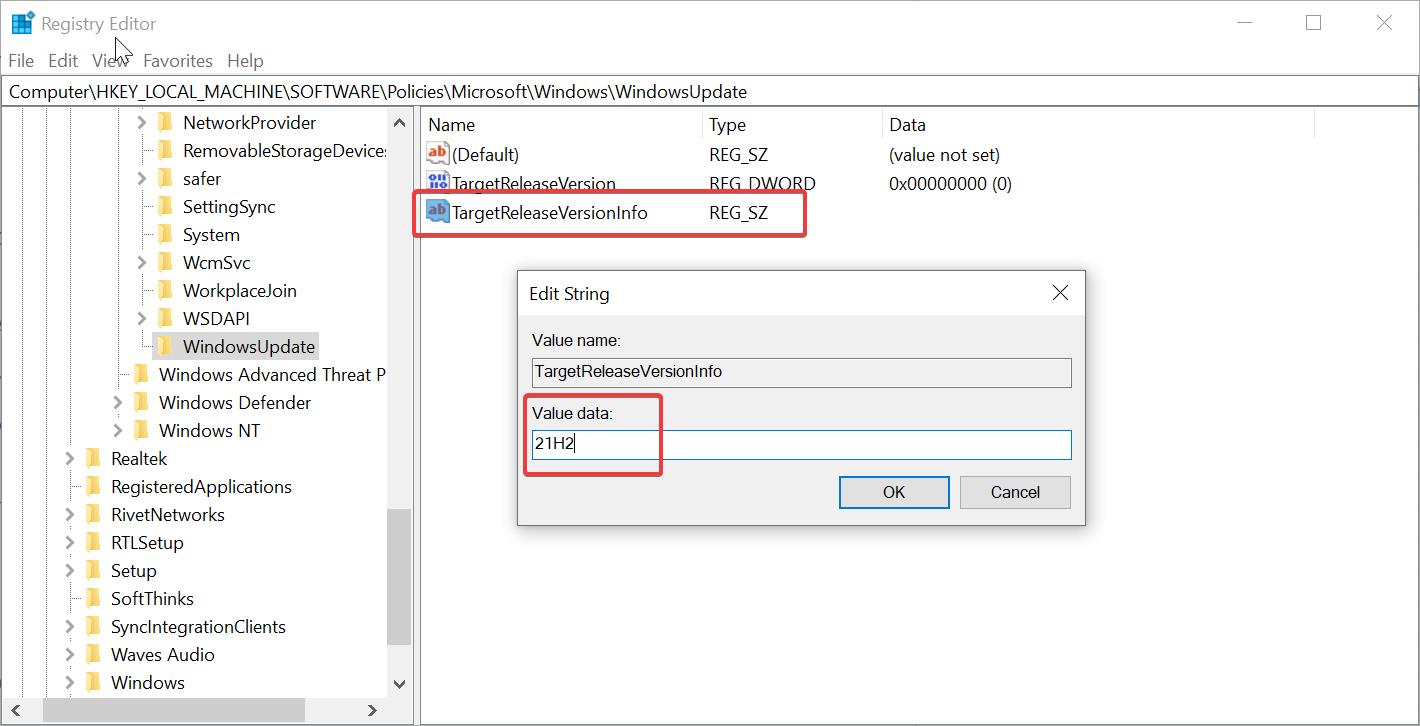
Close the registry editor and restart the system once. That’s it we have successfully stopped the Windows 11 update from getting installed.
Note: Making registry or group policy changes for windows updates will stop the future major Windows 10 updates. Then you need to install the Windows update manually.
Read Also: How to Manually Upgrade to Windows 11?

