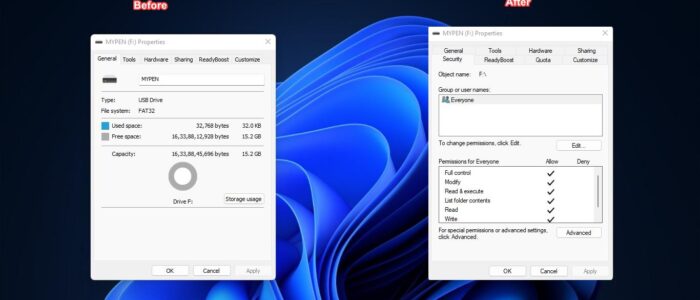
In Windows you can find the Security tab in File Properties Window, File Properties gives you information about that particular file, such as the date you created, the name of the file size, and more stuff. This Properties window is explored in multiple tabs. General Tab, Security Tab, Details, and Previous Versions. Security tab control permissions, which are rules determining who can access the file and what they can do with it. You provide access to any user or Group to that particular folder. Also, you can change the permissions to the user. The advanced button on the Security tab is used to take ownership of the file. Sometimes you can find the Security tab in the File Properties window, due to several reasons. If you are using an official laptop, then there may be a chance that IT admins will disable the Security tab for Security reasons. But you can enable the Security tab if you have proper admin access. Recently one user reported that he is not able to find the Security tab for External HDD, but he can be able to access the security tab for the system hard drive. In this article, we are going to see how to fix the Security tab missing for External HDD or USB in Windows 10/11.
Fix Security tab missing for External HDD or USB:
One of the main reasons for security tab missing issue is that the external HDD or USB may be in a different file format. If your external HDD or USB is in FAT32 file format, then windows won’t show the Security tab in the File Properties window. To fix this issue you need to change the file format FAT32 to NTFS. Follow the below-mentioned solutions to change the file format.
Solution 1: Format the External HDD or USB:
If your external HDD or USB drive has less data or unwanted data, then you can use this method. Just connect the external HDD or USB to your computer.
Open the File Explorer by pressing Windows + E and right-click on the External HDD or USB and choose Format.

Under the Format window, click on the File system drop-down menu and choose NTFS and choose the format options to Quick Format.
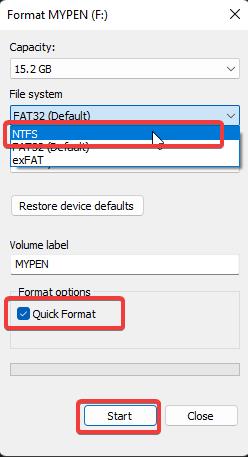
Click on Start, now you will get a warning message, click on Yes and proceed, this will format the External HDD or Pendrive.
Note: Make sure you have backed up all the data from External HDD or USB drive, if you have unwanted data then proceed with the formatting.
Once the format completes successfully, then open the Windows Explorer and right-click on the External HDD, and choose Properties, now you can see the Security tab.
Solution 2: Convert the File format from FAT32 to NTFS without Formatting:
If your External HDD contains a lot of important data and you don’t want to go for formatting, then you can use this method. In this method we are going to use the third-party tool named MiniTool Partition Wizard, this tool will convert the file format from FAT32 to NTFS without formatting.
First, download the MiniTool Partition Wizard from the link and Install it on your system.
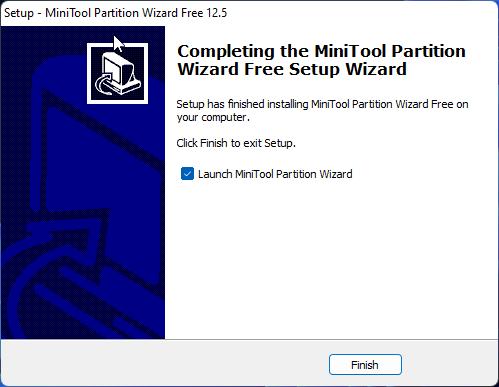
The Installation process is very simple and straightforward. Once you Installed the MiniTool, just launch the tool.
Under Partition Management, just choose the External HDD or USB drive and right-click on it, From the right-click context menu choose the option convert FAT32 to NTFS.
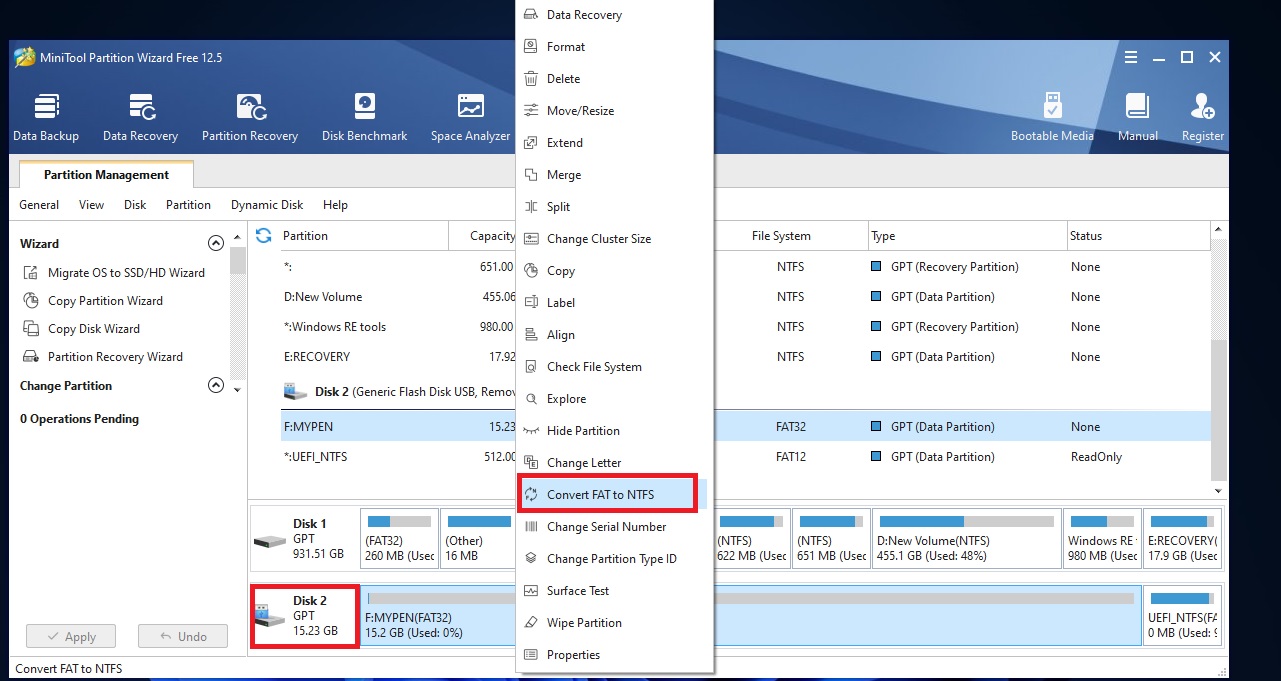
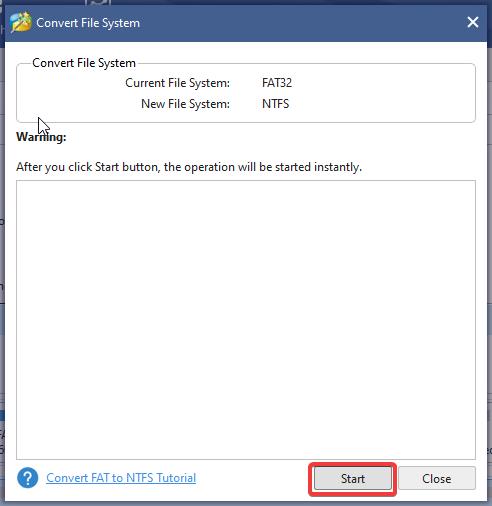
Once you click on the Convert FAT32 to NTFS, you will get one pop-up window, click on Start to initiate the process.
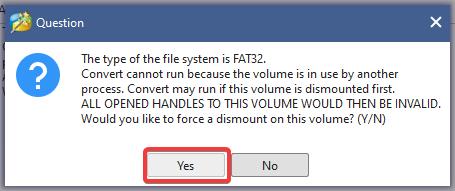
Now you will get one warning message, click on YES to proceed.
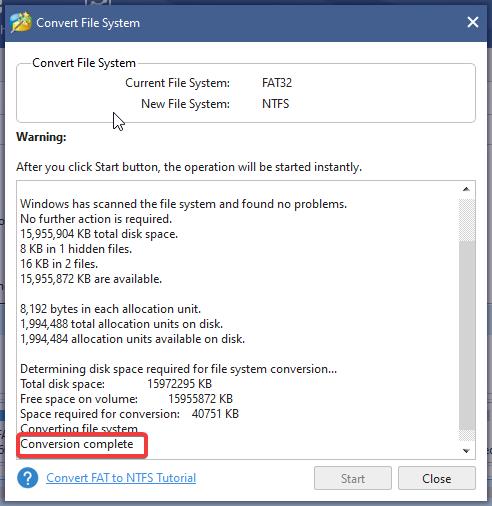
The conversion process will take time depends on the HDD size and the data. Once the conversion process completes, you’ll get the Conversion successfully completes message.
Click on close and Open the HDD properties window and check, now you can see the Security tab. This process won’t delete any data but make sure the External HDD is not full, for the safer side, it’s better to back up your External HDD.
Solution 3: Convert the File Format using Cmd:
If you are using the official laptop and you don’t have access to install third-party tools on your official laptop, then you can use this method. In this method, we are going to use the cmd to convert the file format.
Connect the external HDD or USB Drive to your computer and open the Command Prompt in elevated mode.
Type the following command and hit enter.
Convert Drive_letter: /fs:ntfs
Replace the Drive_letter with the letter of the drive you are converting, In my case, my Pendrive Drive letter is F:, so the actual command would look like this, convert F: /fs:ntfs.
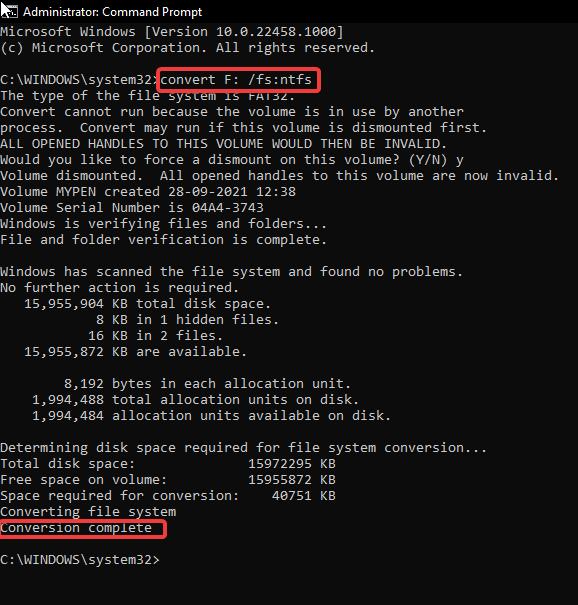
This conversion command will take time depends on the Disk size and data.
Read Also:
How to Fix Security tab missing from File Properties?
How to Enable Power Management tab in Device Manager?

