On-Screen Keyboard is a software-based keyboard that is available in most Operating Systems, In Windows, you can find On-Screen Keyboard from the Vista version. On-Screen Keyboard allows users to type text using a joystick or a pointing device. Instead of a hardware keyboard, you can use the OSK application to type all the keyboard letters and characters. Mostly on-screen keyboard is used by physically challenged users and it helps users to improve input options. This On-screen keyboard exactly resembles the Physical keyboard virtually, it includes all letters, numbers, symbols, and system keys, like Home, End, Insert, Page Up, Page Down, Ctrl, Alt, Caps, and Shift. This article will guide you to Enable/Disable On-Screen Keyboard in Windows 10.
Enable/Disable On-Screen Keyboard:
There are many ways to launch the On-Screen Keyboard on Windows 10, Type On-Screen keyboard in Windows search, and click on the OSK application.
Press Windows + Ctrl + O keyboard Shortcut to launch OSK immediately.
Open Windows Settings by Pressing Windows + I and click on Ease of Access, and from the left-hand side click on the Keyboard. On the right-hand side, Enable use of the On-Screen Keyboard.
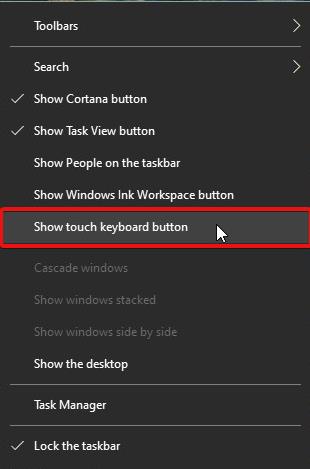
If you didn’t connect the keyboard and if you want to launch the OSK, then right-click on the Taskbar and choose show touch keyboard button. Now you can see the OSK keyboard icon on the taskbar. Click on it and open the OSK.
Enable/Disable On-Screen Keyboard using Setting:
Open Windows Settings by Pressing Windows + I and Choose Ease of Access.
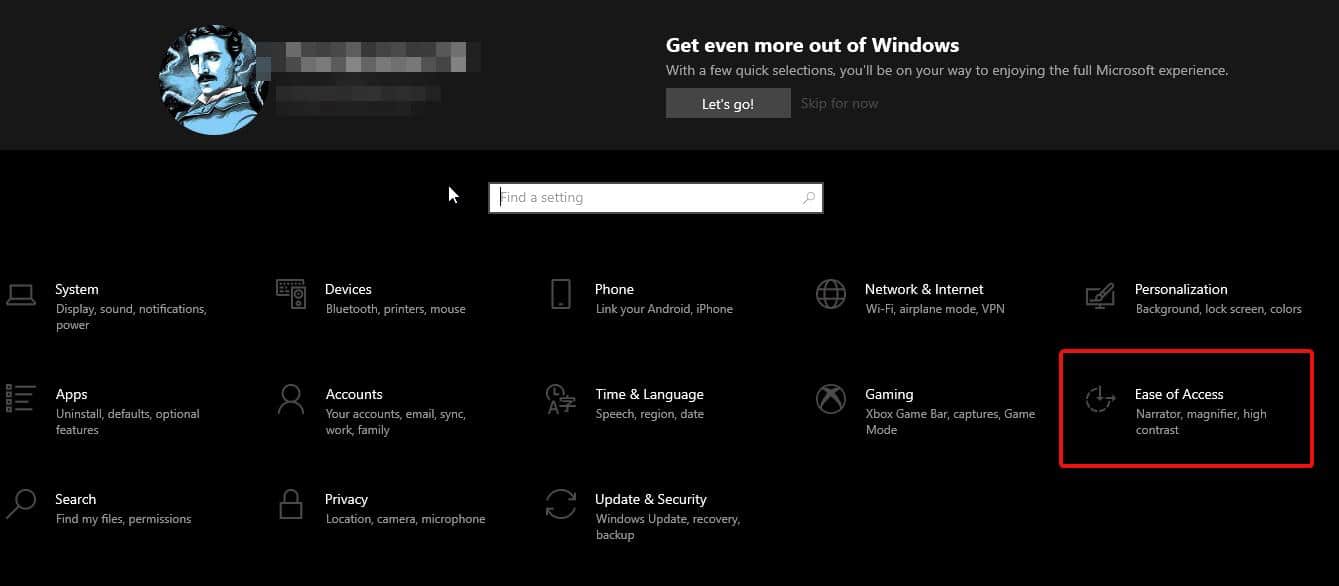
Under Ease of Access From the Left-hand side click on the Keyboard and from the right-hand side under Use your device without a physical keyboard. Turn on the toggle button Use the On-Screen keyboard.
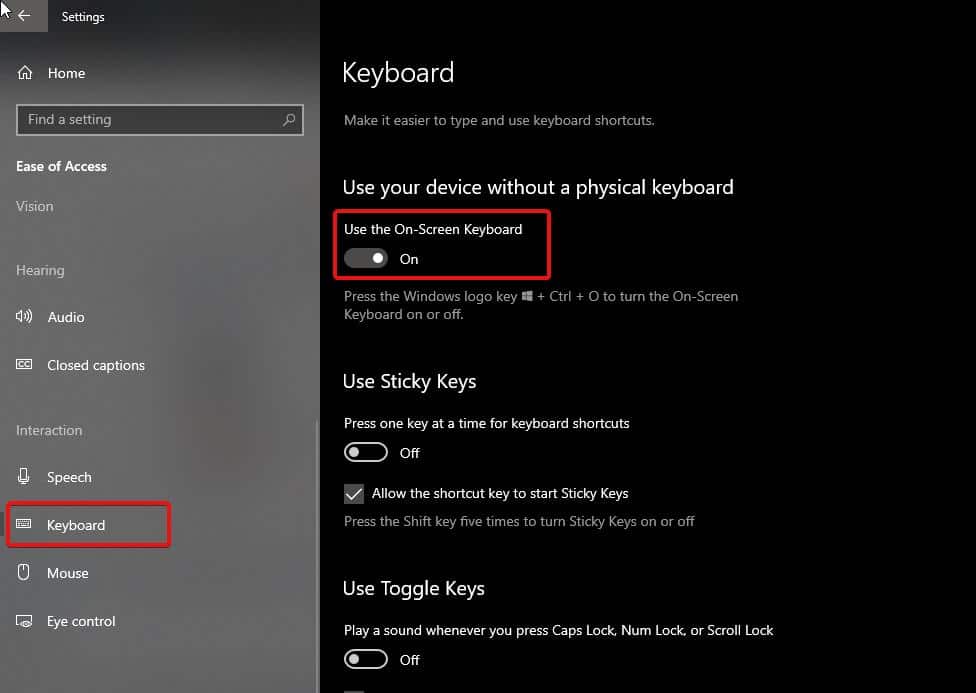
To turn it off just off the toggle button.
Using Registry Editor:
Note: Modifying the Registry is risky, and it causes irreversible damage to your OS Installation Follow the steps correctly. Friendly advice Before Modifying Registry Creating Restore Point is recommended.
Open the Run command by pressing Windows + R and type Regedit and hit enter. This command will open the Registry Editor Console.
Now Navigate to the following path.
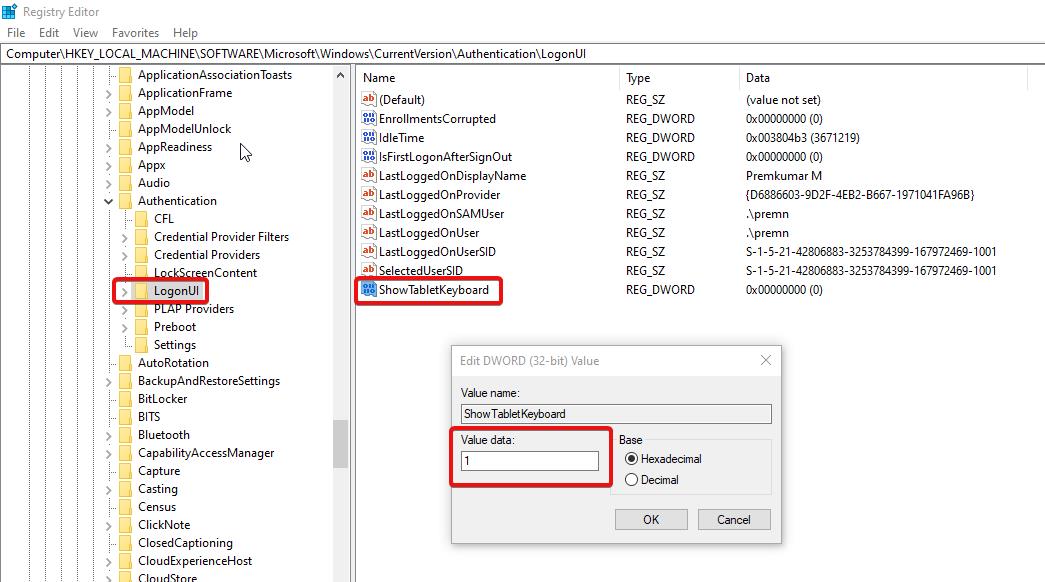
Computer\HKEY_LOCAL_MACHINE\SOFTWARE\Microsoft\Windows\CurrentVersion\Authentication\LogonUI
From the left-hand side click on the LogonUI Registry key and from the right-hand side look for the DWORD named ShowTabletKeyboard.
Double click on the ShowTabletKeyboard DWORD and modify the value from 0 to 1. And click on OK.
Restart the system once. This will Enable/Disable On-Screen Keyboard in Windows 10.


