Windows 11/10 allows you to configure up to three different clocks with different time zones, displaying multiple time zone clocks comes in handy when you deal with work, friends, or family across the world. By default, while configuring your laptop it will ask your region and time zone, this will be considered as a primary clock. The primary clock will show your local time, you can add additional two clocks with different time zones in Windows 10/11. Once you added different time zone clocks, you can enable them both, or you can modify the setting to show only a specific clock. You can view all three clocks by clicking or hovering your mouse over the click in the System tray. This Windows 11 guide will show you to add Different Time zone Clocks in Windows 11.
Add Different Time zone Clocks in Windows 11:
Open Windows Settings by pressing Windows + I and from the left-hand side click on Time & Language.
From the Right-hand side click on Date & time.
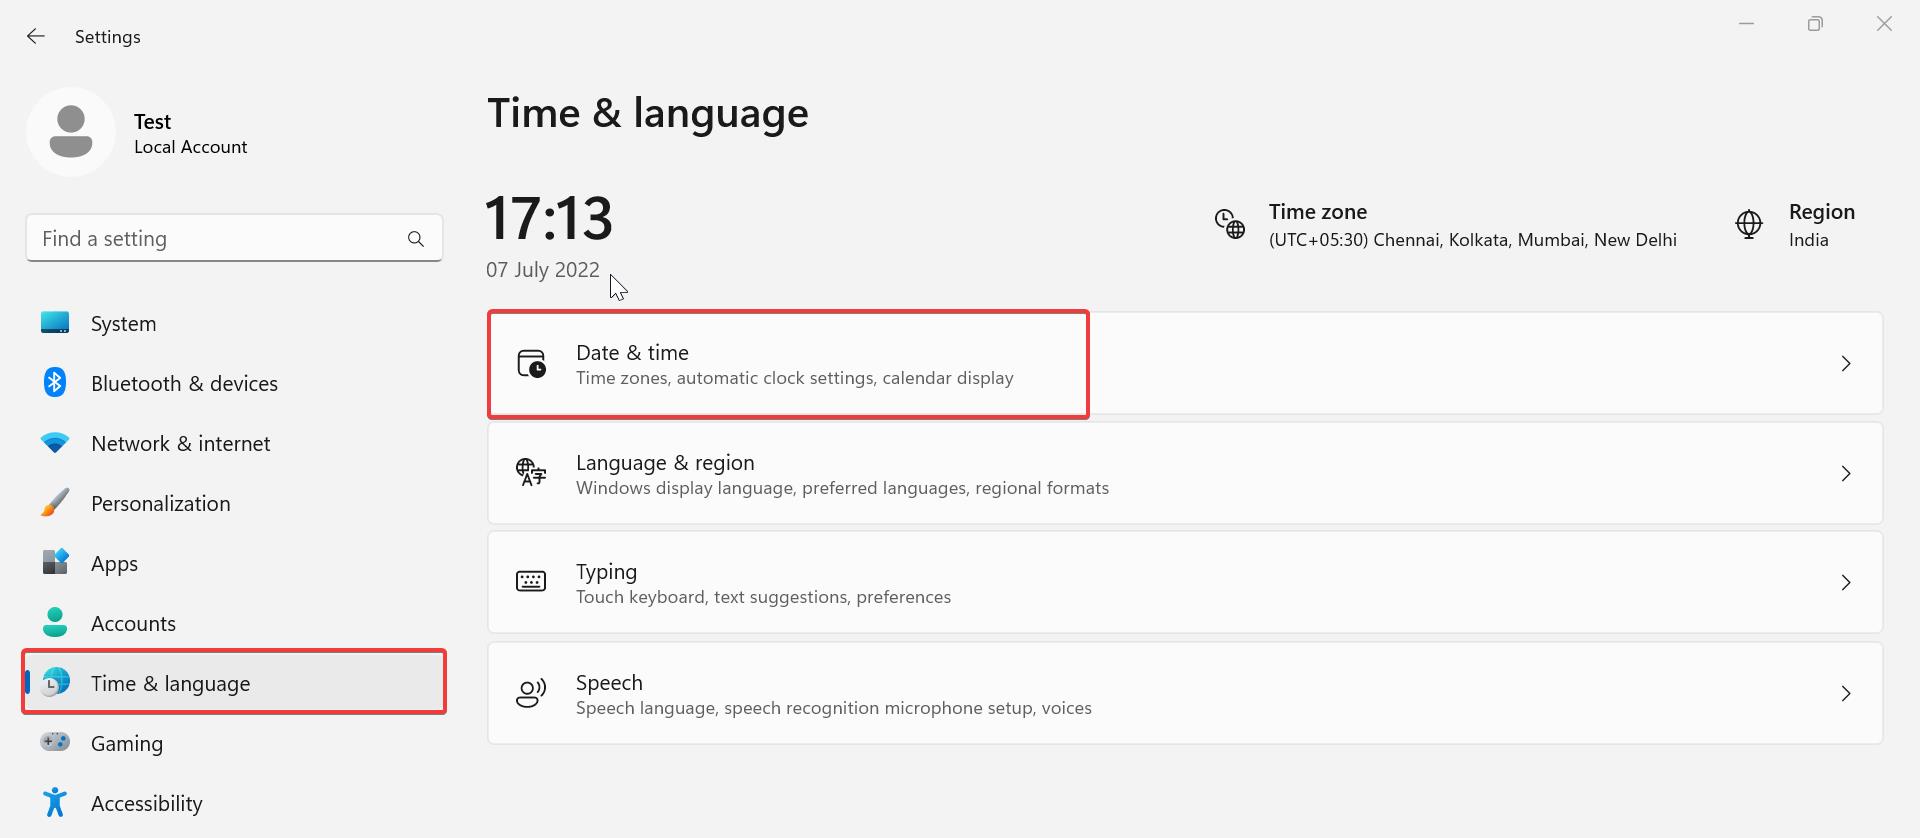
Under Data & time, click on Additional clocks.
Now you’ll get the Date and time window, click on the additional clock tab. Check the Show this clock option and Select time zone.
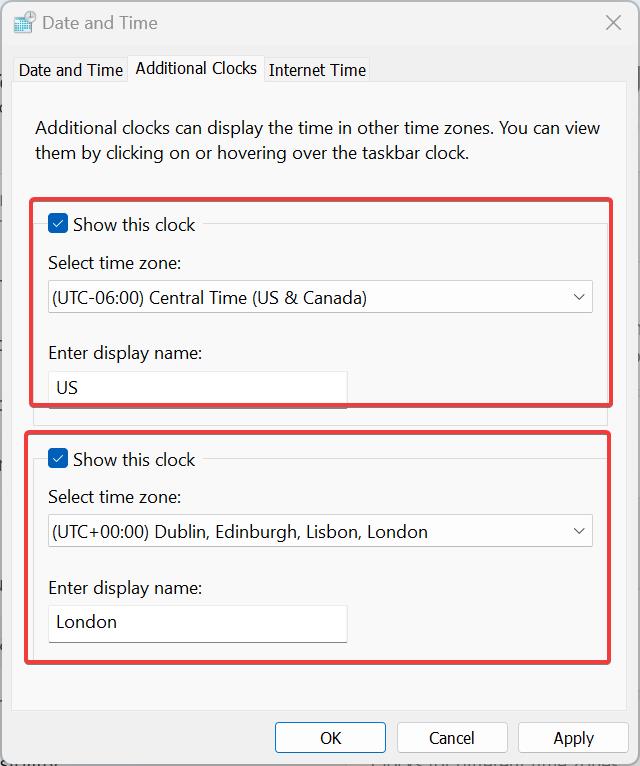
Click on the Select time zone drop-down menu and set the time zone, Enter the display name.
Click on Apply and OK.
Now you can click on the time from the taskbar to view the additional clocks.
Using the Clock App:
In Windows 11 you can add multiple time zone clock using the Clock app. Using the Clock app you can add more than three locations.
Follow the steps below to add multiple time zone clocks in the Clock app.
Click on the Start menu and search for the Clock app. Click and open the Clock app.
From the left-hand side click on the World Clock section.
Here click on the Plus symbol and enter the location of the time zone and add the clock.
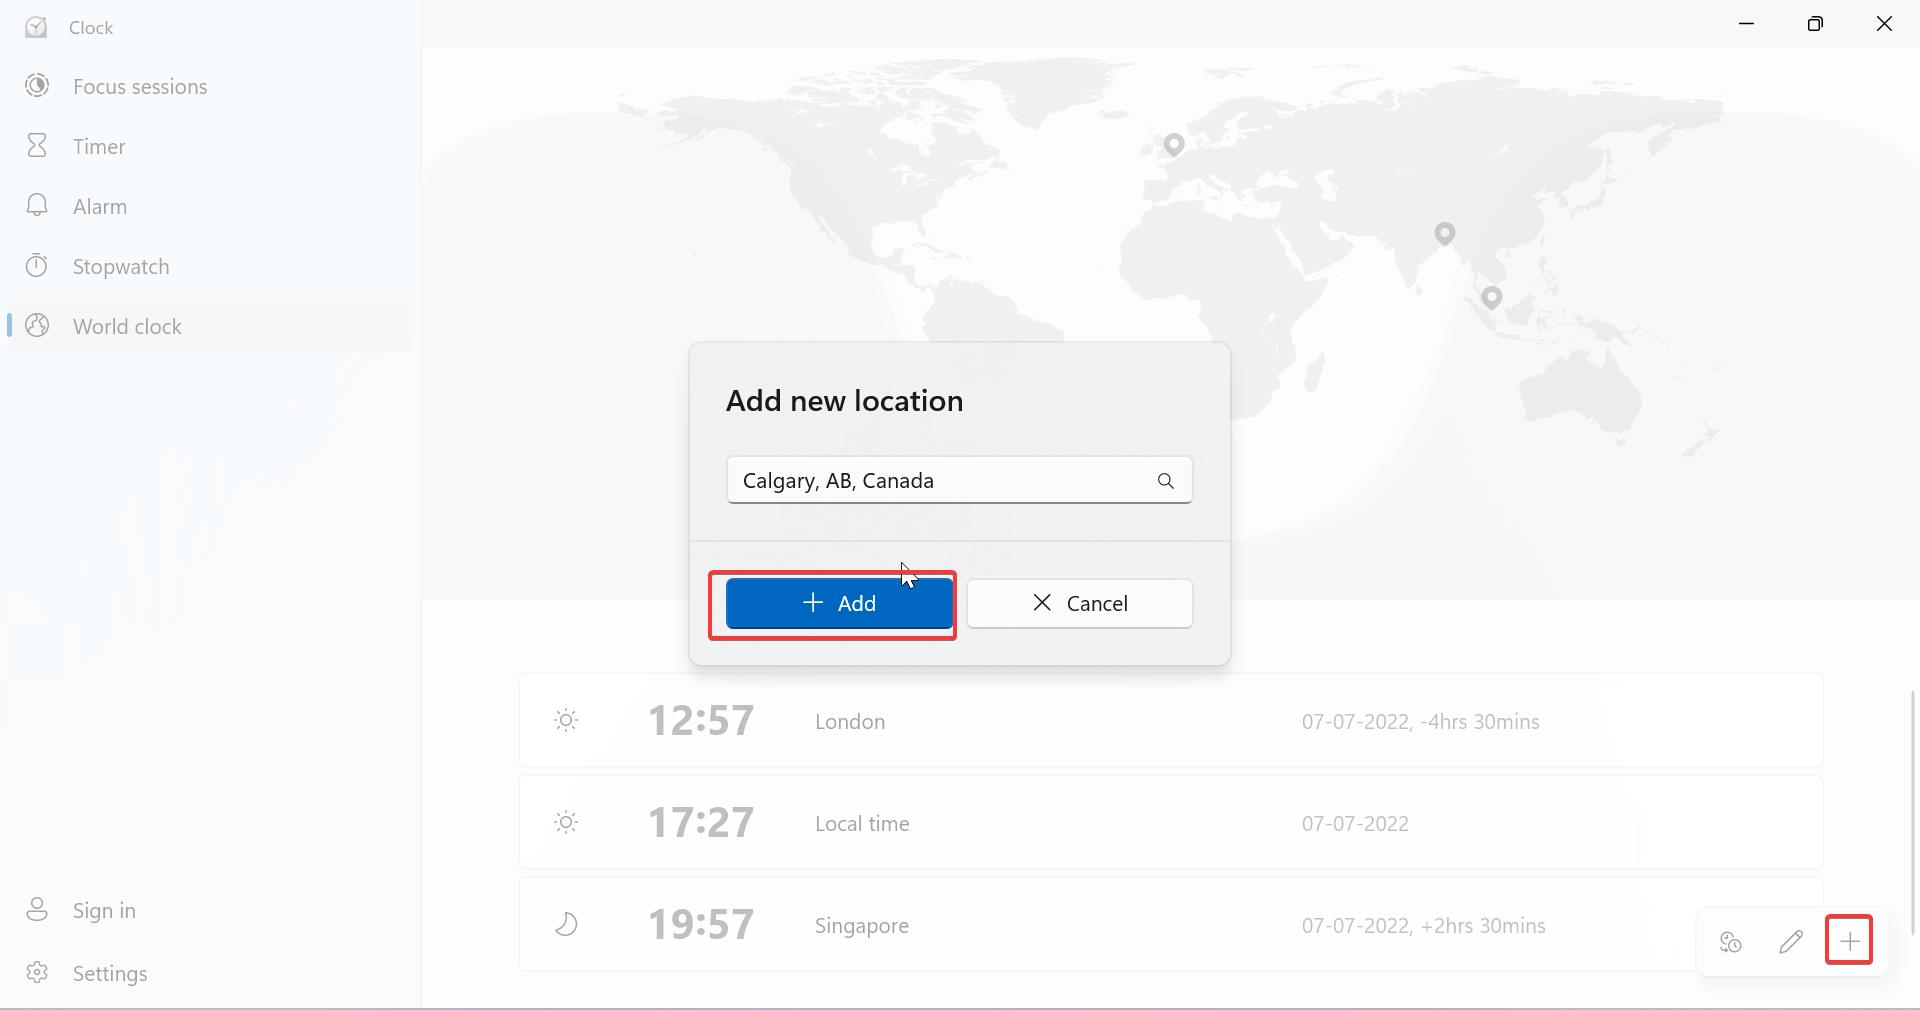
Clock app allows you to add more than three time zone clocks. You can remove the clocks by clicking on the edit symbol and delete icon.
Read Also:
How to Sync Clock using Command Prompt in Windows 11?
How to Display the time in Windows 11 Calendar flyout?

