Windows 10 search is a basic and essential feature which allows users to find anything on your computer like documents, Picture, videos, system files, apps, emails, and settings very quickly, windows 10 search has a lot of advanced features recently Microsoft integrated Bing search to the windows search, this feature helps users to find the information from the web pages also. Also, you can quickly access any webpage from the windows search.
Windows search is located near to the start menu, Windows 10 search works based on the windows search service, this is the engine behind windows search. First, it goes through your device and catalog information from all your files, such as word and metadata. This indexing process helps windows search to return search results so quickly within milliseconds. This service not only indexes file names but all the content within each file. This windows search service also powers the file search for windows file explorer, outlook, timeline, and Many UWPs. Stopping Windows Search will improve system performance. This article will guide you to Disable Windows Search History Feature in Windows 10
Disable Windows Search History Feature:
In Windows 10 you can disable the Windows Search history feature in two methods, one is by using Windows Settings and another method is via Registry Editor.
Using Windows Settings:
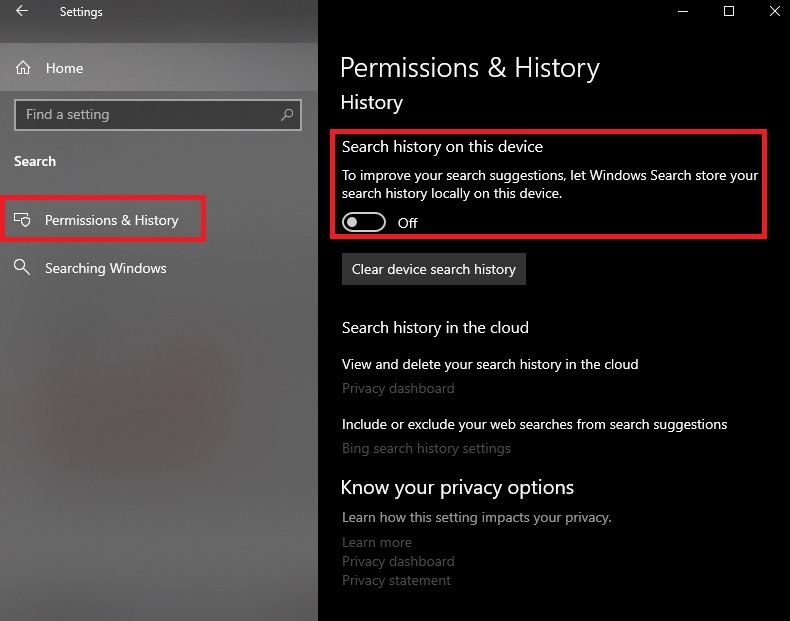
Open Windows Settings by pressing Windows + I and click on Search.
From the Left-hand side click on the Permission & History and from the right-hand side look for Search history on this device.
Under Search history on this device turn off the toggle button to disable it.
That’s it the search history has been successfully disabled.
Using Registry Editor:
Note: Modifying the Registry is risky, and it causes irreversible damage to your Operating system. Friendly advice Before Modifying Registry, Creating Restore Point is recommended.
Open Run command by pressing Windows + R and type Regedit and hit enter to open the Registry editor.
Now navigate to the following path.
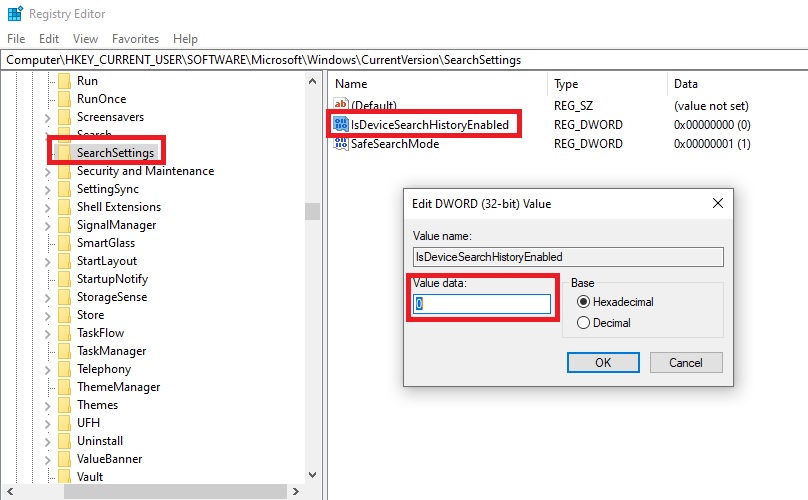
Computer\HKEY_CURRENT_USER\Software\Microsoft\Windows\CurrentVersion\SearchSettings
From the Left-hand side click on the SearchSettings and from the right-hand side look for IsDeviceSearchHistoryEnabled DWORD. If you are not able to find that particular DWORD, then you need to create it. Right-click on an empty area and choose New > DWORD (32-bit) Value. And name it as IsDeviceSearchHistoryEnabled and click on OK.
Now Double click on IsDeviceSearchHistoryEnabled DWORD and set the Value 0.
Click on OK and restart the system once.
Read Also:
How to install SearchFilterHost.exe in Windows 11/10?


