In Windows 10 Dump files are a digital record of information related to a specific crash. These Dump files are known as Memory dump files or crash dump files. If Windows encounters a serious problem, it may crash by displaying BSOD error, and also windows will create a dump file that can help developers to troubleshoot the issue. Dump files contains information about the crash and it shows what processes and drivers that were running at the time of the crash. There are three different types of Memory Dumps or Crash Dumps available in Windows.
Complete Memory Dump:
Complete Memory Dump is the Largest type of dump file supported by Windows, It contains the complete crash information and it reflect the size of the RAM used at the time of the crash.
Kernel Memory Dump
Kernal Memory Dump contains only the kernel-mode read /write pages present in Physical memory at the time of the crash. The size of a kernel memory dump will vary based on the amount of Kernal-mode memory allocated by the operating system the drivers that are present on the system.
Small Memory Dump
Small Memory Dump is also known as mini dump files and it is only 64KB size, (128KB on 64-bit systems) that contains the stop code, parameters, list of loaded device drivers, information about the current process and thread, and the kernel stack for the thread that caused the crash.
Memory Dump files are the main reason for lower disk space, usually the complete memory dump file will occupy 1.5 -3 GB of hard disk space. This post is intended to help you to Increase Disk Space by Deleting Crash Dump Files.
Increase Disk Space by Deleting Crash Dump Files:
In four method we can delete the crash dump files in windows 10. Lets see the methods in detail.
Delete Crash Dump using Windows settings:
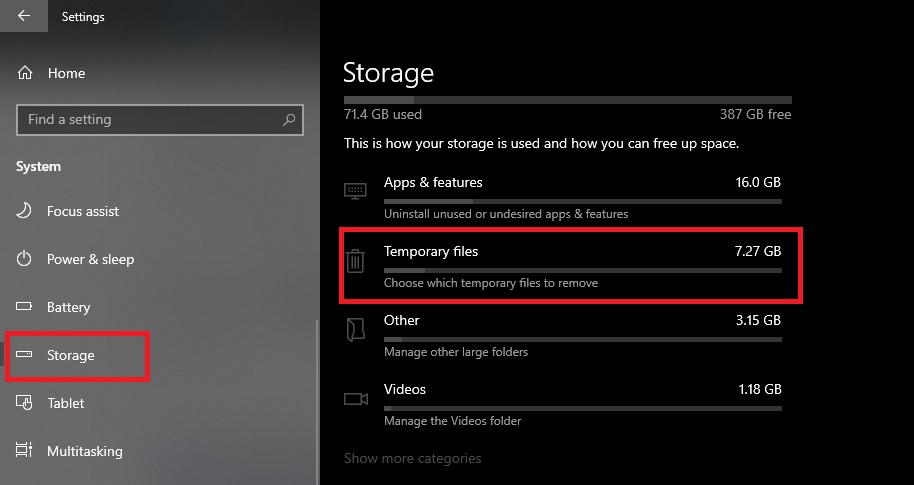
Open Windows Settings by Pressing Windows + I and click on the System.
Under System settings, from the left hand side click on the Storage and from the right hand side click on the Temporary files.
Under Temporary files, check the system error memory dump files and choose Remove files.
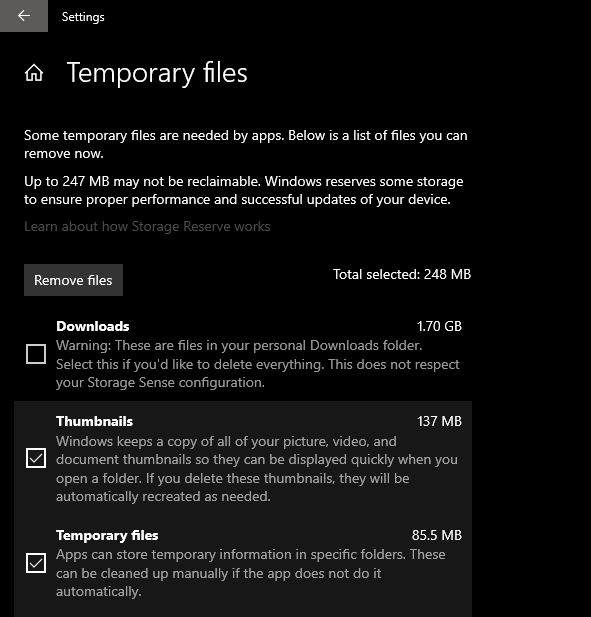
Once you click on the Remove files, windows will delete the crash dump files.
Delete Crash dump files using Disk Cleanup:
Disk Cleanup is a windows utility that allows users to remove files that are no longer needed or that can be safely deleted.
Press Start button and search for Disk Cleanup.
Open Disk Cleanup and choose C drive.
Click on Clean up system files and choose system error memory dump files.
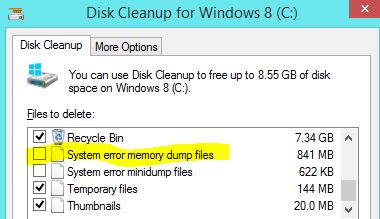
Click on Ok.
The Disk Cleanup tool will delete the crash dump files.
Increase Disk Space Using Command Prompt:
You can use Command Prompt to delete memory dump files.
Open Command Prompt in elevated mode and type the following command one by one.
fsutil usn deletejournal /d /n c:
del “%temp%*” /s /f /q
del “C:$Recycle.bin*” /s /f /q
del “%systemroot%temp*” /s /f /q
vssadmin delete shadows /for=c: /all /quiet
Dism /Online /Cleanup-Image /StartComponentCleanup /ResetBase
Once you executed all the command, your system will automatically get restart. After the system restart check the C drive Disk space.
Turn off Memory Dumps:
If you don’t want your computer to save memory dumps, then you can turn off crash dumps.
Open control panel and click on the System.
Under system settings, click on the Advanced system settings.
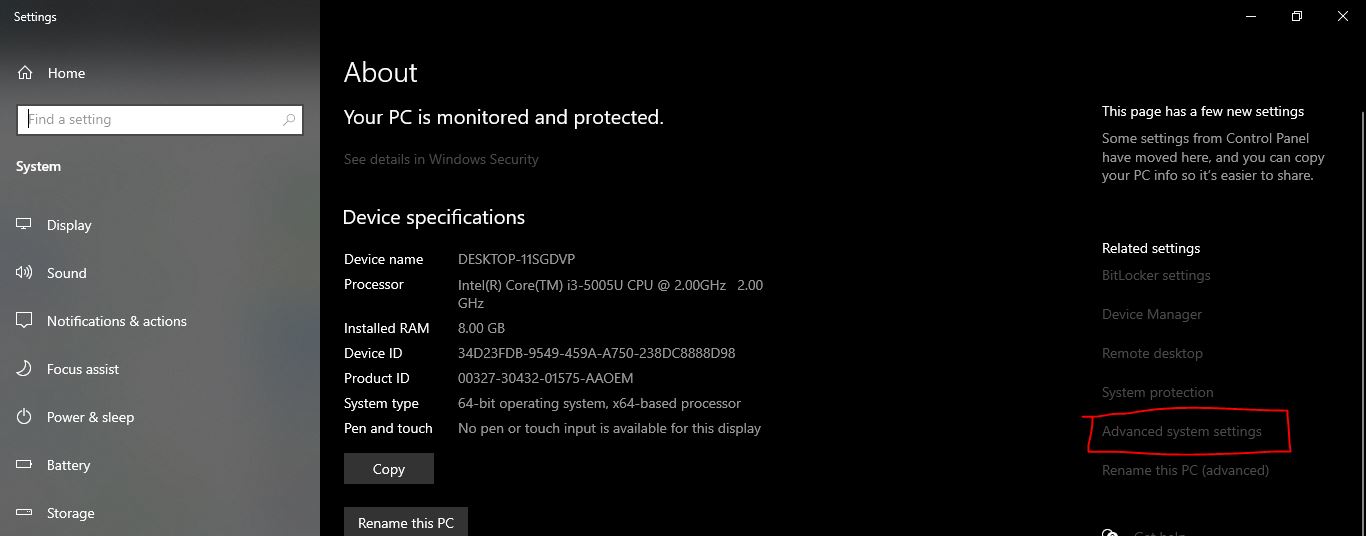
Under system properties, click on the Advanced tabs, under Startup and Recovery, click on Settings.

Under Startup and Recovery settings, Click on the Write debugging information drop down menu and choose none.
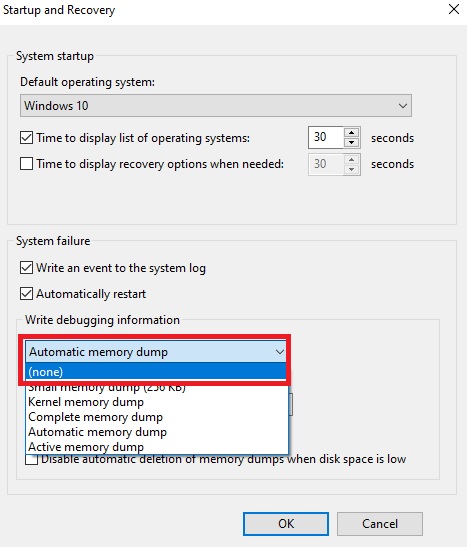
Click on OK.
Read Also:
How to Extend OS partition drive on Windows 11?
Fix Full Disk Space issue in Dell Laptops


Very informative discussion. Thank you!