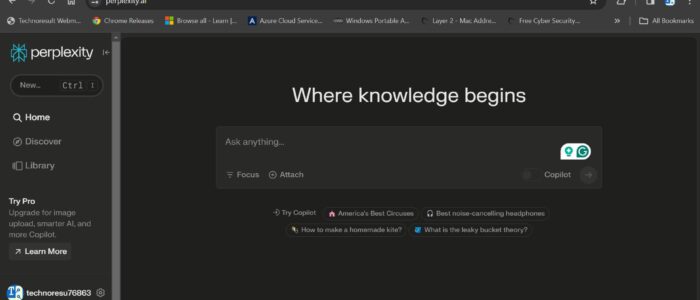
We Know by default Google Chrome uses Google as a default search engine, and from a recent survey, most of the users are switching to AI-based Search engines like Copilot, Arc, or Bing. If you are tired of using the same old default search engine in your Chrome browser and if you wish to switch to a more advanced and intelligent search engine like Perplexity AI. This guide will walk you through the process of setting Perplexity AI as your default search engine in Chrome.
Why Choose Perplexity AI as Your Default Search Engine?
Before we dive into the steps of setting Perplexity AI as your default search engine, let’s take a moment to understand what makes Perplexity AI special. Perplexity AI is an artificial intelligence-powered search engine that utilizes advanced machine learning algorithms to provide highly accurate and personalized search results.
Here are a few reasons why you should consider using Perplexity AI as your default search engine:
- Enhanced search capabilities: Perplexity AI employs state-of-the-art natural language processing techniques to understand the context behind your search queries, resulting in more relevant and meaningful search results.
- Personalized recommendations: By analyzing your search behavior and preferences, Perplexity AI can offer personalized recommendations and suggestions tailored to your interests.
- Advanced filtering options: Perplexity AI allows you to apply advanced filters to your search results, enabling you to quickly find the information you need without having to sift through irrelevant content.
- Seamless integration: Perplexity AI seamlessly integrates with various web browsers, including Chrome, making it easy to set it as your default search engine.
Setting Perplexity AI as Your Default Search Engine in Chrome:
Now that you understand the benefits of using Perplexity AI, let’s get started with setting it as your default search engine in Chrome. Follow the below-mentioned methods:
Method 1: Manually Add Perplexity Search Engine
Click on the three-dot menu icon in the top-right corner of your Chrome browser.
From the dropdown menu, select “Settings”.
In the settings menu, scroll down and click on “Search engine”.
Under, Search engine section click on “Manage Search engines and site search”.

On the Manage Search engines and site search page, you can manually set other search engines as default Search for Chrome. also, you can add the new Search engine. On this page you can see the list of Search engines, click on three dots to set as a default or to delete. You can’t edit the existing search engine, but you can add a new search engine.
Under the “Site Search” section click on the “Add” button.

Now, You’ll get the dialog box to add a search engine, you can find “Search engine”, “Shortcut”, and “URL with %s in place of query” field. Here we have to enter the Perplexity AI Search engine details, Enter the following Perplexity AI Search engine details as mentioned below.
Search engine: Perplexity AI
Shortcut: perplexity.ai/search
URL with %s in place of query: https://www.perplexity.ai/search?focus=internet&q=%s
Once you entered the mentioned details correctly, Click the “Add” button.

Once you add, the search engine will appear in the Site search list. Click on the (Three dots) “More actions” on its right and select “Make Default” from the context menu.

That’s it! You have successfully set Perplexity AI as your default search engine in Chrome. From now on, all your search queries in the address bar will be directed to Perplexity AI, providing you with intelligent search results and personalized recommendations.
Method 2: Install the Perplexity AI Extension
Alternatively, you can use the Perplexity AI Chrome extension to search directly from the address bar. The first thing you need to do is install the Perplexity AI browser extension. Follow these steps to install the extension:
Open your Chrome browser and go to the Chrome Web Store.
Search for “Perplexity AI Extension” in the search bar.
Click on the Perplexity AI Extension from the search results.
Click on the “Add to Chrome” button to start the installation process.

Wait for the extension to be installed, and you will see a confirmation message.
Additional Tips
Here are a few additional tips and tricks to enhance your experience with Perplexity AI:
- Take advantage of advanced search operators: Perplexity AI supports various search operators that can help you customize your search queries and obtain more precise results. Familiarize yourself with these operators to maximize the effectiveness of your searches.
- Provide feedback: If you encounter any issues or have suggestions for improvement, don’t hesitate to provide feedback to the Perplexity AI team. They value user feedback and continuously strive to enhance the search experience.
- Stay updated: Keep an eye out for updates and new features introduced by Perplexity AI. Regularly updating the browser extension ensures that you have access to the latest enhancements and improvements.
Conclusion
In conclusion, setting Perplexity AI as your default search engine in Chrome is a straightforward process that can greatly enhance your browsing experience. By leveraging the power of artificial intelligence and machine learning, Perplexity AI provides advanced search capabilities, personalized recommendations, and advanced filtering options.
Follow the steps mentioned in this guide to customize your Chrome browser and make Perplexity AI your go-to search engine. Unlock the full potential of intelligent search and discover a new way of exploring the web!
Read Also:
How to Set Google as a Default Search in Edge?
Access Bing Chat AI on Chrome or Firefox


