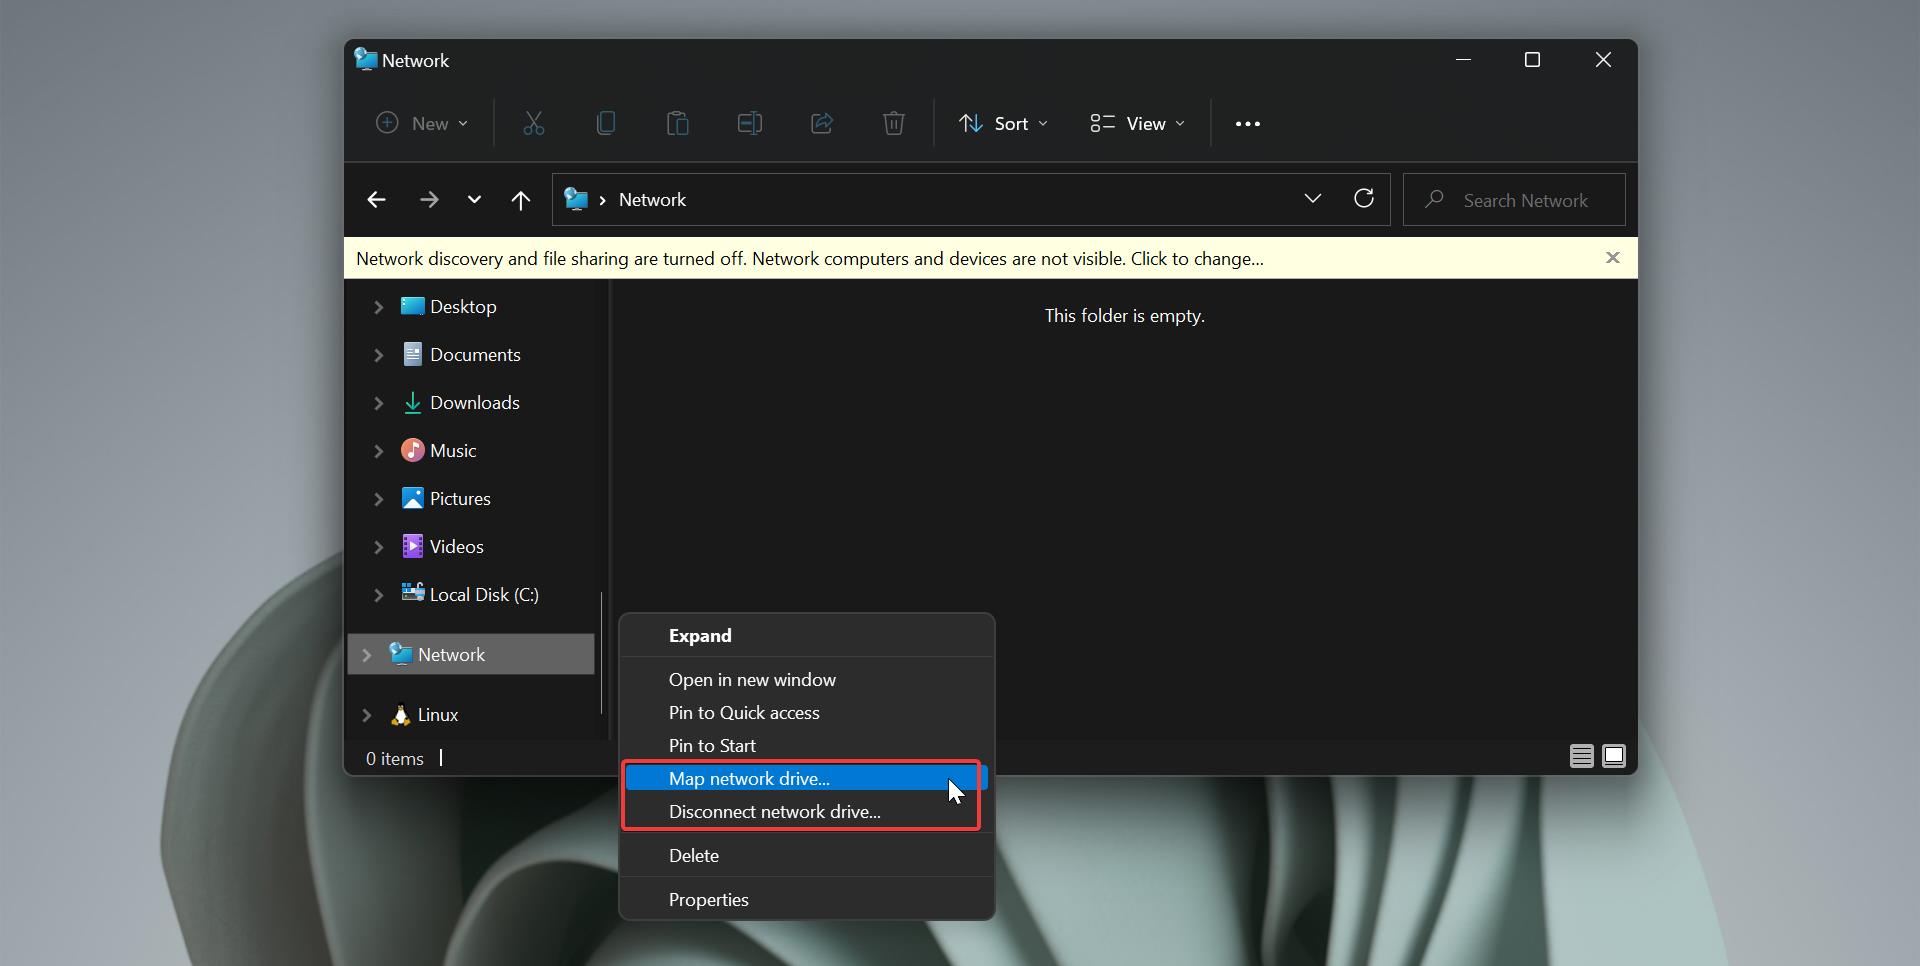
Mapping a Network Drive or Folder in Windows 10 is easy, mapping a drive means getting permanent access to a drive or folder which is currently residing on another computer, File server, and network storage devices in a different location. While mapping a drive windows will assign a separate drive letter to that particular drive or folder and it can be accessed with a single click on windows. You can map or disconnect a network drive from the Windows file explorer. In Windows Explorer you can see the Network option, right-clicking on the Network option shows the new modern context menu. To map any network drive, click on the Show more option in the context menu, now you can access the Map Network Drive and Disconnect Network drive. These options allow users to Map and disconnect a Network drive. For security reasons, if you want to restrict users from adding or removing the network drive, then this windows tutorial will guide you to Remove Map Network Drive from the Context menu in Windows 11.
Remove Map Network Drive from Context menu:
In Windows 11 you can disable the Remove Map network drive and Disconnect Network drive from the right-click context menu using two different methods.
Method 1: Using Group Policy Editor:
Open Run command by pressing Windows + R and type gpedit.msc and hit enter, this command will open the Group Policy Editor.
Now navigate to the following path.
User Configuration > Administrative Templates > Windows Components > File ExplorerFrom the left-hand side click on File Explorer, and from the right-hand side look for the policy named Remove “Map Network Drive” and “Disconnect Network Drive”.

Double-click on the Policy and open the Policy settings.
Under Policy Settings choose Enabled and Click on Apply and OK.

Once you enable this policy, Windows will remove the Map Network Drive and Disconnect network drive commands from the toolbar, tools menu in the File explorer, and from the File Explorer Network location context menu.
Method 2: Using Registry Editor:
Open Run command by pressing Windows + R and type Regedit and hit enter, this command will open the Registry Editor console.
Now navigate to the following Registry path.
HKEY_CURRENT_USER\Software\Microsoft\Windows\CurrentVersion\Policies\ExplorerRight click on the Explorer Registry key and choose New > DWORD (32-bit) Value and name the DWORD as NoNetConnectDisconnect.
Double-click on NoNetConnectDisconnect DWORD and set the Value data as 1 and click on OK.

Close the Registry editor and restart the system once.
Read Also: Update Login Credentials for Mapped Network Drives on Windows 10