In Windows 11, the Network icon is visible on both the login screen and lock screen, with the help of the Network icon you can easily connect to the available Wi-Fi Network without logging into the User Profile. Also, this Network icon gives you a visual indication of the network connection status of your computer, by seeing the Network icon you can easily identify whether your computer is connected to a Wireless, Wired, or dial-up network. This icon shows three types of status connected, not-connected, and Connected but no internet access. And also, this icon is used to connect to the Wi-Fi with a single click and it’s also you can see the listed Wi-Fi networks. Disabling the Network icon restricts other users to log in to the laptop, this article will guide you to disable Network icon on Login Screen in Windows 11.
Disable Network icon on Login Screen:
In Windows Network icon on the Login screen is enabled by default, if you are a domain user, and if you are logging in for the first time, then you need to connect to the Network first. Without the network icon, you cannot connect to the Wireless network, with the help of the Network icon you can easily connect or switch the network. Follow the below-mentioned methods to Disable Network icon in Windows 11.
Method 1: Disable Network icon Using Group Policy Editor:
Open Run command by pressing Windows + R and type gpedit.msc and hit enter, this command will open the Group Policy Editor.
Now navigate to the following path.
Computer Configuration > Administrative Templates > System > LogonFrom the left-hand side click on Logon, and from the right-hand side look for the policy “Do not display network selection UI”.
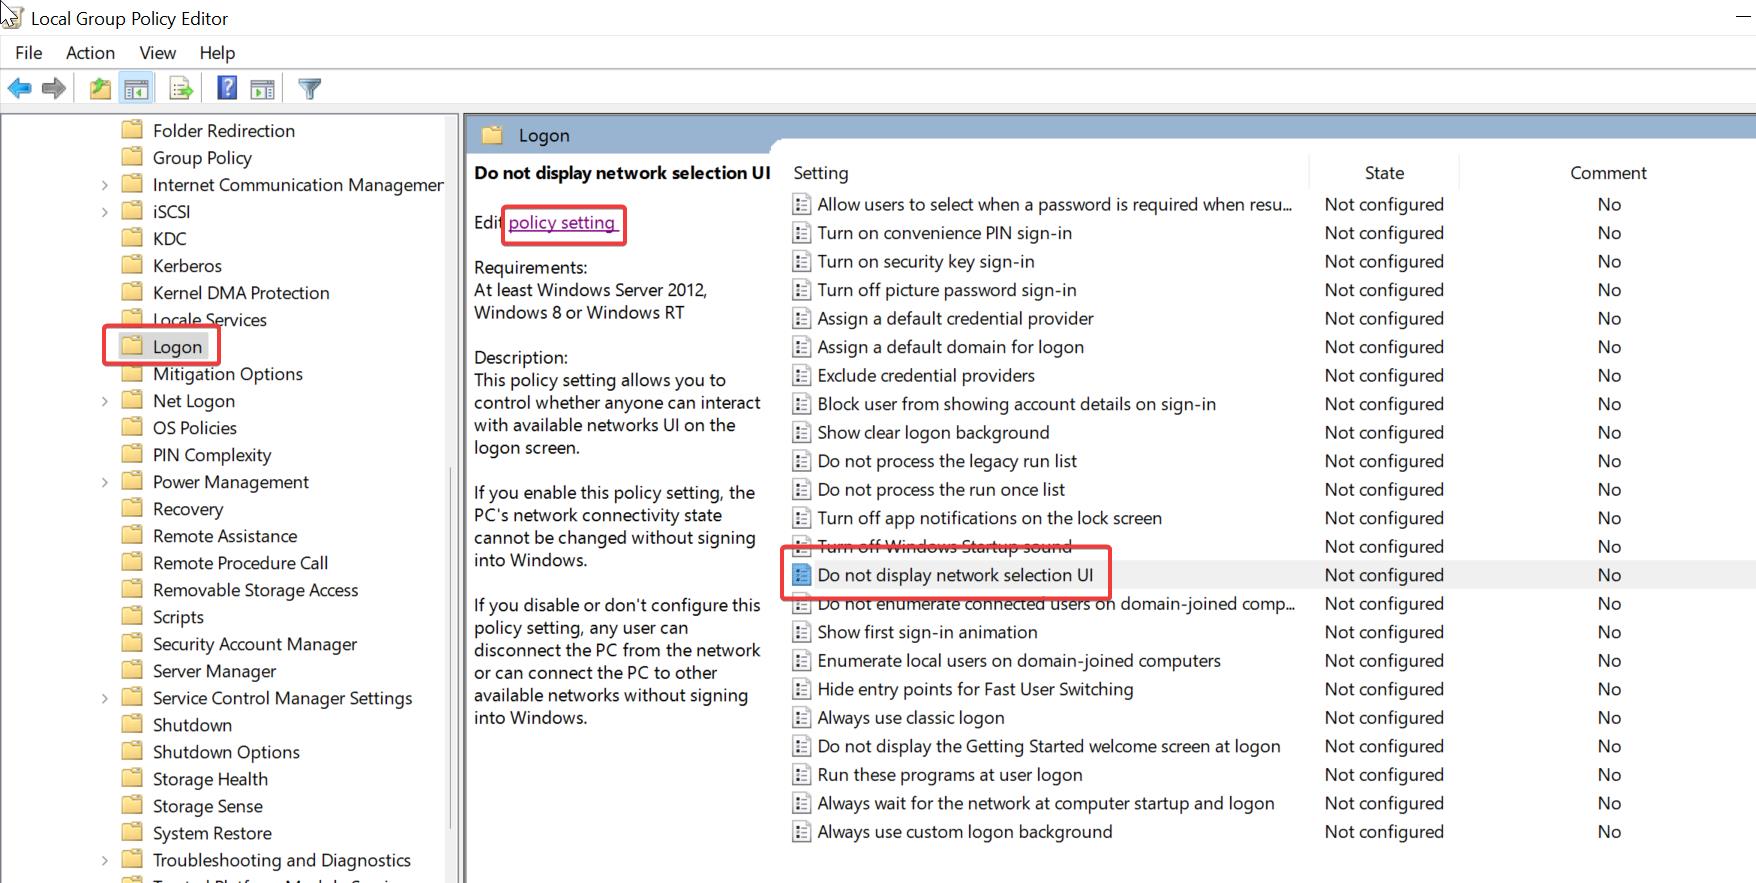
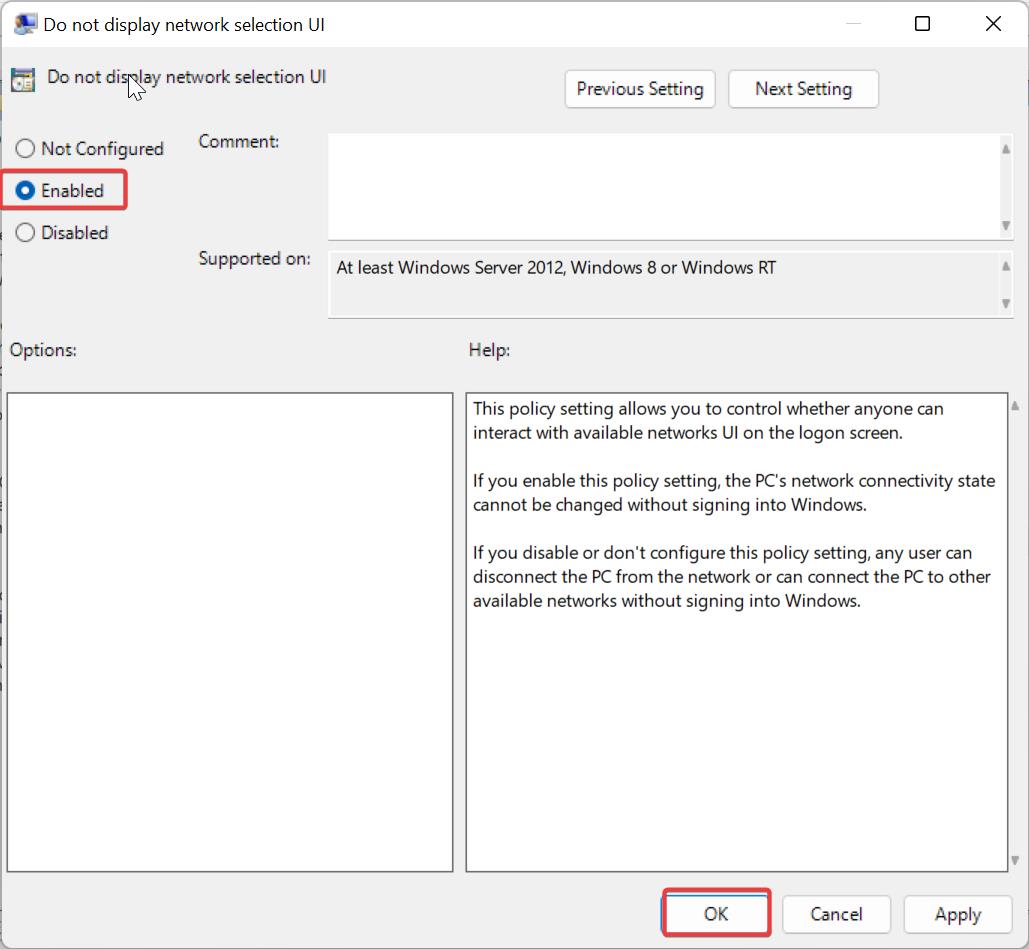
Double-click on the “Do not display network selection UI” policy and open the policy settings.
Under Policy settings, choose Enabled and click on Apply and OK.
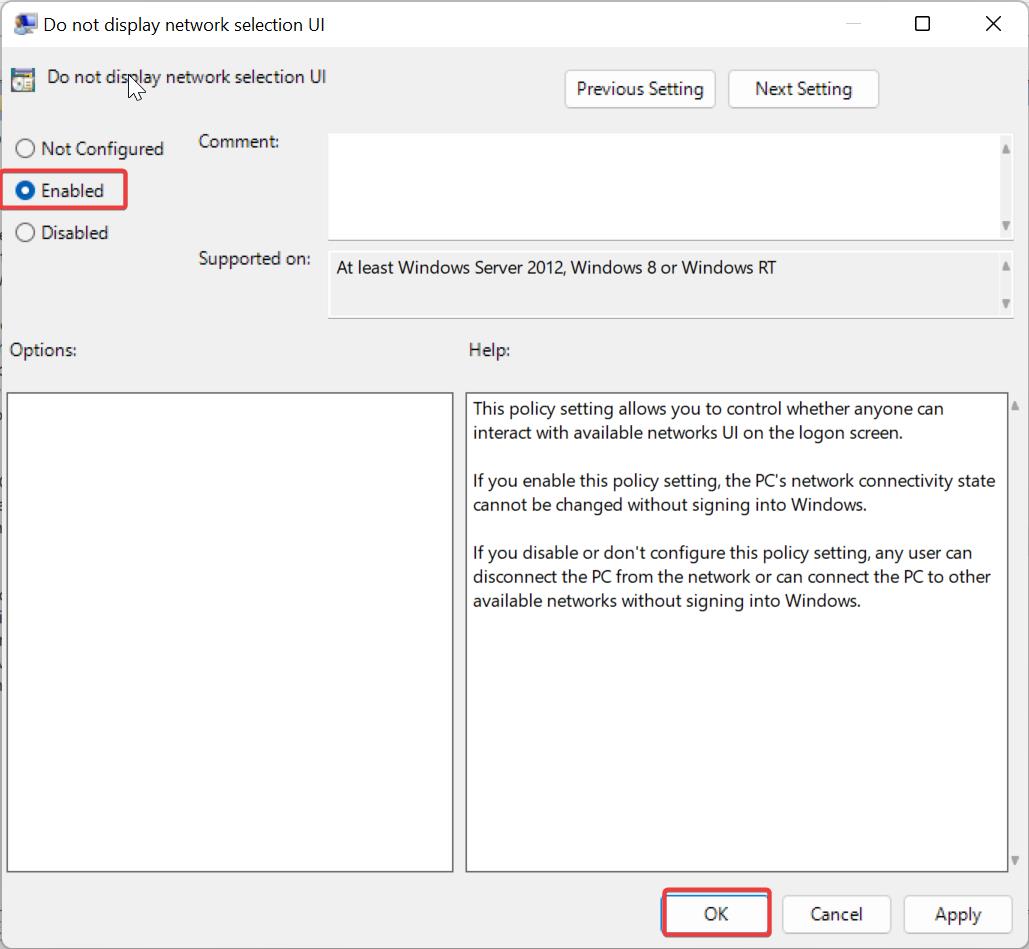
This will Disable the Network icon, and PC’s network connectivity state cannot be changed without signing into Windows.
Method 2: Using Registry Editor:
Open Run command by pressing Windows + R and type Regedit and hit enter, this command will open the Registry Editor.
Now navigate to the following registry path.
Computer\HKEY_LOCAL_MACHINE\SOFTWARE\Policies\Microsoft\Windows\SystemRight click on the System registry key and choose New > DWORD (32-bit) Value and name the DWORD as DontDisplayNetworkSelectionUI.
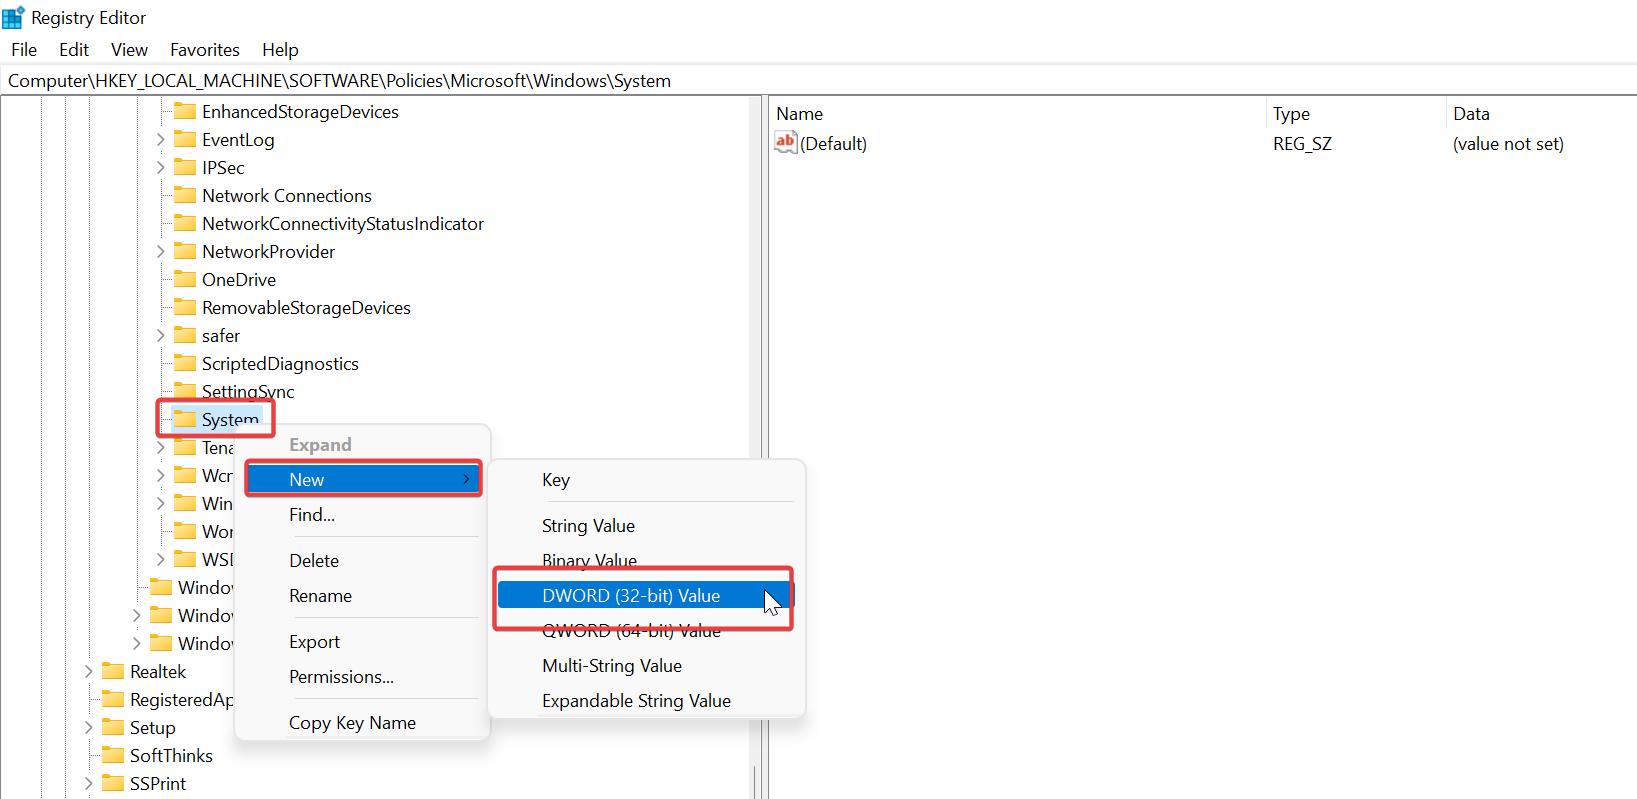
Double-click on DontDisplayNetworkSelectionUI DWORD and modify the Value data to 1 and click on OK.
Close the Registry editor and restart the system once, this will disable the Network icon.
Method 3: Using Command Prompt:
Open Command Prompt in elevated mode, Right click on the command prompt and choose Run as Administrator.
To Disable the network icon, type the following command.
REG ADD "HKLM\SOFTWARE\Policies\Microsoft\Windows\System" /V DontDisplayNetworkSelectionUI /T REG_DWORD /D 1 /F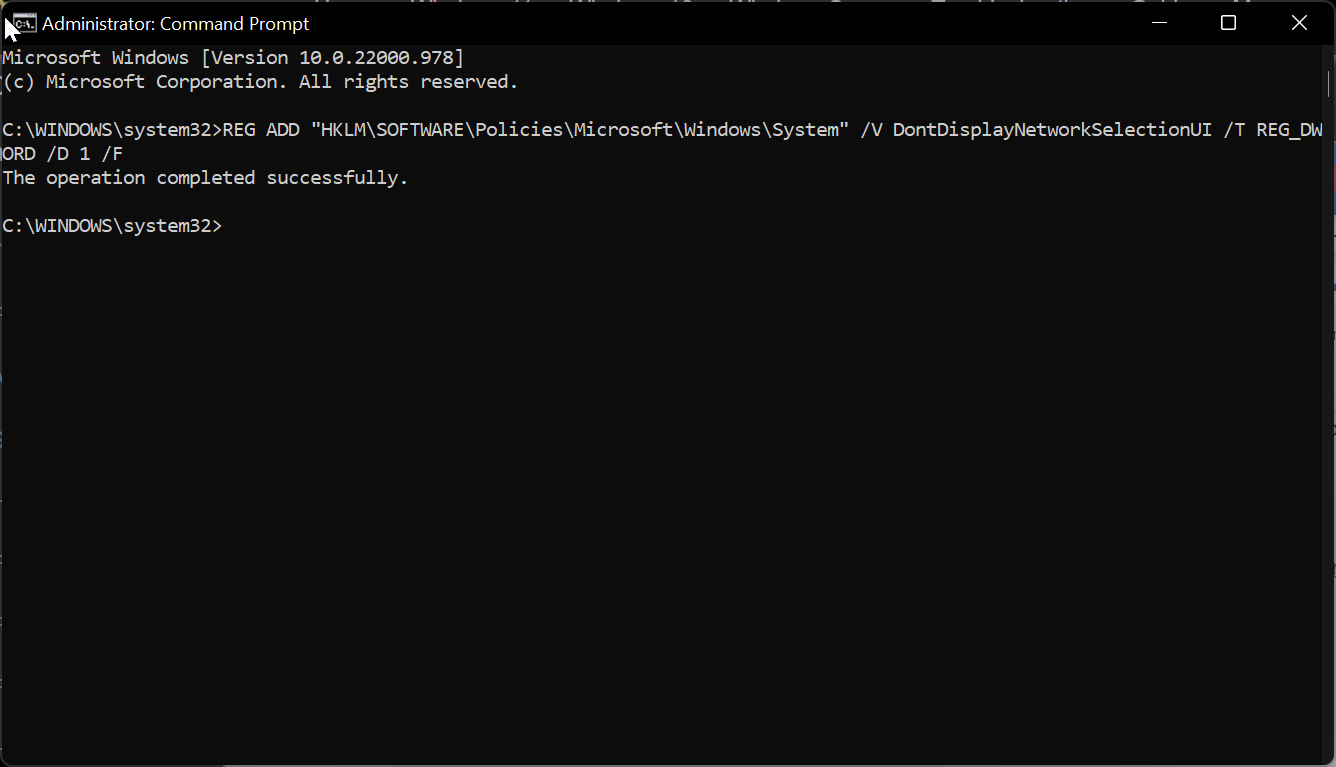
Close the command prompt and restart your system once.
Read Also:
How to Show all users on Login Screen in Windows 11?
How to Reset Network using cmd in Windows 11?
How to Create Sign-in Message Using Registry Editor in Windows 10?
How to Hide Power button on Login Screen in Windows 11?

