Windows 11 allows you to rollback from Windows 11 to Windows 10, if you accidentally upgraded to Windows 11, or you indented to rollback to the previous version, then you can downgrade your operating system within a particular period of time. Microsoft allows you to rollback to Windows 10, you can find the “Go Back” option under Windows Settings. This option is only available for 10 days because Windows only keeps your old operating system files for 10 days. After 10 days, Windows will automatically delete them from your internal drive to free up space. In case if you need to test Windows 11 for while, then you can increase the time limit up to 60 days, This article will guide you to Extend Rollback to Windows 10 time limit in Windows 11.
Extend Rollback to Windows 10 time limit:
You can extend the time limit to Go back to Windows 10 using two different methods, follow the below-mentioned methods to extend the time limit of the ‘Go Back’ feature up to 60 days.
Using Registry Editor:
Open Run command by pressing Windows + R and type regedit and hit enter, this command will open the Registry editor console.
Now navigate to the following registry path.
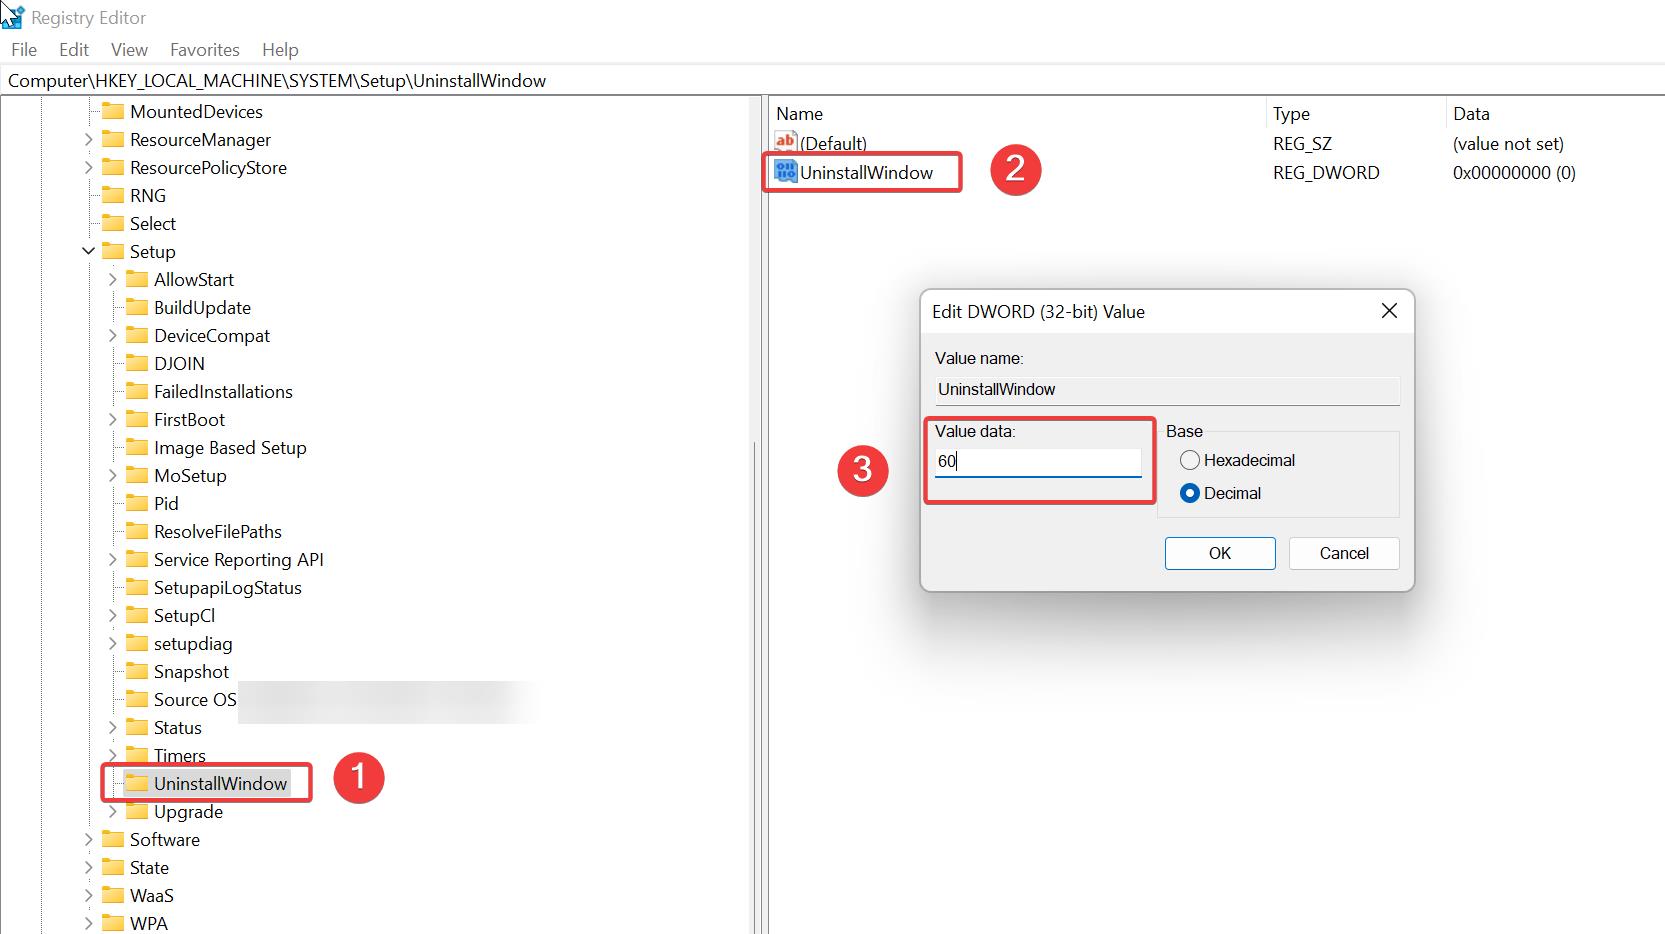
HKEY_LOCAL_MACHINE\SYSTEM\Setup\UninstallWindowFrom the left-hand side look for the UninstallWindows registry key, if you recently upgraded to Windows 11 from Windows 10, then you would definitely find this Registry key.
Click on UninstallWindows registry key and from the right-hand side look for the DWORD named “UninstallWindows”.
Right-click on UninstallWindow DWORD and choose modify, set the Base to Decimal and enter the value data 60 and click on OK.

Once you entered the value, close the registry editor and restart the system once, that’s it you have successfully extended the time limit of the ‘Go Back’ feature up to 60 days.
Using PowerShell:
Launch PowerShell in elevated mode, click on the start menu, and type “PowerShell”, right click on PowerShell and choose Run as Administrator.
Type the following in PowerShell Window.
DISM /Online /Set-OSUninstallWindow /Value:NumberofDaysHere you need to Change the NumberofDays in the code to the actual number of days that you want to extend the time limit. You can enter the time limit from 2 to 60.
So, the actual code will look like this –
DISM /Online /Set-OSUninstallWindow /Value:60

Once you executed the PowerShell code, restart the system once.
Read Also: How to Manually Upgrade to Windows 11?


