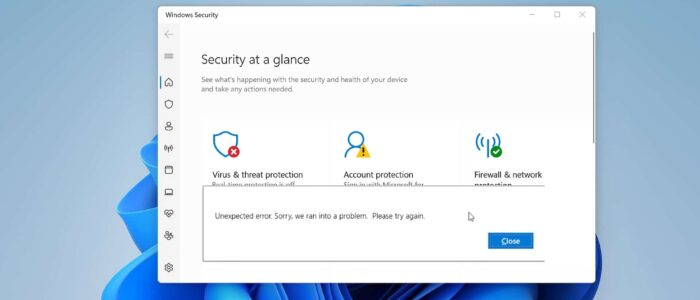
Microsoft Defender also Known as Windows Defender is an anti-malware component of Microsoft Windows. It is an official Protection Program provided by Microsoft to Protect computers running windows from Spyware and malware. Defender comes with several security components like Virus and threat protection, account protection, firewall and network protection, device security, device performance, etc. Virus & threat protection is an important feature that runs in the background, it scans, detects threats, and downloads updates to help identify new viruses and malware. By default, virus & threat protection is enabled in Windows 10/11. Sometimes Windows defender will throw an error like “The threat service has stopped. Restart it now” and if you try to restart the Windows defender service, you’ll receive an error like “Unexpected error. Sorry, we ran into a problem. Please try again”. If you are encountering the same issue, then this article will guide you to Fix Defender Threat Service has stopped error in Windows 11
Fix Defender Threat Service has stopped error:
If you received the same error while starting the windows defender service, then here I have mentioned some effective resolutions to fix this issue.
Solution 1: Fix Defender Threat Service has stopped error by Disabling Third-Party Antivirus:
Windows Defender will disable automatically if you install any third-party antivirus. So, make sure there is no third-party antivirus installed on your system. If you found any third-party antivirus then uninstall it and enable the Defender virus & threat protection. Follow the below-mentioned steps to enable Real-time protection.
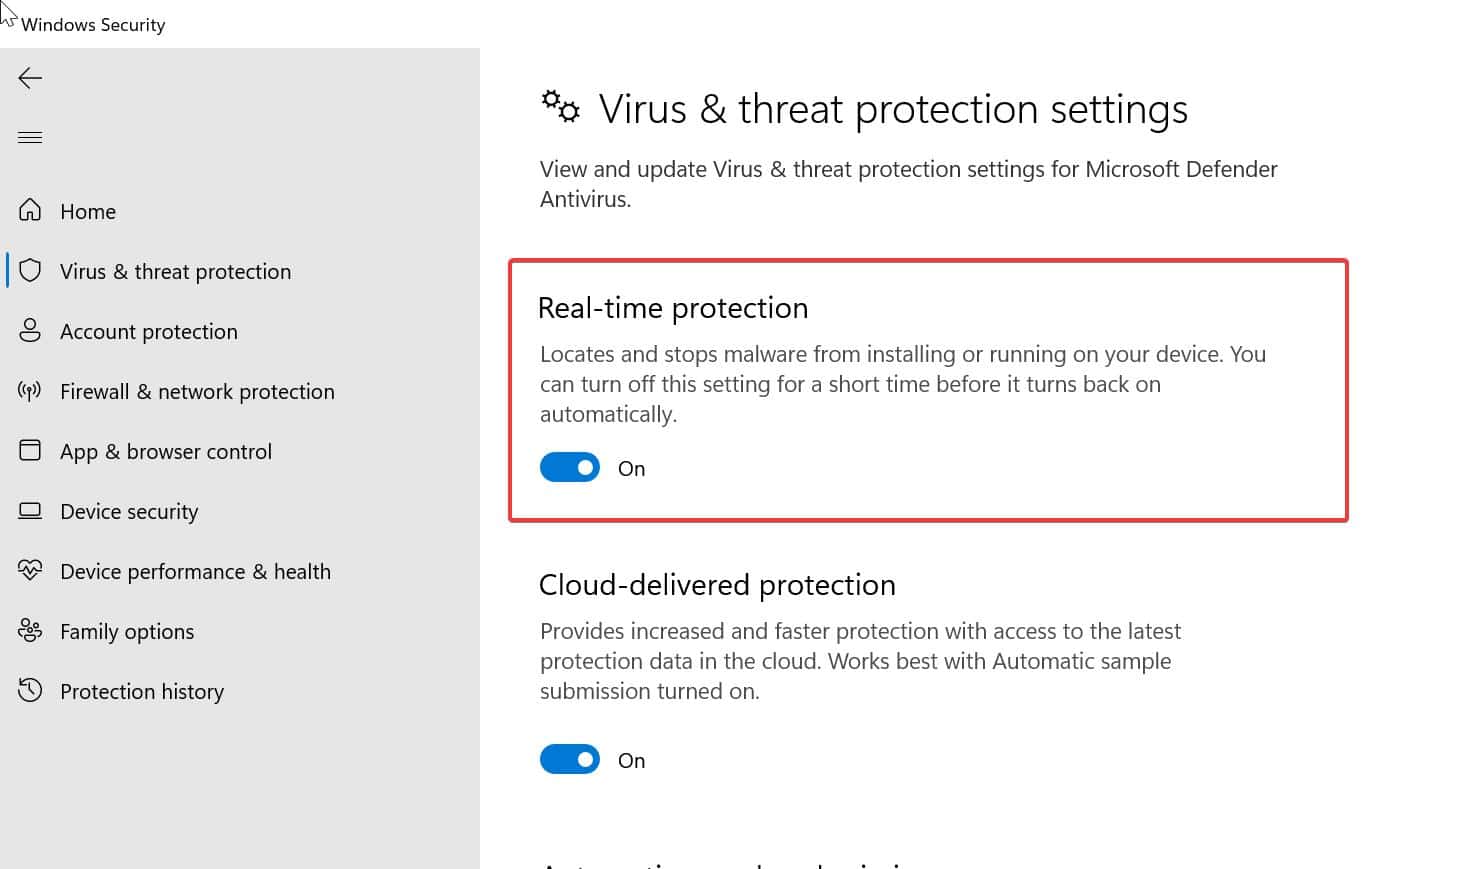
Open Start and search for Windows Security and Click on Windows Security. From the Left-hand side click on Virus & threat protection.
Under Virus & threat protection settings from the right-hand side click on the Manage settings.
Turn On the Real-time Protection toggle switch to Enable Windows Defender.
Solution 2: Enable Defender service using Registry Editor:
Open the Run command by pressing Windows + R and type Regedit and hit enter, this command will open the registry editor console.
Now navigate to the following registry path.
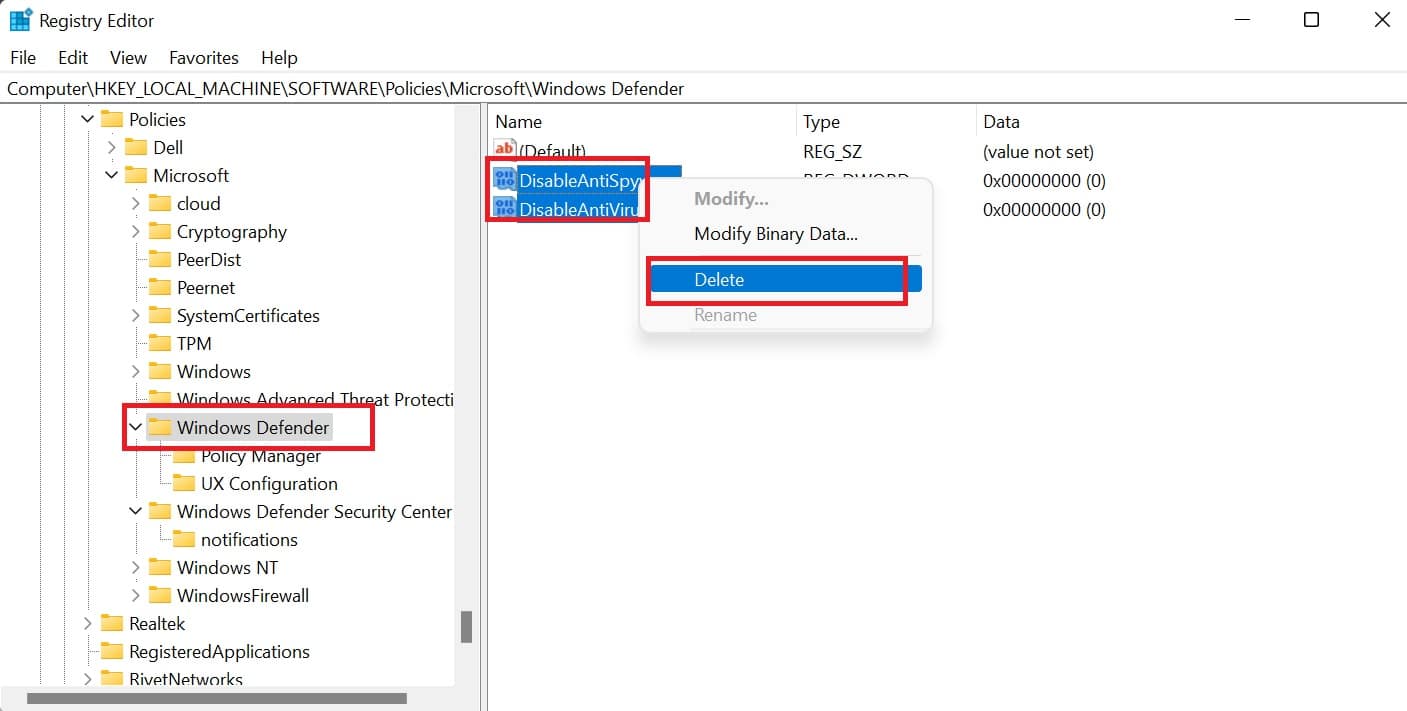
HKEY_LOCAL_MACHINE\SOFTWARE\Policies\Microsoft\Windows DefenderFrom the left-hand side click on the Windows Defender registry key and from the right-hand side look for the following DWORDs.
- DisableAntiSpyware
- DisableAntiVirus
If you found the DWORDs then right-click and choose Delete.
Or you can modify the above-mentioned DWORDs value to 0. Right-click on the DWORDs and choose to modify and set the value to 0.
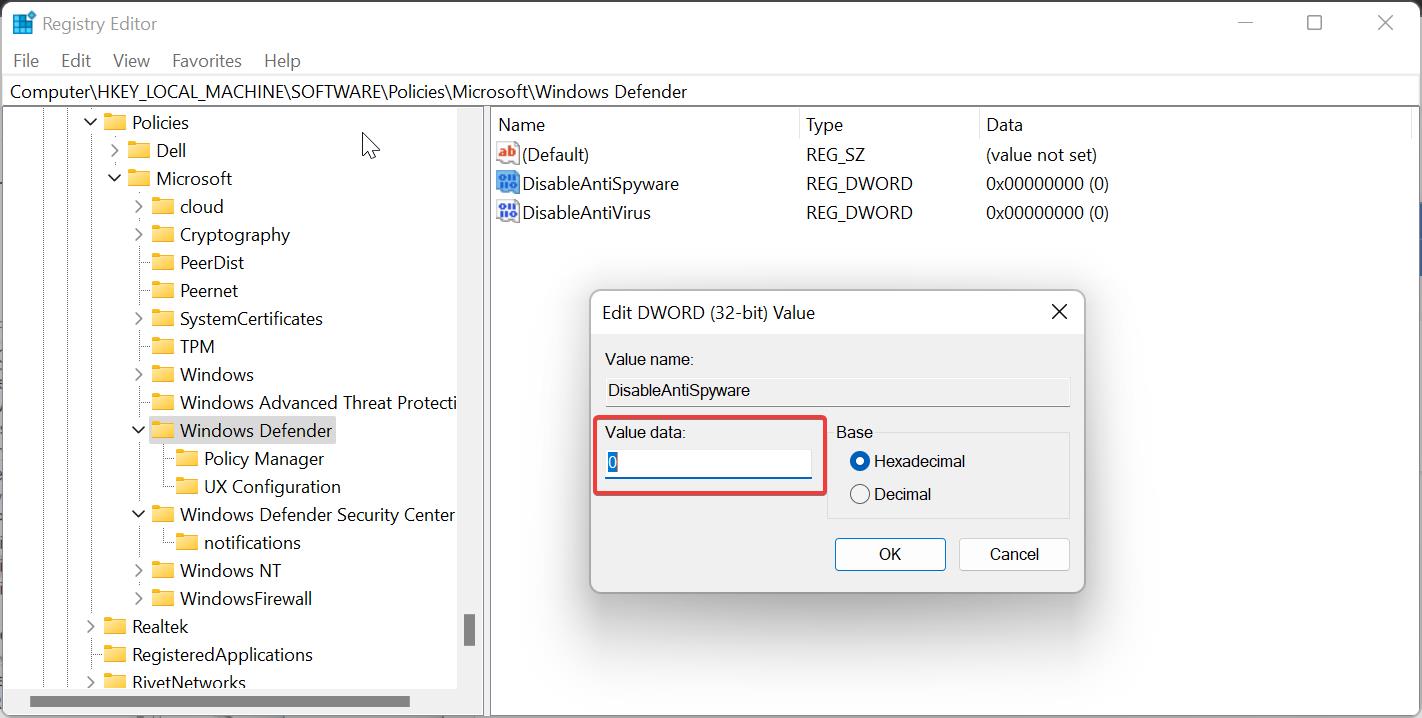
Click on OK and close the registry editor. Restart your computer once to apply the changes.
Now follow the Solution 1 steps to enable the Virus & threat protection.
Solution 3: Check the Defender Services are running:
Open run command by pressing Windows + R and type services.msc and hit enter, this command will open the Services Management console.
Now check the following services are running.
- Windows Defender Firewall
- Microsoft Defender Antivirus Network Inspection Service
- Microsoft Defender Antivirus Service
- Security Center
If any of these services are not running then, click on start the service. And restart all the services once, mostly this will fix the issue.
Solution 4: Check for Pending Windows updates:
Check if Windows is showing any notification for pending updates, if there are pending updates then restart the system to install the pending updates.
Follow the below-mentioned steps to check for updates.
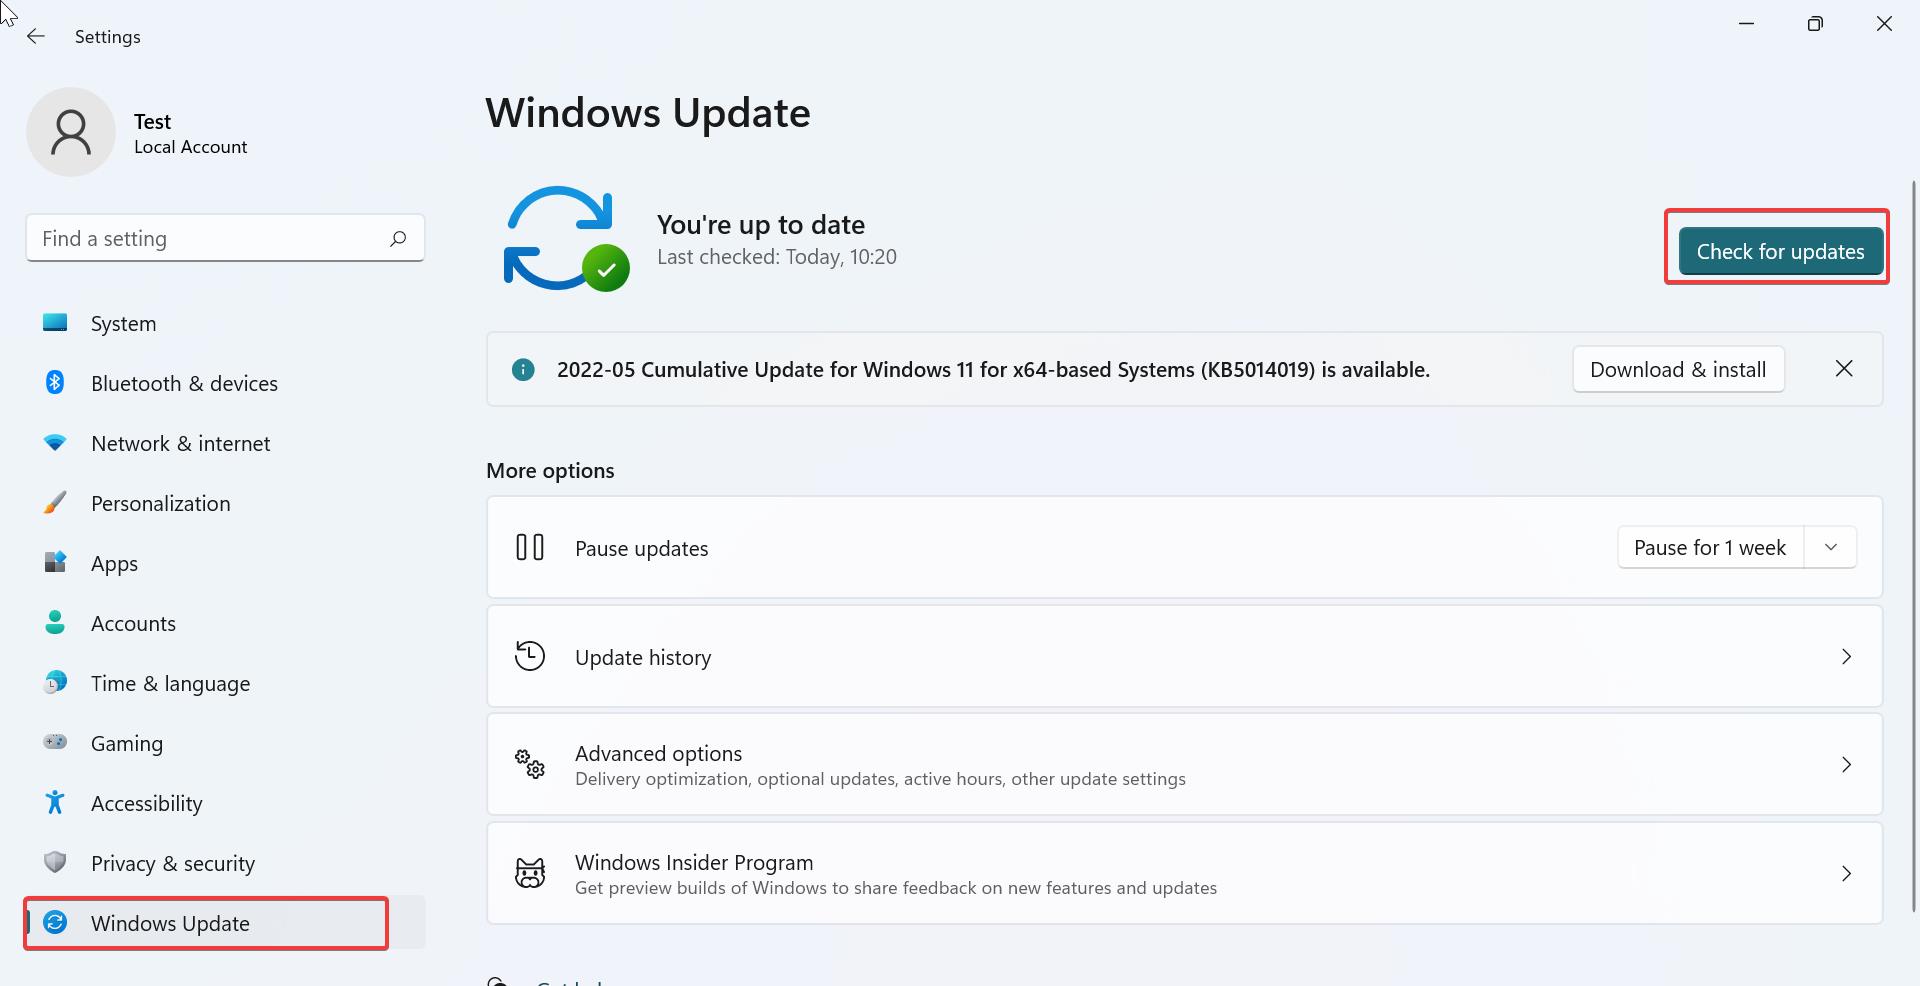
Open Windows Settings by pressing Windows + I and from the left-hand side click on Windows updates.
Click on Check for updates. Windows will automatically download and install suitable updates.
Once the windows updates are installed, restart the system once.
Read Also:
How to Disable Non-critical notifications from Windows Security?
How to scan individual Files and Folders using Microsoft Defender?
How to Permanently Disable Microsoft Defender in Windows 11?

