Windows PowerShell is a Command-line interface for task automation and configuration management, PowerShell was released in 2006 by Microsoft, It is the new shell of Microsoft which combines the old command prompt functionality with new scripting instructions set with built-in system administration functionality. PowerShell is a booming command-line scripting language, which is built on the .net framework, and it includes a command-line shell and scripting language. PowerShell is particularly designed for IT administrators to automate system tasks, such as batch processing, and to create system management tools for commonly implemented processes. In 2016 Microsoft open-sourced PowerShell and made it available on Linux and macOS.
In this article, we are going to see how to Change DNS Server Using PowerShell. Changing the DNS server is relatively easy, you can directly open network adapter properties and change the DNS server address. But if you are preparing a script to change the DNS server address then this article will help you.
Change DNS Server Using PowerShell:
Open PowerShell in elevated mode.
Then type the following command and hit enter.
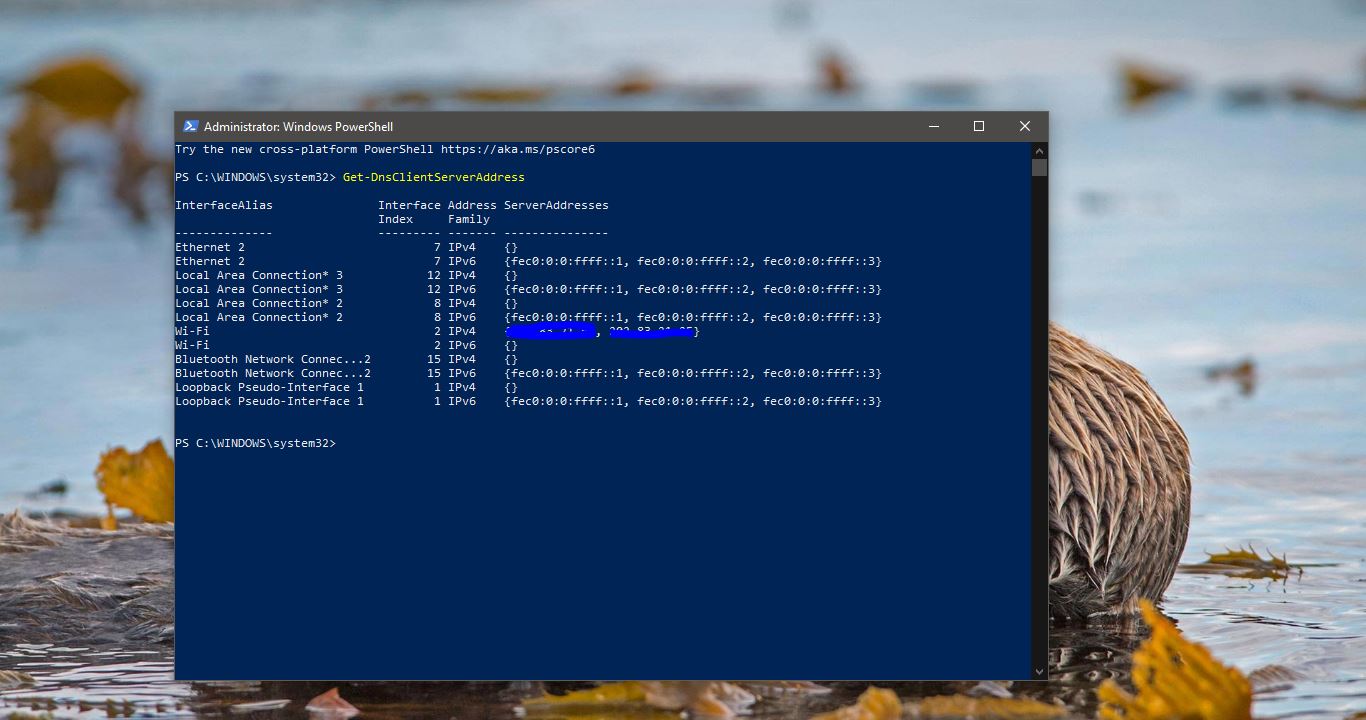
Get-DnsClientServerAddress

This command will list out the DNS server address for different connected InterfaceAlias or Network adapters. In above-mentioned screenshot I have connected to Wi-Fi, so you can notice the server addresses details on the same line.
To change the DNS server address, type the following command by changing the InterfaceALias, Preferred DNS address, Alternate DNS address. Use the below-mentioned format.
Set-DNSClientServerAddress "Wi-Fi" –ServerAddresses ("1.1.1.1"," 8.8.8.8")
To change the DNS server address you need to change three different parameters.
- InterfaceAlias,
- Preferred-DNS-address,
- Alternate-DNS-address.
Set-DNSClientServerAddress "InterfaceAlias" –ServerAddresses ("preferred-DNS-address", "alternate-DNS-address")
From this command, if you want to change the Ethernet DNS address, then change the InterfaceAlias name and the Preferred DNS address and alternate DNS server address and hit enter. This will change the DNS address then flush the DNS cache once.
Open Command Prompt and type ipconfig /flushdns.
This command will flush the DNS.
Read Also: