File or Folder Ownership in Windows refers to the user or group that has primary control over a particular file or folder and its contents. The Owner of a file or folder has full rights and permissions, including the ability to modify permissions, control access, and perform administrative tasks related to that folder. Whenever you create a folder in Windows, by default you’ll become the owner of that folder. The Owner has the highest level of control and can modify permissions, change the folder’s attributes and perform various operations on the files and subfolders within it. Windows automatically creates a folder and make TrustedInstaller as a default owner, these folders are created by Windows, and Administrators or users don’t have access to these folders. Changing folder ownership requires administrative privileges. Sometimes you may need full control ownership of System folders, in Windows, you can change the file or folder ownership using different methods. This article will guide you to Change Ownership of a file or folder using Command prompt or PowerShell.
Change Ownership of a file or folder:
You can use the following methods to Change the Ownership of a file or folder.
Method 1: Change Ownership of a file or folder using Properties
To get full folder or file permission first, right-click on the file or folder and choose Properties.
Under Folder Properties click on the Security tab to access the NTFS Permissions. Click on the Advanced option.

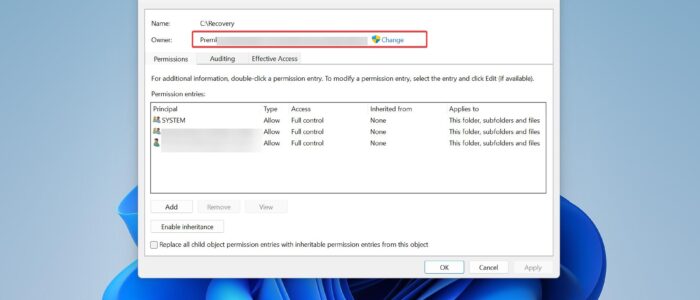
Under the Owner section, you can see the current Owner of the file or folder, click on the Change button.

Now you can see Select User or Group Window, click on the Advanced button.
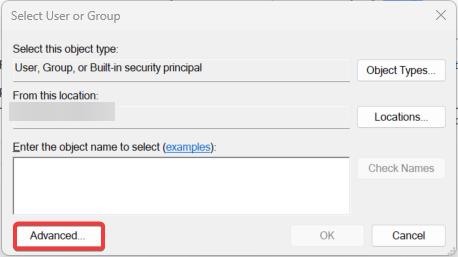
On the next window, click on the Find Now button, choose the users or groups, and then click on OK.

Make sure you have checked the “Replace all child object permission entries with inheritable permission entries from this object” option, this option allows you to take control of subfolders inside the main folder.
Finally, click on Apply and OK.
Method 2: Change ownership of a file or folder using Command Prompt
Open the Command Prompt in elevated mode, click on the start menu and search for the command prompt, right-click on the command prompt, and choose Run as administrator.
To Change the Ownership of a file, use the following command.
takeown /f "C:\path\to\file.txt"
This command will change the Ownership to the currently logged-in User, and make sure you have replaced the file path before executing the command.
To Change the Ownership of a folder, use the following command.
takeown /f "C:\path\to\folder" /r /d y

Replace “C:\path\to\folder” with the actual path of the folder you want to change ownership.
The /r flag is used to perform the operation recursively on all files and subfolders within the specified folder, and the /d y flag is used to answer “Yes” to any confirmation prompts.
This command will change the ownership of the folder and its subcontents to the currently logged-in user.
Method 3: Using PowerShell
Open PowerShell in elevated mode, click on the start menu and search for PowerShell, right-click on it, and choose Run as Administrator.
To change the Ownership of the file, use the following command.
$acl = Get-Acl -Path "C:\path\to\file.txt"
$acl.SetOwner([System.Security.Principal.NTAccount]::new("NewOwner"))
Set-Acl -Path "C:\path\to\file.ext" -AclObject $acl
Replace “C:\path\to\file.ext” with the actual path and filename of the file you want to change ownership, and “NewOwner” with the desired username or group name.
To change the ownership of a folder and its contents, use the following command:
$acl = Get-Acl -Path "C:\path\to\folder"
$acl.SetOwner([System.Security.Principal.NTAccount]::new("NewOwner"))
Set-Acl -Path "C:\path\to\folder" -AclObject $acl
Replace “C:\path\to\folder” with the actual path of the folder you want to change ownership.
After executing the command, the ownership of the file or folder will be changed to the specified user or group.
Read Also:
How to get full folder permission in Windows 11?
How to Find Folder Ownership on windows 10 using Command Prompt?
Reset File and Folder Permission to default in Windows 10