Whenever you start your Computer, the Login screen is the first thing you’ll see after the boot screen. The login screen allows you to choose your user account and sign in to your account securely using the Username and password. You can also use different sing-in options to log in to your user profile in Windows 10/11. There are different sign-in options available in Windows 10/11 like Picture password, Fingerprint, Windows hello PIN, facial recognition, and iris scan. Once you configure these sign-in options, you’ll get a stopping point at the login screen to enter your credentials or other types of security checks. But if you are using your own laptop or computer and don’t want to enter the password each time you log in, then you can enable the Auto-login feature. Auto-Login is a Windows feature that allows you to bypass the Login screen without giving a username and password. If you want to bypass the Login screen and directly log in to your user account then this article will guide you to Enable Auto-Login in Windows 11.
Enable Auto Login in Windows 11:
Note: Enabling the Auto Logon feature is a security risk, once you enable the auto-login feature, the computer will automatically sign in to your user account, anyone who can physically obtain access to the computer can gain access to your user account, data, and network information.
You can enable auto login in Windows 11 by using two different methods, the first two methods are for your personal laptop or computer (Non-domain systems), if you are using a domain-based system then you can use the registry editor method.
Before Proceeding Make sure you have configured username and password for your system and then configure Hello PIN for your Laptop/computer.
Configure Hello PIN in Windows 11:
Open Windows Setting by pressing Windows + I and from the left-hand side click on the Accounts and from the right-hand side click on Sign-in Options.
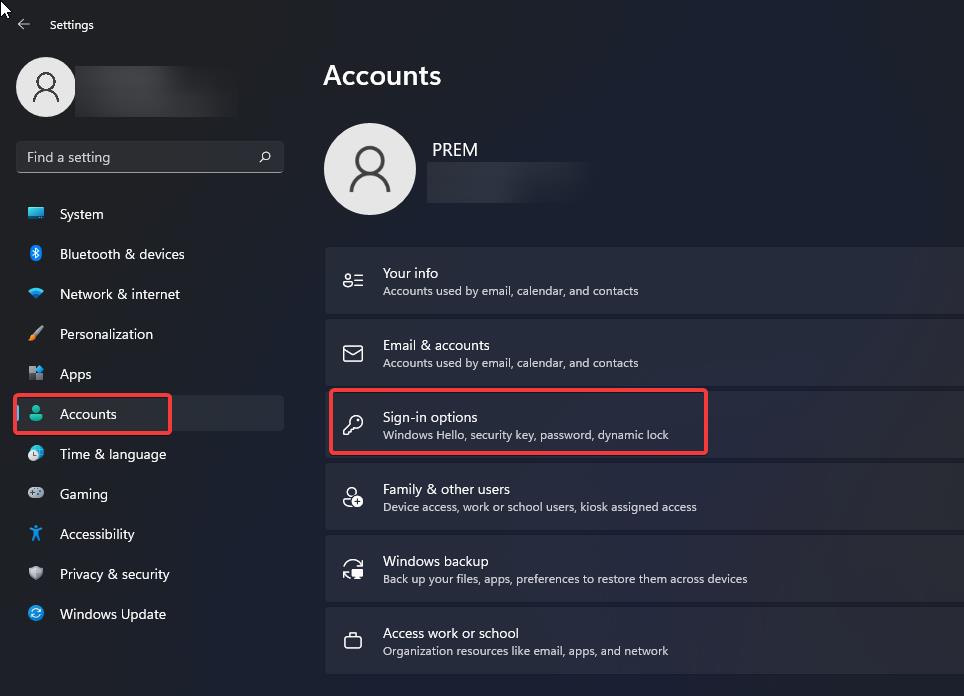
Under Sign-in Options click on PIN (Windows Hello) and then choose Set up. Next, Enter your Current Password and then Enter a new PIN.
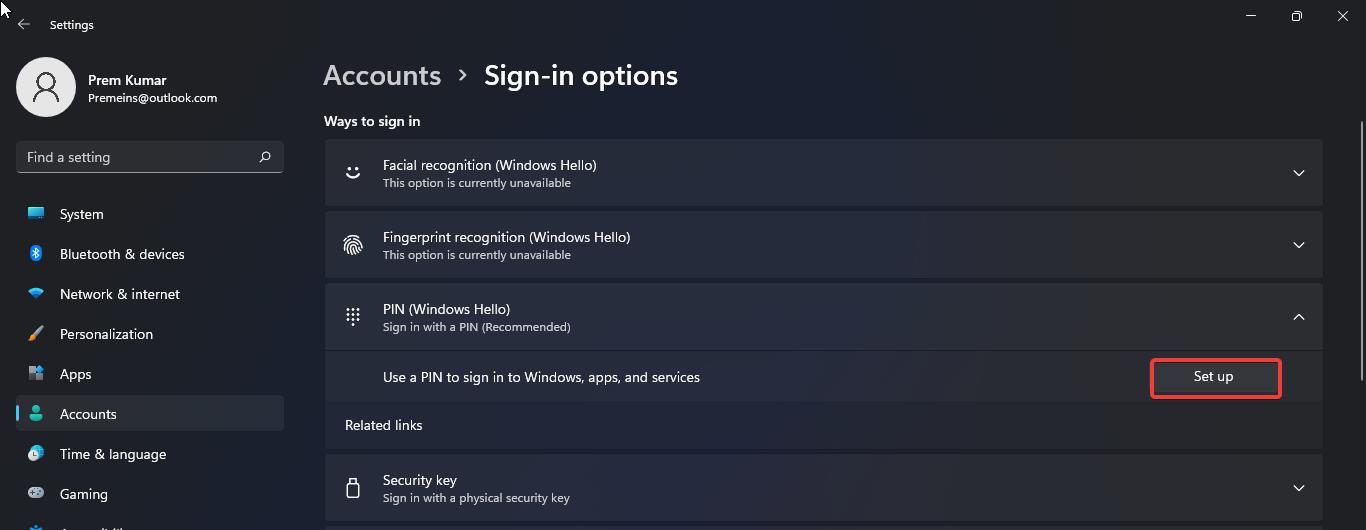
Once you configured Hello PIN restart your system once. And follow the below-mentioned steps.
Enable Auto login using Windows Settings:
Open Windows Settings by pressing Windows + I and Navigate to Accounts > Sign-in Options.
Under Sign-in options Additional Settings, turn off the toggle button of For improved security, only allow Windows Hello Sign-in for Microsoft accounts on this device.
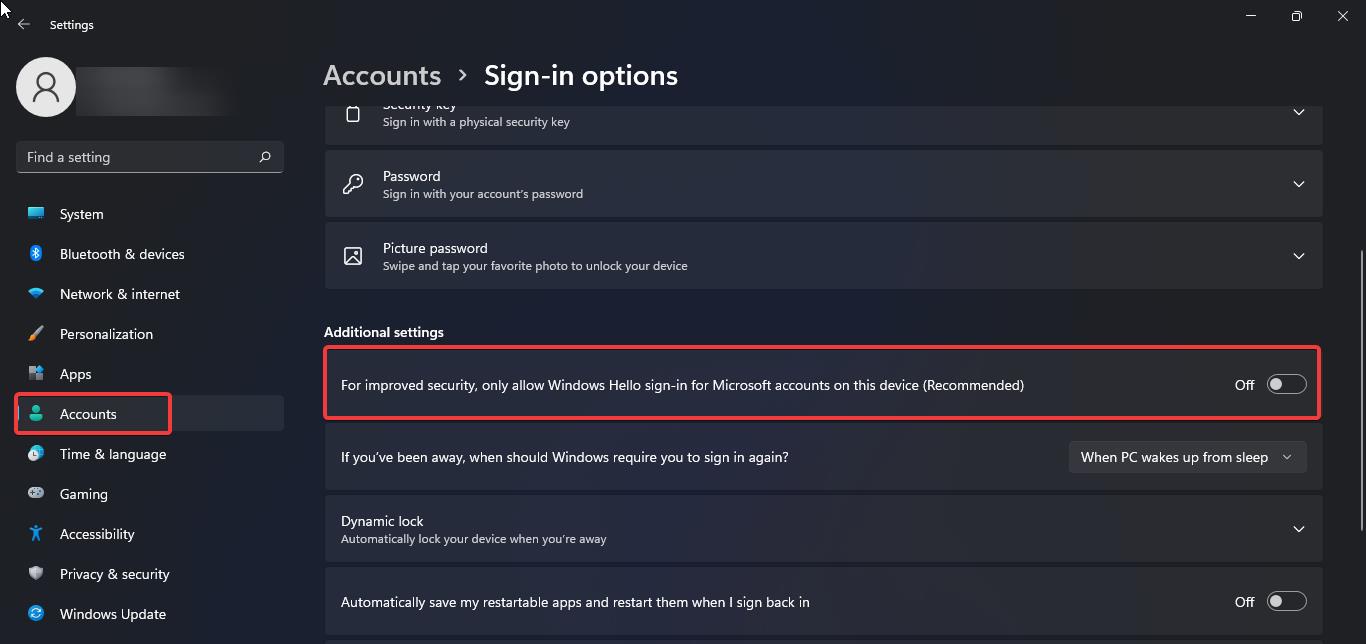
Now Open the Run command by pressing Windows + R and type netplwiz and hit enter, this command will open the User Accounts.
Under User Accounts click on the Users Tab and Uncheck the Users must enter a username and password to use this computer.
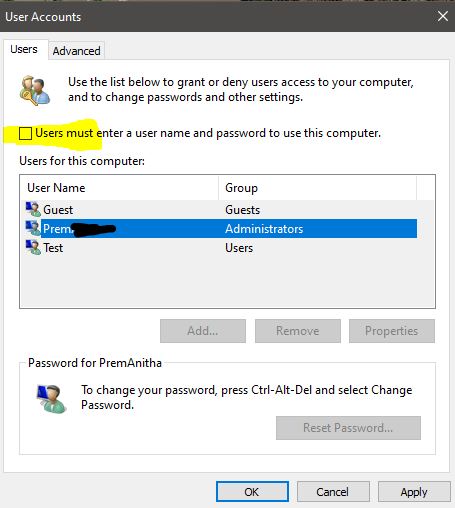
Click on Apply and give OK. Restart your computer once and check. It should directly login without requesting a password.
Using Group Policy Editor:
Open Run command by pressing Windows + R and type gpedit.msc, this command will open Group Policy Editor.
Now Navigate to the following path.
Computer Configuration > Administrative Templates > System> Logon
From the Left-hand side click on Logon and from the right-hand side look for “Don not display the Getting Started welcome screen at logon”. Double click on that policy on check Enabled.
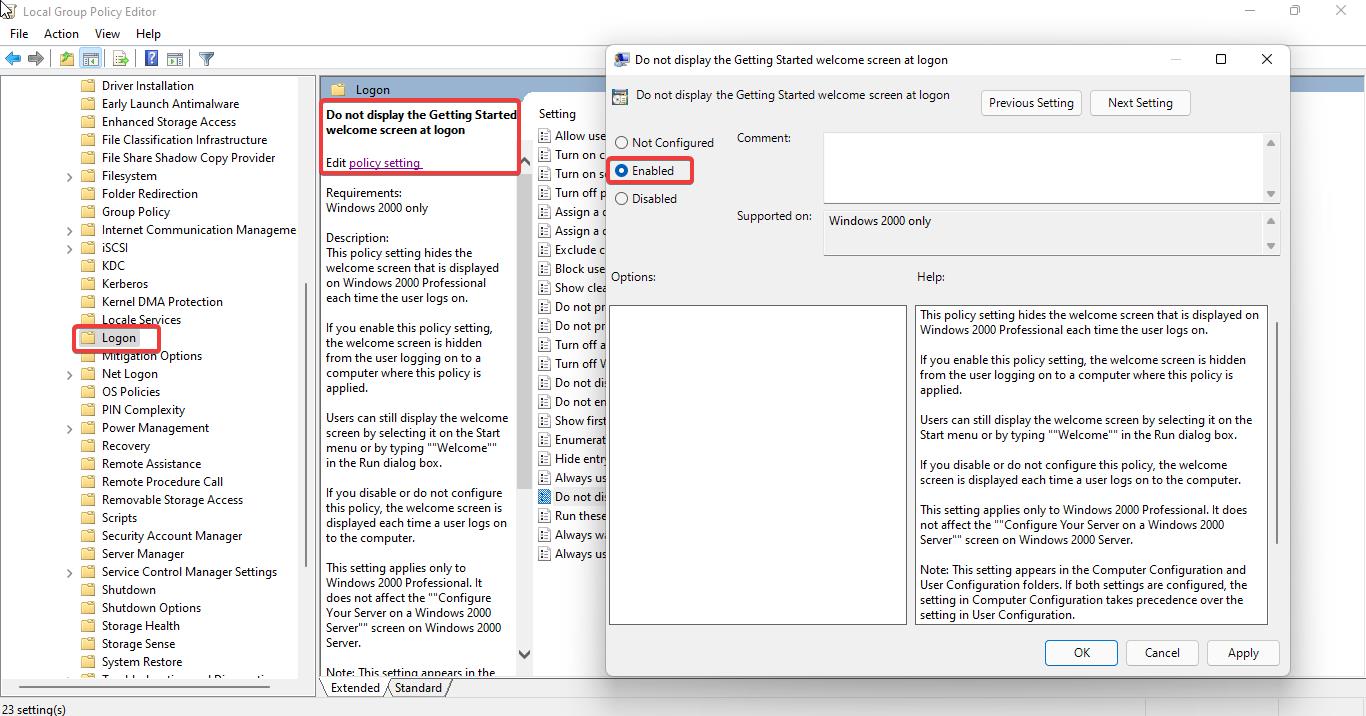
Click on Apply and give OK, Restart the system once and check.
Using Registry Editor:
If you are using the domain-based system, then you can use this registry editor method to enable auto sign-in.
Note: Modifying the Registry is risky, and it causes irreversible damage to your OS Installation Follow the steps correctly. Friendly advice Before Modifying Registry Creating Restore Point is recommended.
Open run command by pressing Windows + R and type regedit and hit enter, this command will open the Registry Editor console.
Now navigate to the following registry path.
HKEY_LOCAL_MACHINE\SOFTWARE\Microsoft\Windows NT\CurrentVersion\Winlogon
From the left-hand side click on the Winlogon and from the right-hand side look for the following String Values and modify the value data accordingly.
DefaultUserName – Enter your User Name
DefaultPassword – Enter your Password
AutoAdminLogon – 1
DefaultDomainName – Domain Name
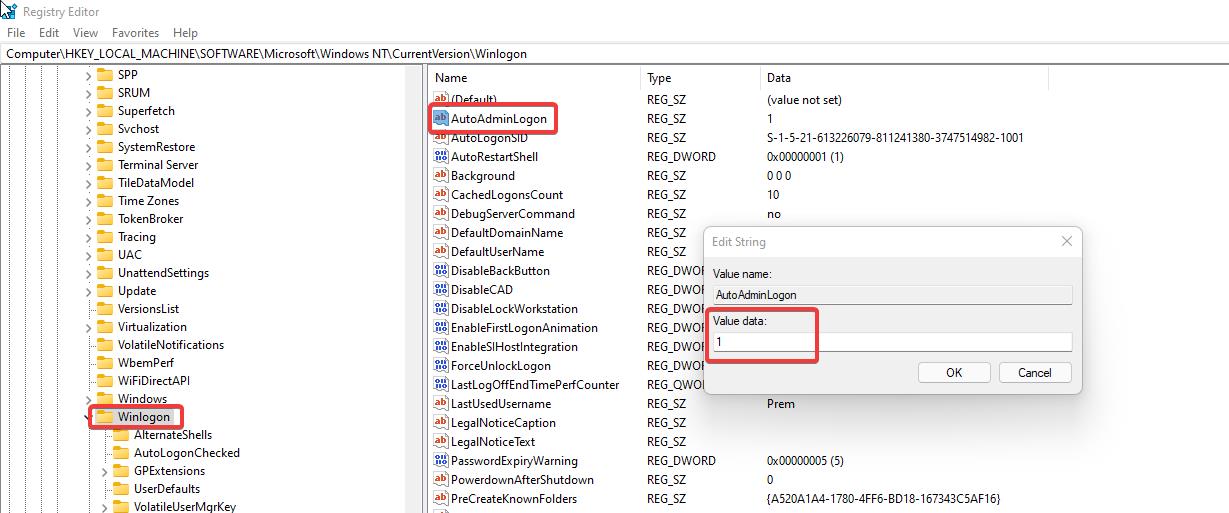
Once you Modified the above-mentioned string values, close the Registry Editor and restart the system once.
To Revert it Back:
Open Run command by pressing Windows + R and type netplwiz and hit enter, this command will open the User Accounts.
Under User Accounts click on the Users Tab and Check the Users must enter a username and password to use this computer.
Click on Apply and give OK.
Read Also:
Fix Windows Hello Not Working in Windows 10
How to Set Default Sign-in Option in Windows 11?


