Windows Registry is the heart and soul of the Microsoft Windows Operating system, Windows registry Editor available in every version of Windows since Windows 95. It is a database that stores a wide variety of configuration settings for the Windows Operating system and for applications. System administrators use Registry editor to modify the wide variety of system and application settings. But to modify the registry values you need sufficient permission; without permission, you can’t edit or delete a registry key. By default, the Windows operating system takes full ownership of registry keys to protect the integrity of the device. And you should not modify any individual keys without any prior knowledge of the registry key and its purpose. In this article, we’ll see how to take full ownership and to give full permission to a registry key in Windows 10/11.
Give full permission to a Registry key in Windows 10/11:
To give permission to a registry key, first, you need to change the ownership and take full permission on your name. Follow the below-mentioned steps to Change the Ownership of a registry key.
Note: Modifying the Registry is risky, and it causes irreversible damage to your OS Installation Follow the steps correctly. Friendly advice Before Modifying Registry Creating Restore Point is recommended.
Change Ownership of a Registry key:
Open the Run command by pressing Windows + R and type Regedit and hit enter, this command will open the Registry Editor console.
Now navigate to the registry key for which you want to change the ownership.
Right-click on the Registry key and choose Permissions.

Under Permissions click on Advanced.

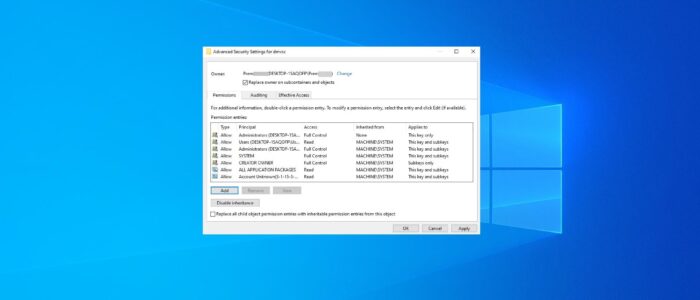
Under Advanced Security Settings, click on Change beside the Owner Option.

Next, under Select User or Group, click on Advanced.

Next, click on the Find Now option and choose your User ID or groups. And click on OK.

Once you choose the user name click on OK.

Next under the Advanced Security Settings, check Replace owner on subcontainers and objects.

Then click on Apply and OK.
Give Full Permission to a Registry key:
Once you change the ownership of the Registry key, Now you can take full permission of the key.
Under Advanced Security Settings, click on Add.

Next, under Permission Entry click on Select a principal.

Next, under Select User or Group, click on Advanced.

Next, click on Find Now option and choose your User ID or groups. And click on OK.

Once you choose the user name click on OK.

Then click on Apply and OK.
That’s it, now you have taken full ownership of the registry key.
Read Also: Reset File and Folder Permission to default in Windows 10