Indexing is the process of collecting the information of the files, email messages, and other content on your PC and cataloging it in order. Indexing helps computers to search faster, when you search any file on your PC, windows search will look into the search and get the results faster. By default, Indexing will collect all the information about files on your PC, like file names, file path, their contents, and the Metadata. Indexing also collects information about the application that you installed on your PC. Windows 10 constantly tracking changes to files and updating the index with the latest information. It automatically opens recently changed files, looks for the changes, and stores the new information in the index. All the data gathered from the indexing is stored locally on your PC. When you run the indexing for the first time it will take a couple of hours to complete. Then indexing will be in a monitoring state, it will run in the background on your PC. If there is any change on files indexing will keep track. If there is any issue with the Windows search, like search results are missing, incorrect information then re-indexing will fix the issue. Sometimes re-indexing will run automatically, if it didn’t update correctly, then you can manually rebuild the Search Index. This article will guide you to Rebuild Search Index Using Batch File
Rebuild Search Index Using Batch File:
In windows 10 you can manually rebuild the search index in two different methods. In the first method, we are going to use Control Panel to Rebuild the search index, and in the second method, we can create a simple batch file to rebuild the search index. Let’s see the methods in detail.
Using Control Panel:
Open Run command by Pressing Windows + R and type Control and hit enter. This command will open the Control Panel.
From the top right corner, set the view by option to Large icons. Then look for the Indexing Options and Click on it.
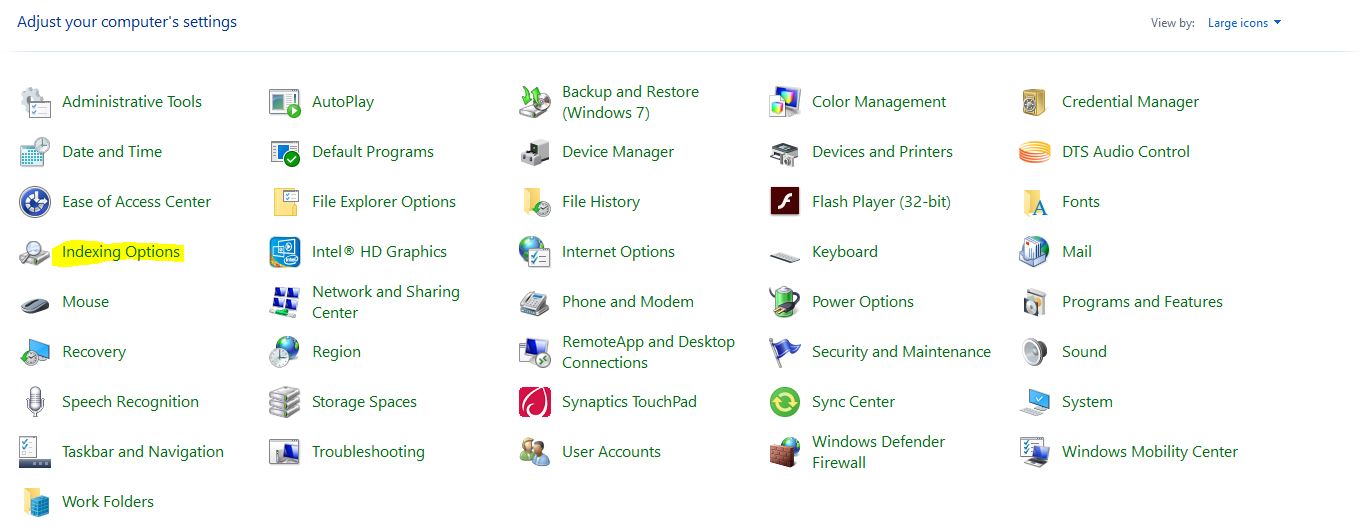
Next under Indexing Options click on Advanced, now you will get Advanced options window.
Click on the Index settings tab and under troubleshooting, click on Rebuild.
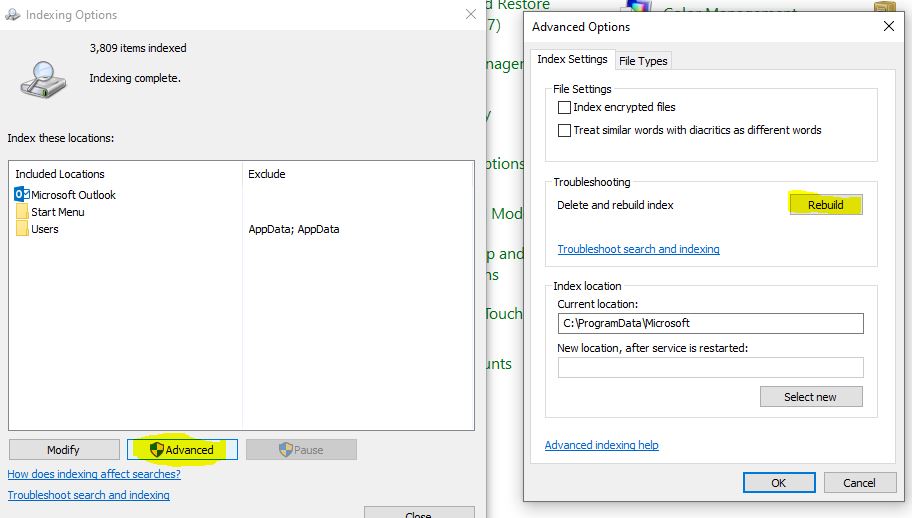
This will rebuild the search index, it will take some time depends on your computer speed and the number of files on your system.
Using Batch File:
Open Run command by Pressing Windows + R and type Notepad and hit enter. This will open the Notepad.
Now Copy-Paste the below mentioned Code into the text editor.
@echo off
net stop wsearch
del "%ProgramData%\Microsoft\Search\Data\Applications\Windows\Windows.edb"
:wsearch
net start wsearch
IF NOT %ERRORLEVEL%==0 (goto :wsearch) ELSE goto :END
:END
OR
@echo off
net stop wsearch
REG ADD "HKLM\SOFTWARE\Microsoft\Windows Search" /v SetupCompletedSuccessfully /t REG_DWORD /d 0 /f
del "%ProgramData%\Microsoft\Search\Data\Applications\Windows\Windows.edb"
:wsearch
net start wsearch
IF NOT %ERRORLEVEL%==0 (goto :wsearch) ELSE goto :END
:END
Now save the file to the Desktop with the .bat extension. Save it as Rebuild.bat and click on OK.
Now right click on the batch file and select Run as administrator from the context menu.
It will rebuild the search index in the background.
Read Also:
How to fix SearchIndexer high disk usage in Windows 11/10?



Thank you. It work GREAT .
Ralph