To install Windows 11 on your system, your system has to meet the minimum hardware requirements, like specific processor, amount of memory, and storage capacity. These requirements are necessary for the operating system to function properly and for a good user experience. This rules out millions of existing Windows 10 devices from upgrading to Windows 11 with full support. But still, you can install Windows 11 on unsupported devices. But you’ll get the warning message before, during, and after the Windows 11 installation. This clearly indicates Microsoft doesn’t provide support if you install Windows 11 in an unsupported system. In recent preview builds you’ll get a “System requirements not met” watermark at the bottom right corner. And you can see the same warning message on the settings update page also. Microsoft not going to block the Windows 11 update for unsupported devices because Microsoft believes that users should have the choice to install and use the operating system at their own risk. However, they warned unsupported devices may not receive feature updates, security updates, and support. Also, Microsoft encourages users to upgrade to a compatible device for a better experience. If you are annoyed because of this watermark and want to remove it, then this article will guide you to remove System requirements not met watermark in Windows 11
Remove System requirements not met watermark in Windows 11:
If you installed Windows 11 on any unsupported device then you may notice the watermark titled “Managing Windows 11 “System requirements not met” message in your organization”. Microsoft’s document confirmed that you can remove this watermark on Windows 11 Pro and Enterprise Edition by using the following methods.
Method 1: Using Group Policy Editor
Open Run command by pressing Windows + R and type gpedit.msc and hit enter, this command will open the Group Policy Editor.
Now navigate to the following path
Go to Local Computer Policy > Computer Configuration > Administrative Templates > System.
From the left-hand side click on the System policy folder and from the right-hand side look for the policy named “Hide messages when Windows system requirements are not met”.
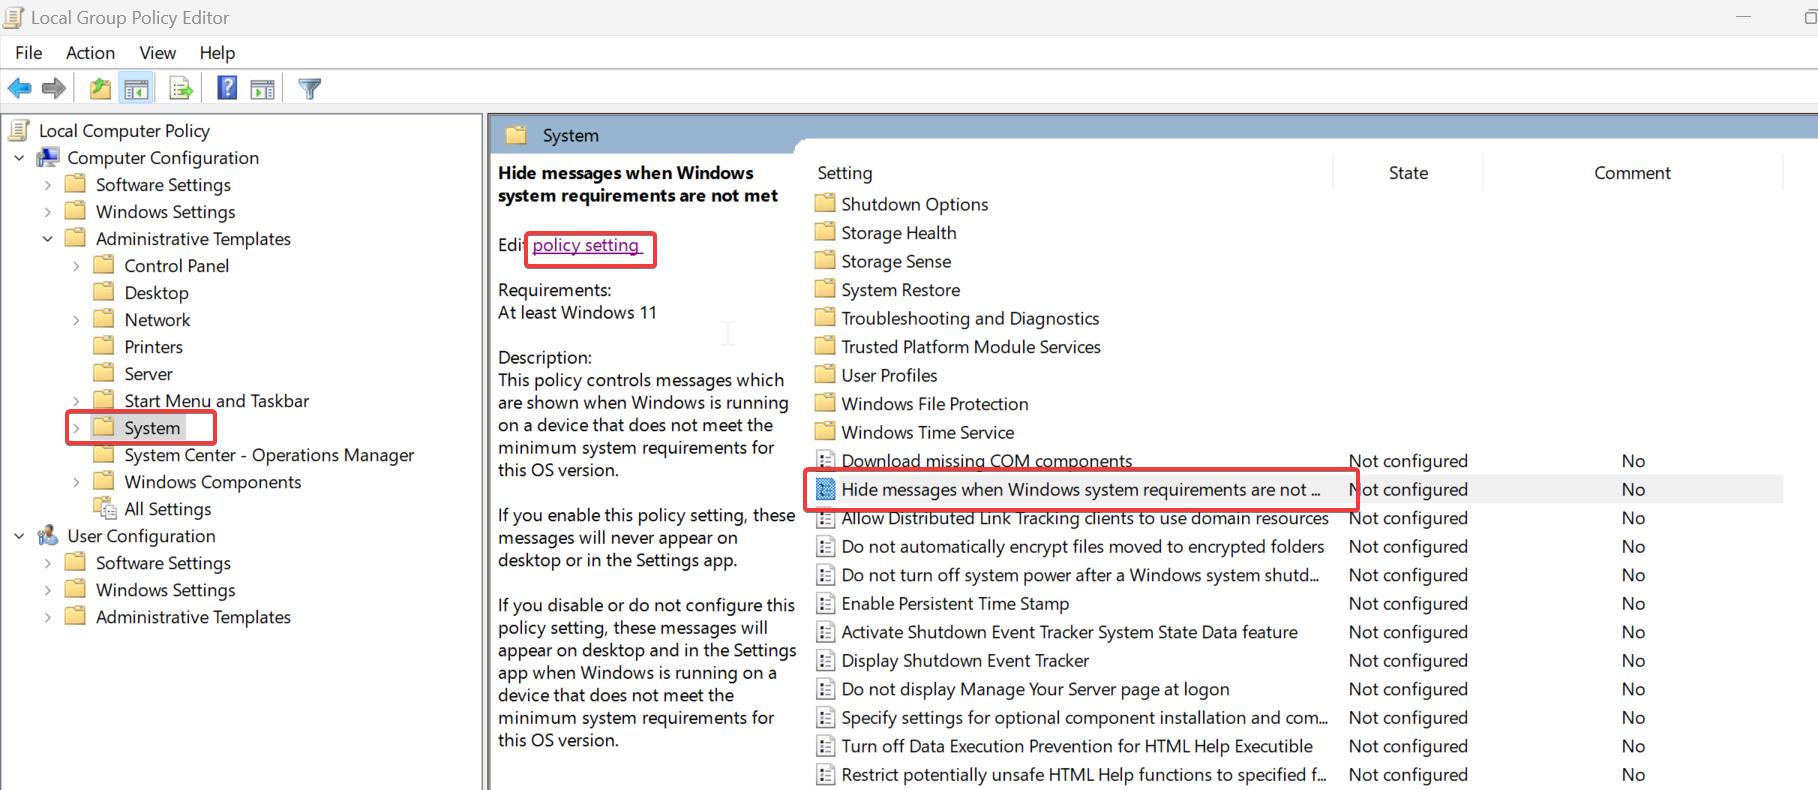
Double-click on the policy and open the Policy Settings.
Choose Enabled and click on Apply and OK.
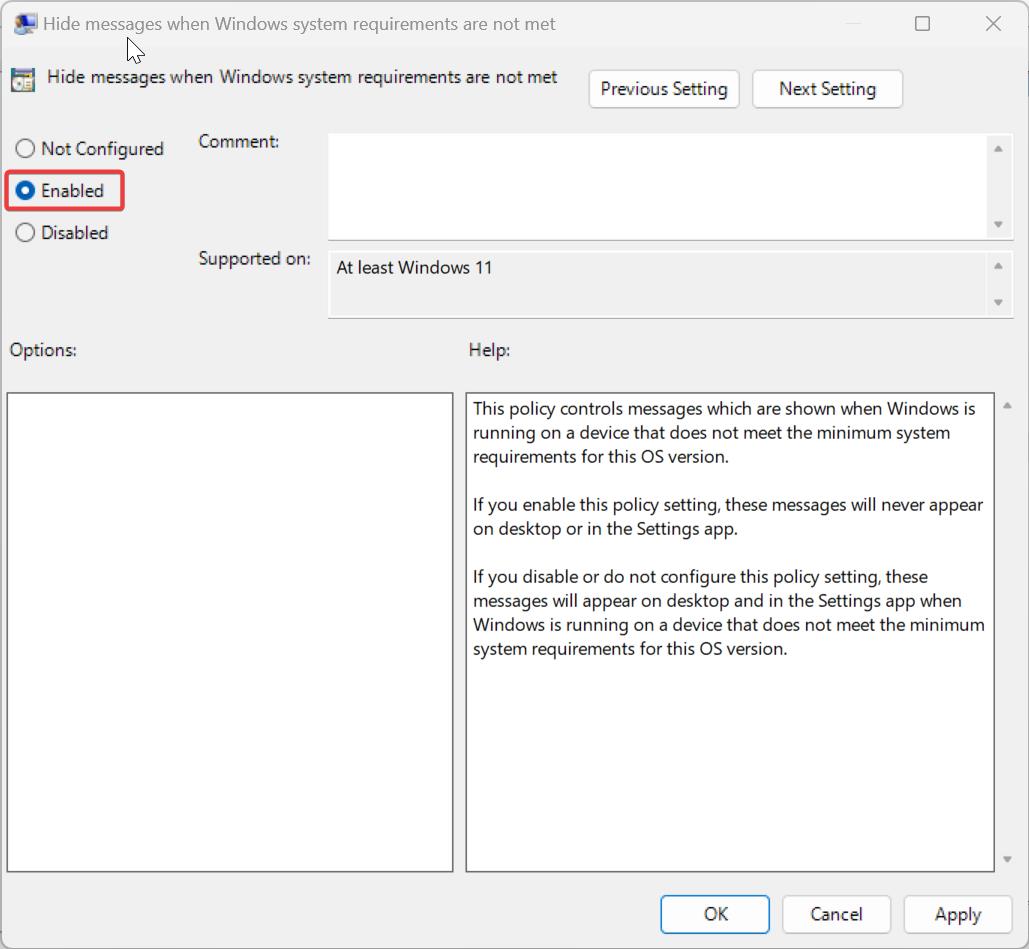
If you enable this policy setting, these messages will never appear on the desktop or in the settings app.
Method 2: Using Registry Editor
Note: Modifying the Registry is risky, and it causes irreversible damage to your OS Installation Follow the steps correctly. Friendly advice Before Modifying Registry Creating Restore Point is recommended.
Open the Run command by pressing Windows + R and type Regedit and hit enter, This command will open the Registry Editor Console.
Now navigate to the following registry path
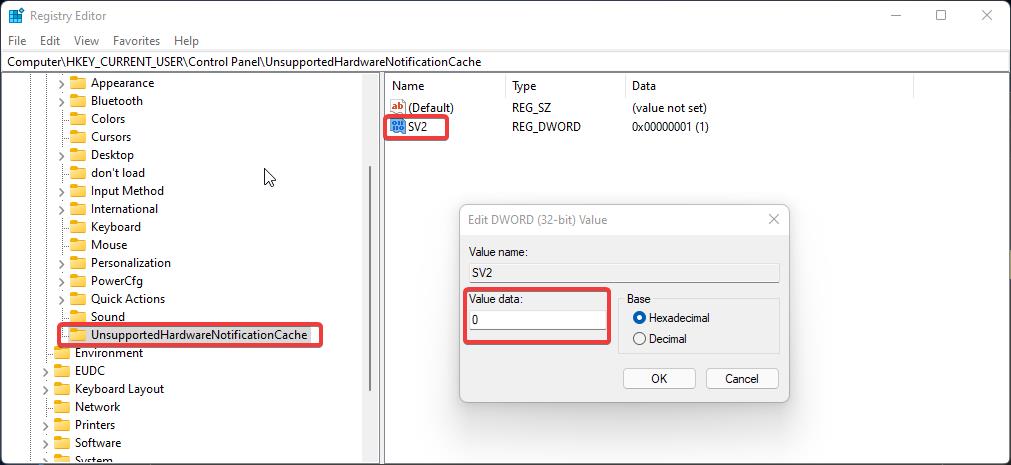
HKEY_CURRENT_USER\Control Panel\UnsupportedHardwareNotificationCache
From the left-hand side click on the UnsupportedHardwareNotificationCache Registry key and from the right-hand side look for the DWORD named SV2.
Double-click on the SV2 DWORD and change the value from 1 to 0, Click on OK.
Restart your system once to make the changes effective.
Note: After the system restarts, the Watermark in the bottom-right corner will be no longer visible.
Read Also:
Remove Activate Windows Watermark on Windows 10
How to Check Activation Status using cmd in Windows 11?
Fix Windows Script Host Error 0xC004F025, Access denied
How to Hide ‘System Requirements not met’ watermark in Windows 11?


