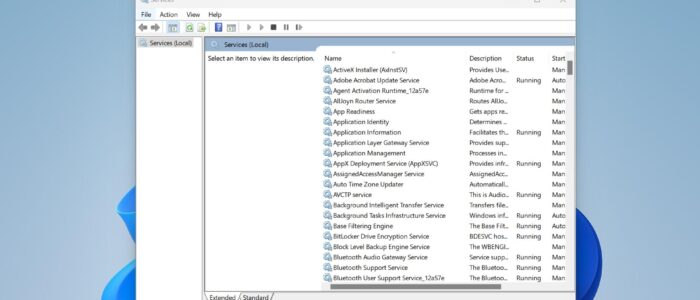
Windows services play a vital role for any working Windows feature to run without user intervention. These services are known as background services and many Windows features, software, and applications depend on these background services. Disabling this service will result in breaking their respective feature or software. Sometimes you may find Background services running in Windows and consume System resources. Background services in Windows refer to programs or processes that run in the background without user interaction. These services automatically start even after the system Restart, and for some services, you can’t find the stop option to kill that service. In case any service consumes a lot of system resources, and if you confirm that service is not a critical service, then you can delete that Windows service, this article will guide you to remove Windows Service in Windows 11.
Remove Windows Service in Windows 11:
You can remove Windows Service in Windows 11 using three different methods, follow the below-mentioned methods to remove the Windows service safely.
Method 1: Using Command Prompt
Open Command Prompt in elevated mode, click on the start menu, search for Command Prompt, right-click on it, and choose Run as administrator.
Run the following command to list out all services.
sc queryex type=service state=allNext, execute the following command.
Sc delete <service-name>
This command will delete the specific service and it’s removed the service from your system.
Method 2: Using Windows Terminal
Launch Windows Terminal in elevated mode and choose PowerShell.
Type the following command to list out all Windows Services.
Get-ServiceTo Delete a specific Windows Service, type the following command.
Remove-Service -name "<Service name>"This command will delete the specific Windows Service.
Method 3: Using Registry Editor
Open Run command by pressing Windows + R and type regedit and hit enter, this command will open the Registry Editor console.
Now navigate to the following Registry path.
HKEY_LOCAL_MACHINE\SYSTEM\CurrentControlSet\ServicesFrom the left-hand side, expand the Services registry key, under the Services registry key you can find all the Windows Services registry keys.
Each Registry key sub-key corresponds to a service. You can identify the registry key for a service using DisplayName value.
Once you confirm the Service name with the Help of DisplayName value from the right pane, right-click on the Registry key and choose Delete, click Yes for the Confirmation.

Once done, close the Registry Editor and restart the system once. That’s it you have successfully removed the Windows Service.
Read Also:
How to Delete a Windows Services using Registry or command-line?
Add windows Services to control panel in Windows 10
How to Start-Stop windows services using CMD?