Windows 11 taskbar by default comes with the Start menu, Task view, Widgets, Chat, File explorer, Microsoft Edge, and Microsoft store pinned on it. However, you can add or remove any items to the Taskbar, Windows 11 allows you to pin files, folders, drivers, and even websites to the Taskbar. You can more apps including the default pinned items, you can customize the pinned items on the Taskbar. Mostly we’ll pin only the frequently used programs or apps to the Taskbar so that we can access the pinned items easily. But if you are switching your laptop or computer all your taskbar items will be missing and you need to configure it from the beginning. In this article, we’ll see how to Backup and Restore Taskbar Pinned items on Windows 11. Using this method, you can easily backup all your Taskbar pinned items, and then later after installing all your required apps or programs on your new laptop, then you can restore the pinned items back to the new laptop.
Backup and restore Taskbar Pinned items on Windows 11:
Before restoring Taskbar pinned items, make sure the new laptop is configured and all the required apps are installed. First, we need to take a backup of the Taskbar Pinned item, in Windows all the taskbar pinned items are in a specific folder.
Open the Run command by pressing Windows + R and copy-paste the following path in the text box.
%AppData%\Microsoft\Internet Explorer\Quick Launch\User Pinned\TaskBarOnce you open the TaskBar folder you can see the list of Pinned items, Copy all shortcuts to any external drive like a USB. We recommend you to copy all the Shortcut items to OneDrive.
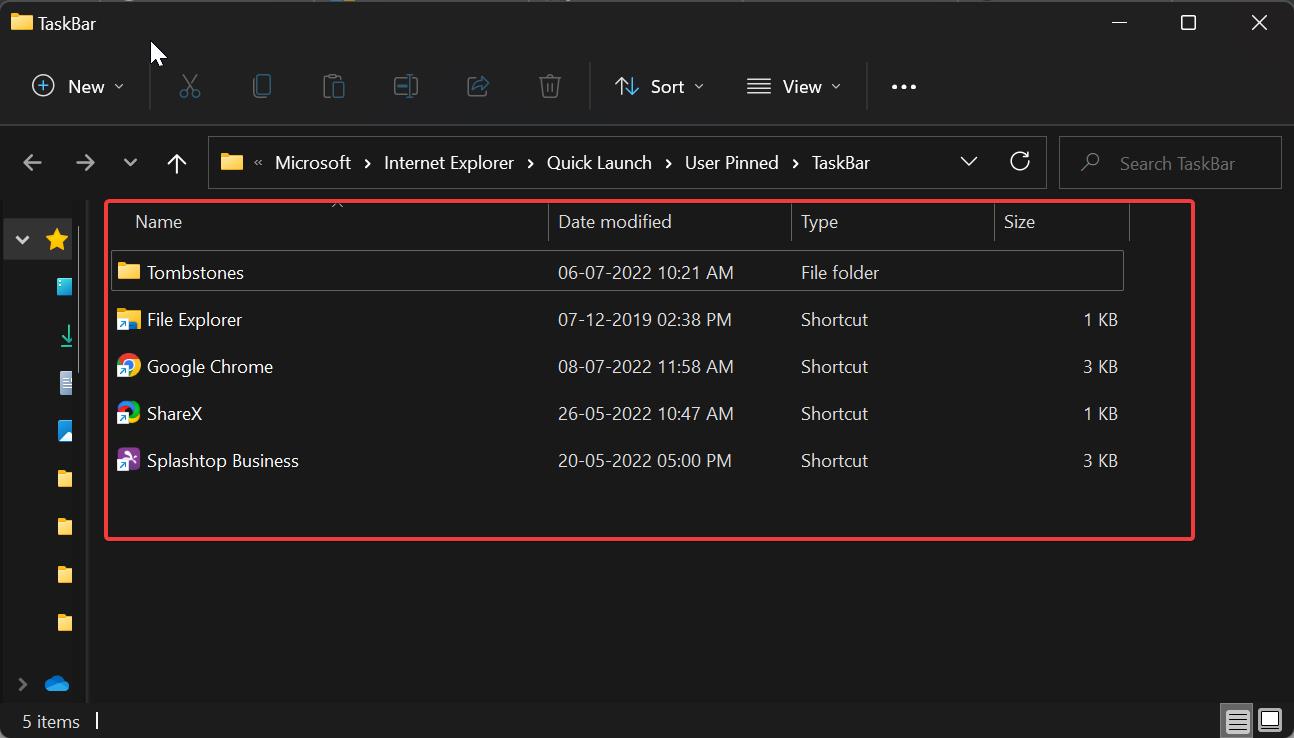
Next, we need to create a backup of the Taskbar in the Registry editor console, Open the Run command by pressing Windows + R and type regedit and hit enter, this command will open the Registry editor console.
Now navigate to the following registry path.
HKEY_CURRENT_USER > Software > Microsoft > Windows > CurrentVersion > Explorer > TaskbandNext, right-click on the Taskband Registry key and choose Export. Save the exported key to an external drive or OneDrive.
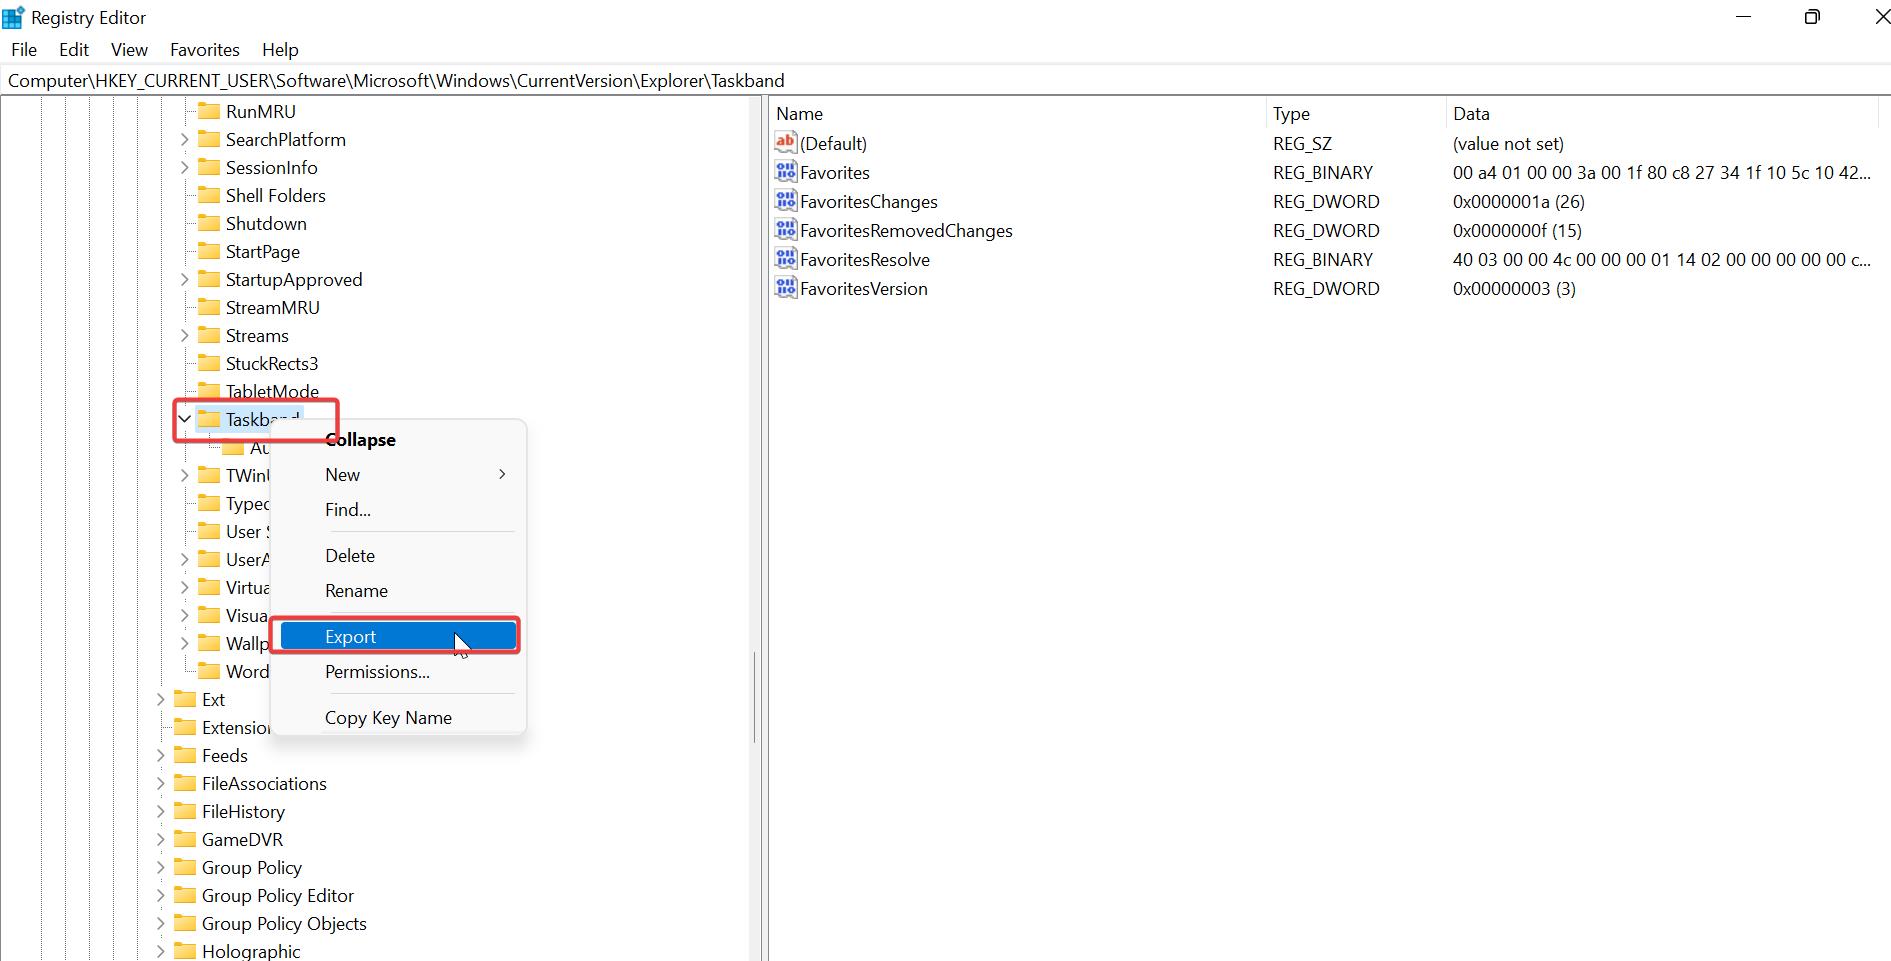
Now we have copied all taskbar pinned items shortcuts, as well as Taskband, exported key.
Restore Taskbar Pinned items:
Restoring taskbar pinned items is pretty easy, login into your new laptop/computer, then you need to copy the taskbar pinned items shortcuts and Taskband exported key from the external dive or OneDrive.
Open Run command and copy paste the following path.
%AppData%\Microsoft\Internet Explorer\Quick Launch\User Pinned\TaskBarOnce you open the Taskbar folder, then go to the location where you saved the backed-up Taskbar pinned items shortcuts. Copy all the shortcuts and paste them into the Taskbar folder.
Next, we need to merge the backed-up Taskband registry key, Go to the location where you saved the Taskband registry file, double-click on the registry file and then click on Yes on the UAC prompt. Then you’ll get the confirmation pop-up window, click on Yes to continue with the merge.
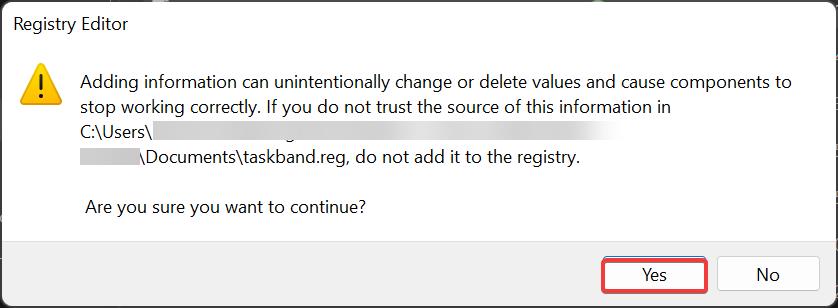
Once the merge completes successfully, just restart your system once, when the PC boots up, you can see all the Taskbar items on the Taskbar where they belong.
Read Also:
How to Enable Taskbar on dual monitors in Windows 11?
How to Backup Windows 11 OS to External Drive?
How to Move the Taskbar to Right in Windows 11?

