OneDrive is Microsoft Cloud-based Storage service, It is available for free to all Microsoft Account holders. OneDrive allows users to store, sync, and share files. There are two types OneDrive available, one is for normal users (OneDrive) and the other one is enterprise edition (OneDrive for Business). For Microsoft account users OneDrive gives 5GB of free storage space. For Office365 Subscription users have 1TB of OneDrive storage space. OneDrive is available for iOS, Android, macOS, Xbox, and all versions of Windows 10/11. OneDrive is pre-installed by default in Windows 11 devices, also you can download and install OneDrive manually from its official site. In Windows you can sync files and folders between your computer and the cloud, so you can access your files from anywhere. If you want you can disable OneDrive, this article will guide you to Disable OneDrive in Windows 11.
Disable OneDrive in Windows 11:
To disable OneDrive, you must sign in as an administrator, in Windows you can disable OneDrive by using two different methods.
Note: Disabling OneDrive in Windows 11 won’t remove the OneDrive folder, so whatever the data inside the OneDrive folder remains the same, you can find all your offline data in OneDrive path C:\Users\<username>\OneDrive.
Disabling OneDrive will remove the OneDrive folder from the File Explorer Navigation pane, but you can access the Online Version of OneDrive using a Web Browser.
Before proceeding first make sure all the files are synced and take a backup, and it’s recommended to turn off OneDrive backup for any folders before disabling OneDrive.
Method 1: Disable OneDrive Using Local Group Policy Editor:
Open Run command by pressing Windows + R and type gpedit.msc and hit enter, this command will open the Group Policy Editor.
Navigate to the following path.
Computer Configuration/Administrative Templates/Windows Components/OneDriveFrom the left-hand side click on OneDrive and from the right-hand side look for the policy “Prevent the usage of OneDrive for file Storage”.
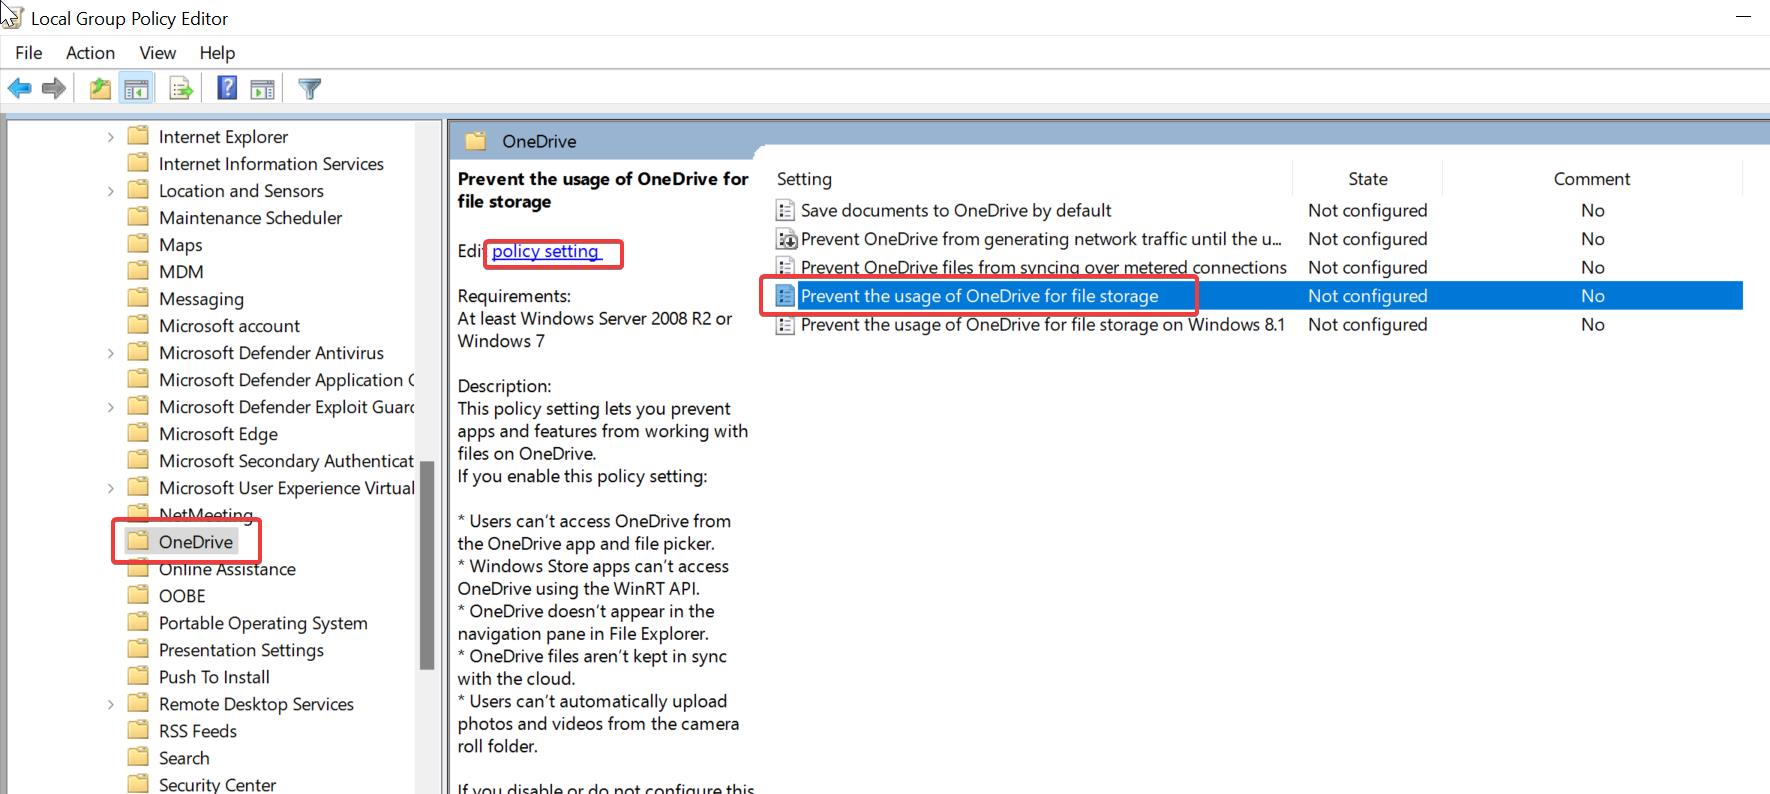
Double-click on the Policy “Prevent the usage of OneDrive for file Storage” and open the Policy Settings.
Choose Enabled and Click on Apply and OK.
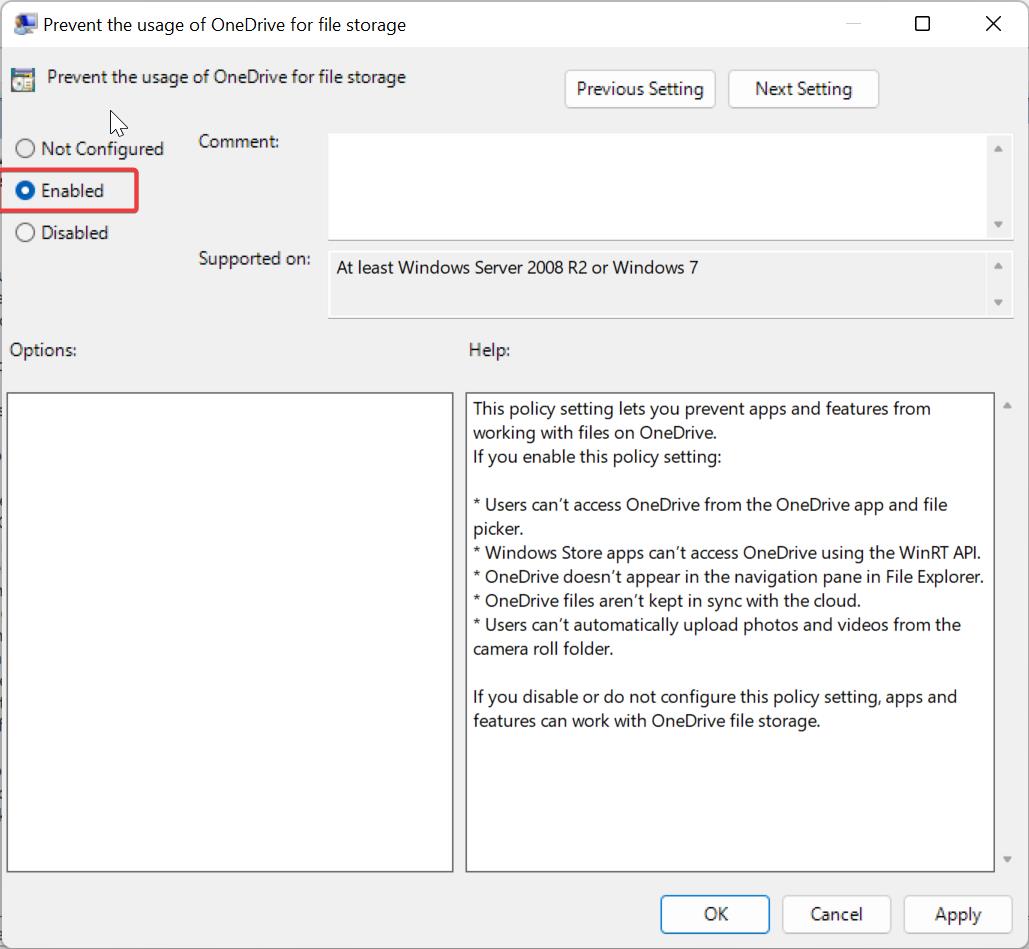
This will disable OneDrive for all users, open the command prompt and type gpupdate /force, after the policy update, restart the system once.
Method 2: Using Registry Editor:
Open Run command by pressing Windows + R and type regedit and hit enter, this command will open the Registry Editor console.
Now navigate to the following path,
Computer\HKEY_LOCAL_MACHINE\SOFTWARE\Policies\Microsoft\WindowsRight click on Windows Registry key and choose New > Key and name the Key as OneDrive.
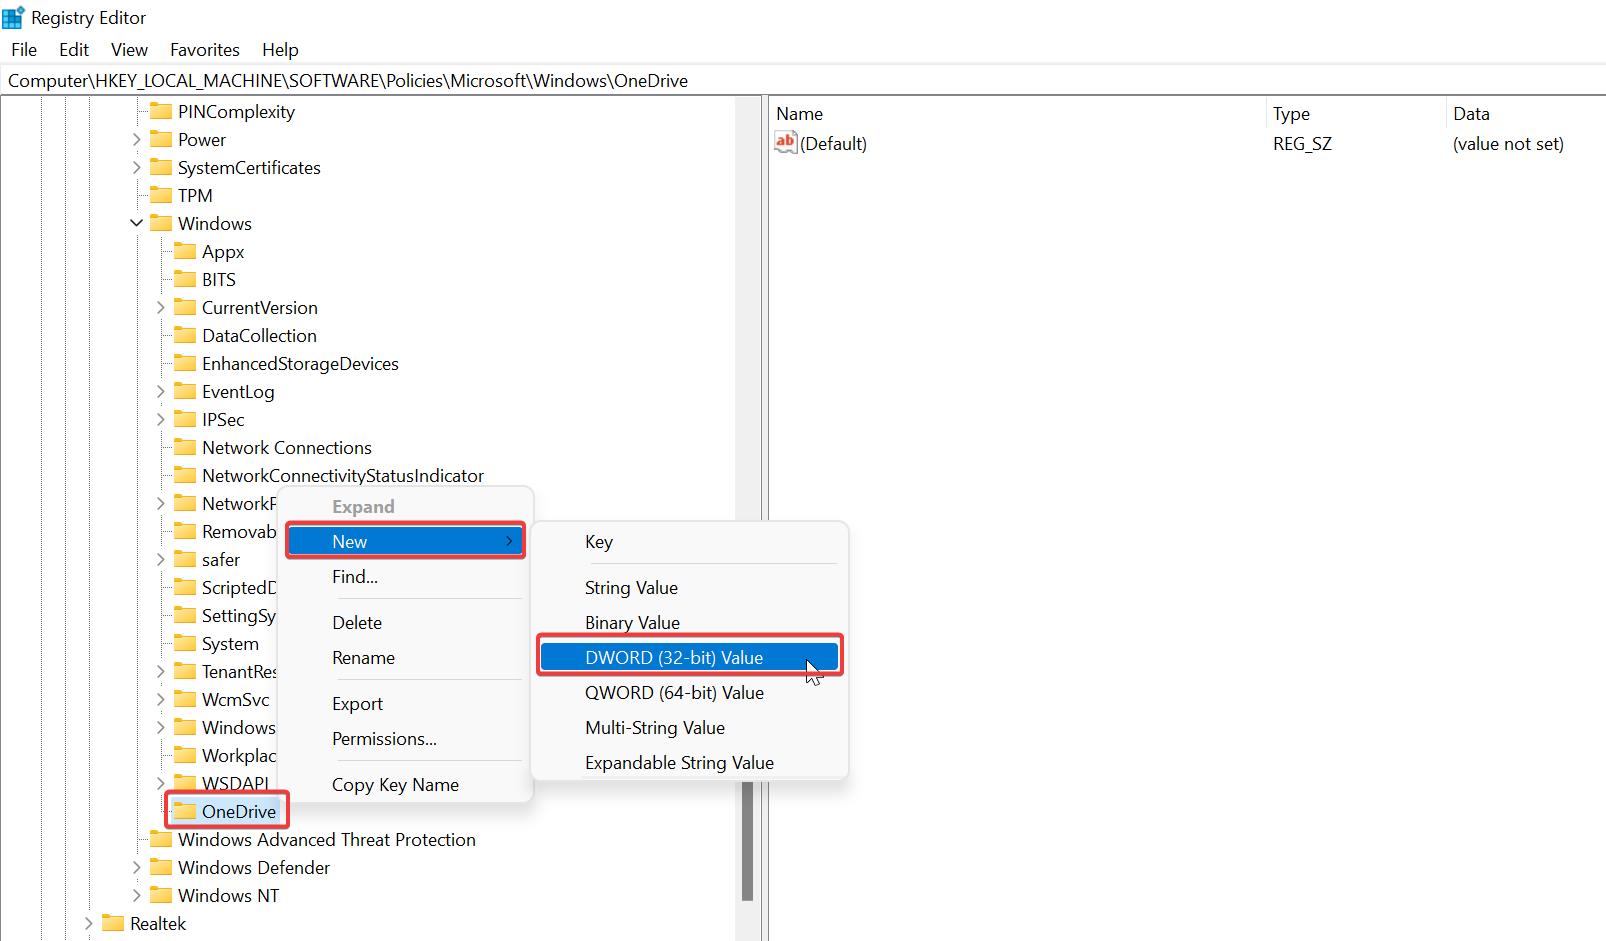
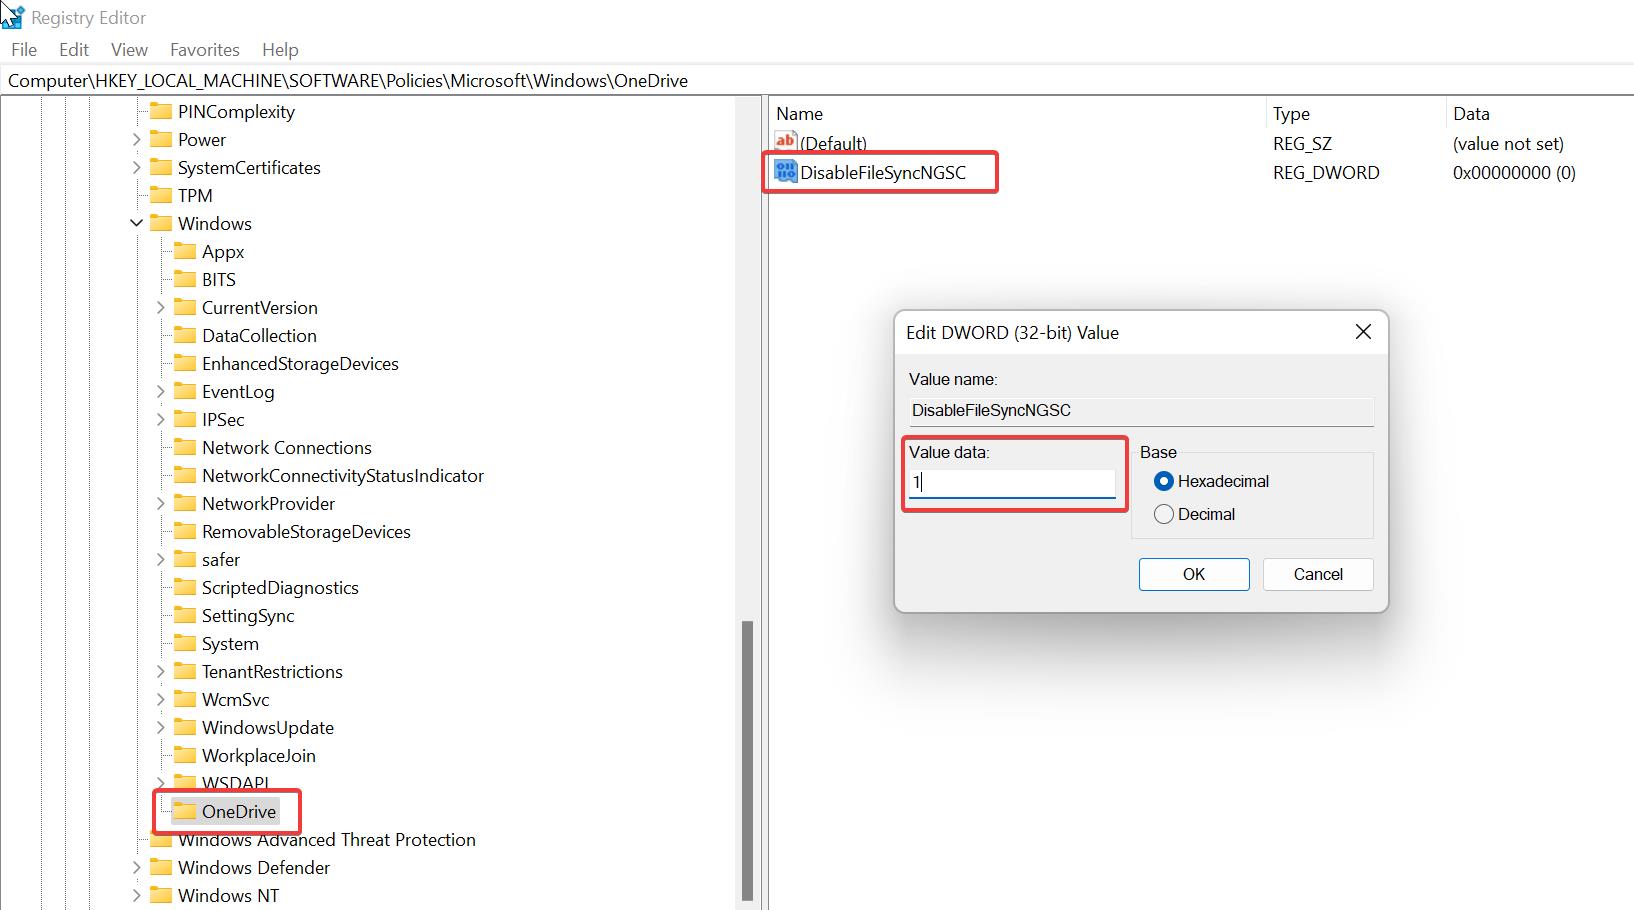
Next, right click on OneDrive and choose New > DWORD(32-bit) Value and name the DWORD as DisableFileSyncNGSC.
Double Click on DisableFileSyncNGSC DWORD and modify the value data. Set the value data 1 and click on OK.
Close the registry editor and restart the system once.
Read Also:
How to Remove OneDrive from File Explorer on Windows 10?
How to Stop Files from Saving to OneDrive?
How to Reset OneDrive in Windows 11/10?
Fix OneDrive is getting Crashed and not getting synced issue in Windows 11/10
How to Change File Explorer View to OneDrive in Windows 11?


