After the release of Windows 11, Microsoft made an announcement that Windows 10 users can freely upgrade to Windows 11 via Windows Insider Channel. It makes easier for general users to access the early release of Windows 11 Insider Preview builds. Most of the users already upgraded from Windows 10 to Windows 11. After upgrading to Windows 11, Most of the users will face the Disk Space issue, so first, we need to clear the old Windows update files, which means Junk files and temporary files to Increase the Disk Space. This article will guide you to Increase Disk Space After Upgrading to Windows 11.
Increase Disk Space After Upgrading to Windows 11:
This article will guide you to free up Disk space after upgrading to Windows 11 using different methods. Follow the below-mentioned methods to clear Junk files after upgrading to Windows 11.
Method 1: Using Windows Settings
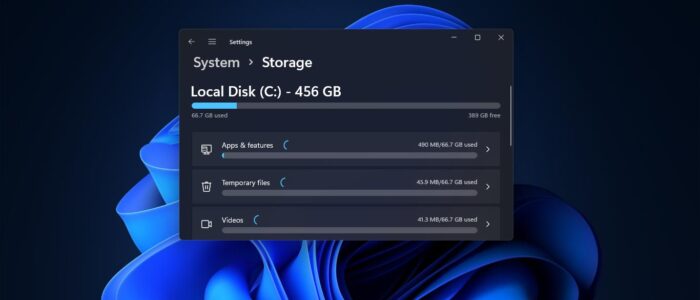
Open Windows Settings by pressing Windows + I and navigate to System > Storage.
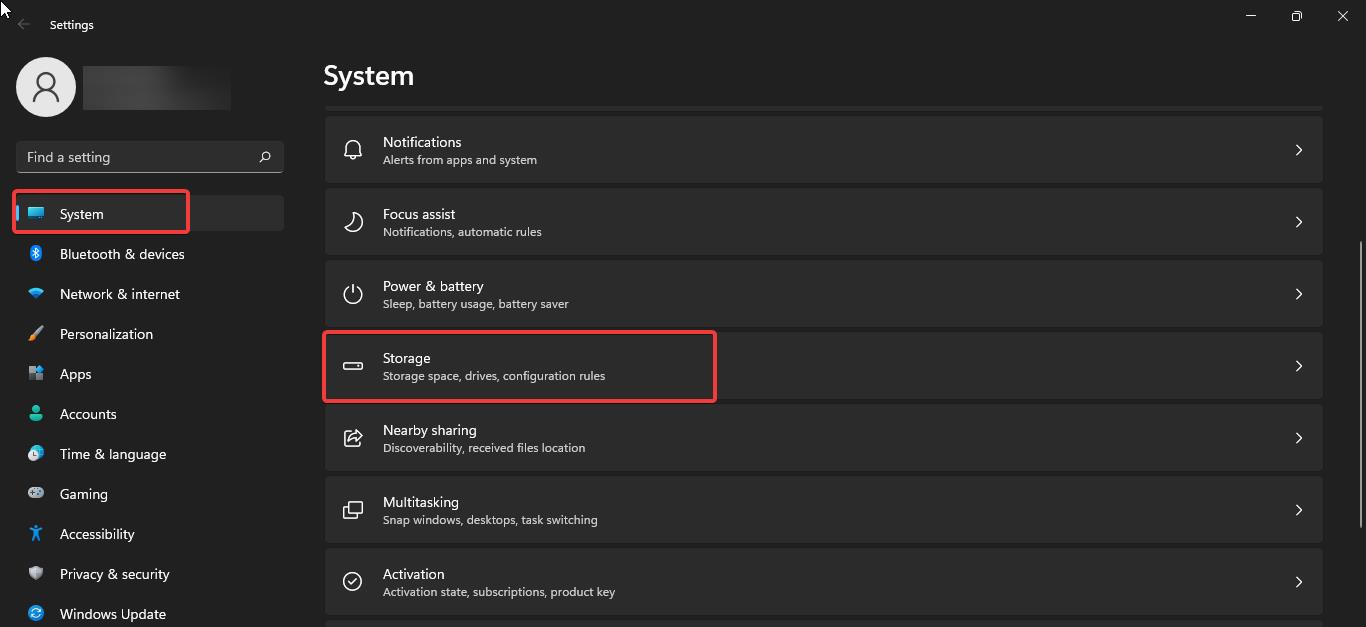
Under Storage Click on the “Temporary files”.
Now Look for “Previous Windows Installation” files and “Windows Update Clean-up” and check the boxes, if you upgraded to Windows 11 recently, then you can see both the files, but if you upgraded long back then you can’t find Previous Windows Installation. Mostly these two files will take up most of your HDD Disk space.
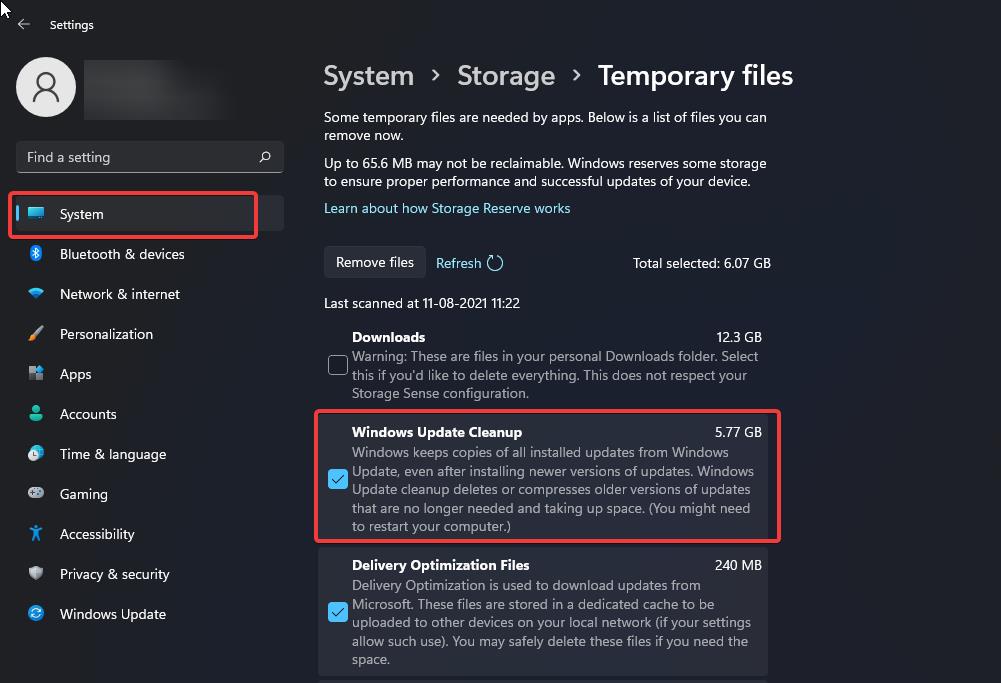
Once you selected the files then click on the “Remove Files” button. This will delete all the temporary and leftover files from the Windows 10 update. Now you’ll get extra Disk space.
Note: Once you deleted the Previous Windows Installation files, then you can’t go back to Windows 10. Moreover, if you want to downgrade to Windows 10, you have to do it before ten days after the upgradation. Find more about the rollback to Windows 10.
Method 2: Using Disk Clean up
Disk Cleanup is a Microsoft Windows maintenance utility, which is used to clean your Hard drive by deleting unwanted cache files, temporary files, and windows updates files. While performing disk analysis, the Disk Cleanup tool will target different types of categories
Open Run command by pressing Windows + R and type cleanmgr and hit enter. This command will open the Disk Cleanup Utility.
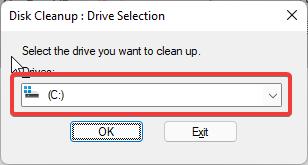
Now you’ll get one pop-up window, choose your OS drive mostly C drive is the OS drive, and click on OK. Now the Disk clean-up utility will scan your system drive for temporary files.
After the scanning, you’ll get another popup window, click on Clean up system files.
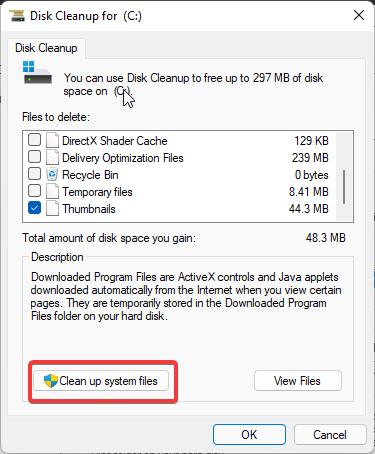
Now the utility will scan for your system and list out the number of options to clear the junk files. Select the Previous Windows Installations and Windows Update Clean up and click on OK.
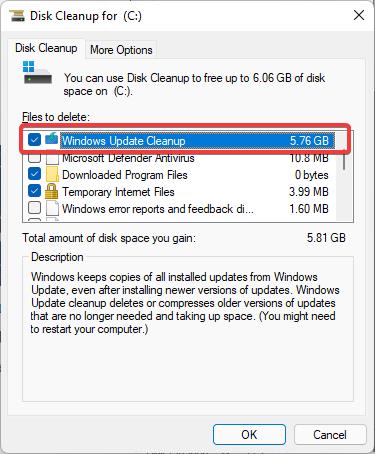
This will delete all the leftover files and help you to increase the Disk space, this process will take some time.
Method 3: Delete Temp files
Deleting the Temp files will increase your Windows 11 performance, once you cleared your Disk space by following the above two methods, then you need to delete the left-over files which is dumped by the apps while running Windows 10.
Delete Temp files and find more about temp files.
Read Also:
How to Extend OS partition drive on Windows 11?

