Windows Subsystem for Linux is a way to run the Linux operating system in windows without installing any Third-Party virtual machine. WSL allows users to run the Linux Operating system alongside Windows. Windows has a driver that sits between the NT kernel and Linux kernel mode that does the translation and exposes the virtual files. Its compatibility layer for running Linux binary executables natively on windows 10/11. Using WSL, you can install the Linux distributions as an app from the Windows Store. You can install any Linux distribution using WSL, you can download and install WSL from Microsoft Store. Since you are installing distros from the Store, they are considered as applications, which means removing WSL distros is very easy. You can uninstall Linux distributions using different methods. In Windows, you can remove WSL Linux distro using three different methods. This article will guide you to remove WSL Linux distro using different methods.
Remove WSL Linux distro in Windows 11/10:
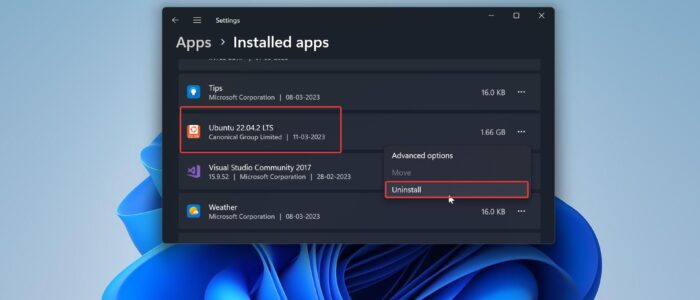
Method 1: Remove WSL Linux distro using Windows Settings
Open Windows Settings by pressing Windows + I and from the left-hand side click on Apps and from the right-hand side look for Installed apps.

Under Installed apps, look for the Linux Distribution app that you have installed. Click on the three dots and choose Uninstall.

Click on the Uninstall button again.
Once the Uninstallation is completed, the specific distribution will no longer be available on Windows 11/10
Method 2: Using Command Prompt:
Open Command Prompt or PowerShell in elevated mode, right-click on the Command prompt, and choose Run as Administrator.
Type the following command and hit enter
winget list
This command will list out all installed apps, look for the Linux distribution which you want to remove, and note down the canonical id of the Linux distribution.
Type the following command to the Linux Distribution like Ubuntu, Debian, Kali, Mint, etc., and hit enter.
Winget uninstall –id “DISTRO-NAME”Here replace the “DISTRO-NAME” with the actual Linux distribution ID. The actual command will look like this. winget uninstall –id Canonical.Ubuntu
Once you completed the steps, the WSL instance and distribution files will be removed from Windows.
Method 3: Remove WSL Linux distro using PowerShell
If you install the WSL Distro from a backup or from any application, then it won’t appear in the Windows settings app, command prompt, or PowerShell. In this scenario, you need to unregister the distribution using the WSL command to delete.
Open PowerShell in elevated mode, right-click on PowerShell, and choose Run as administrator.
Type the following command to list out all the Linux distributions.
Wsl –listYou can also use this command wsl -l to list out all the Linux distributions.
Type the following command to unregister or to delete the distro.
wsl --unregister DISTRO-NAME
Here you have to replace the DISTRO-NAME with the actual WSL Distro name, once you completed the steps, the distro will be removed and no longer available in your system.
Read Also:
How to install WSL2 in Windows 11?
How To Install Kali Linux inside Windows 10 Using WSL?
How to set automatic suspend timing using Terminal in Ubuntu Linux?
Fix No Internet connection in WSL on Windows 11/10
Fix WslRegisterDistribution failed with error 0x80004005 in Windows 11
Fix Process Exited with Code 4294967295 in WSL on Windows 11