Nowadays most laptops are coming with Fn function key, the fn key is a special key which you can find in most Keyboards and laptops. The Fn key allows you to perform various functions such as adjusting screen brightness, increasing/decreasing the volume, Print screen, muting, Project screen option, and other various features. These functions are usually indicated by symbols on top of the Function keys. The Fn key is located on the lower left side of the keyboard, next to the Ctrl Key. The order of the function may get different depending on the manufacturer and model of your laptop. Some command uses of the fn key include Volume and brightness adjustment, activating sleep mode, and projecting the screen. You can access these features by pressing the fn key and F1-F12 keys, the function keys perform dual roles, the standard F1-F12 keys role, and Multimedia and designated keys. By default, the fn keys are enabled, so if you want to increase or decrease the volume you have to press fn key + the designated function key. If you don’t want this combination then you can disable fn key, this article will guide you to Disable Fn Function key in Windows 11/10.
Enable or Disable Fn Function key:
You can enable or disable Fn Function using different methods, follow the below-mentioned methods to Enable or Disable Fn Function key.
Method 1: Using Keyboard Shortcut:
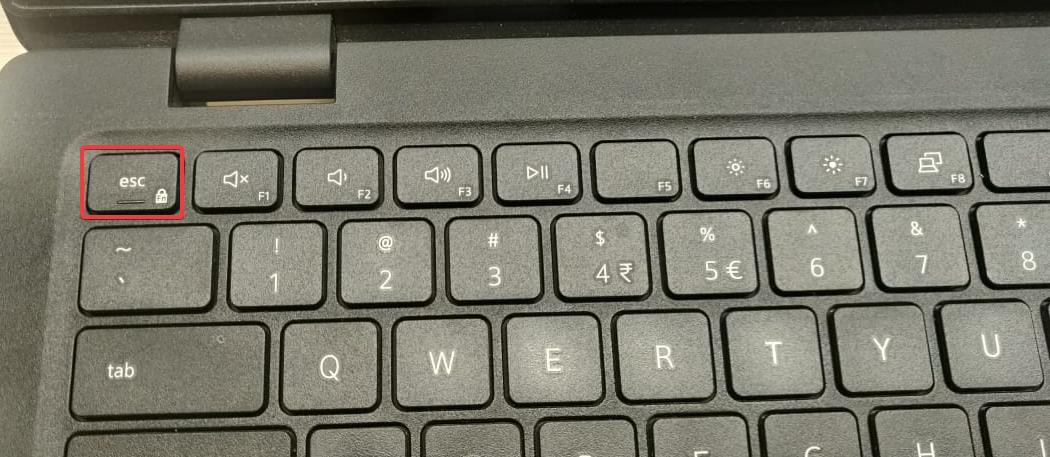
This is the easiest method to enable or disable the fn key is by using the dedicated fn lock key. The fn lock key allows you to toggle the fn key on or off, you can find the fn lock on top of the Esc key. This fn lock key may be available depending on your laptop manufacturer. In some laptops, you need to hold the fn key, and then you need to press the fn lock key to enable or disable fn.
Method 2: Using BIOS Settings:
Based on your laptop’s Manufactured and model, you can disable the fn key from BIOS, First, you need to access BIOS settings, the process of accessing the BIOS settings can vary depending on the make and model of your laptop.
First, restart your laptop and press the BIOS key, BIOS key may vary depending on the make and model of your laptop.
Once you are on the BIOS page, look for the System configuration page and click on it.
You may find the Fn key lock option, which allows you to toggle the fn key on or off.
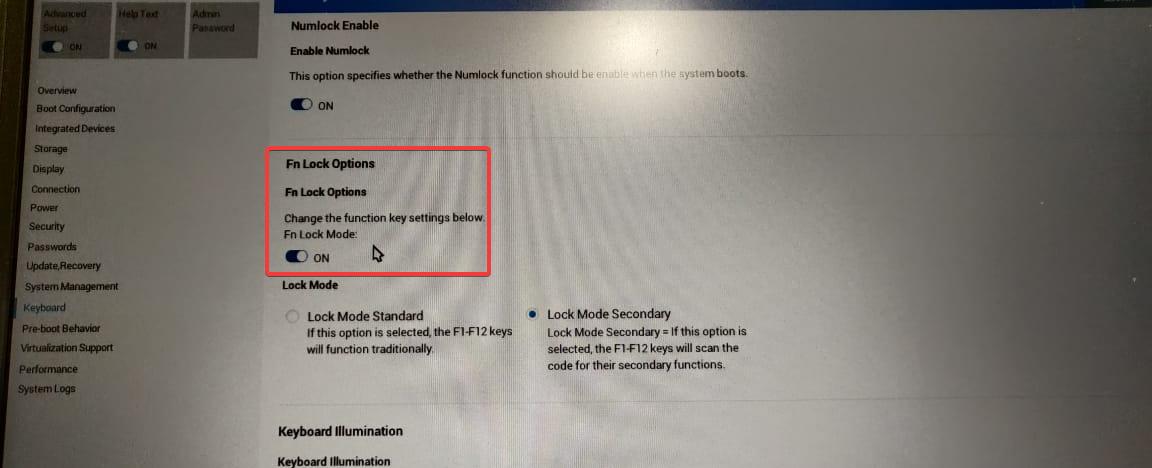
Apply the changes and restart your system once. That’s it the fn key is permanently disabled on your laptop.
Method 3: Using Control Panel:
Open Run command by pressing Windows + R and type control and hit enter, this will open the Control panel, now set the icons to Large. Look for Windows Mobility Center.
Open Windows Mobility Center and next click on the Function key row dropdown menu and select Function key.
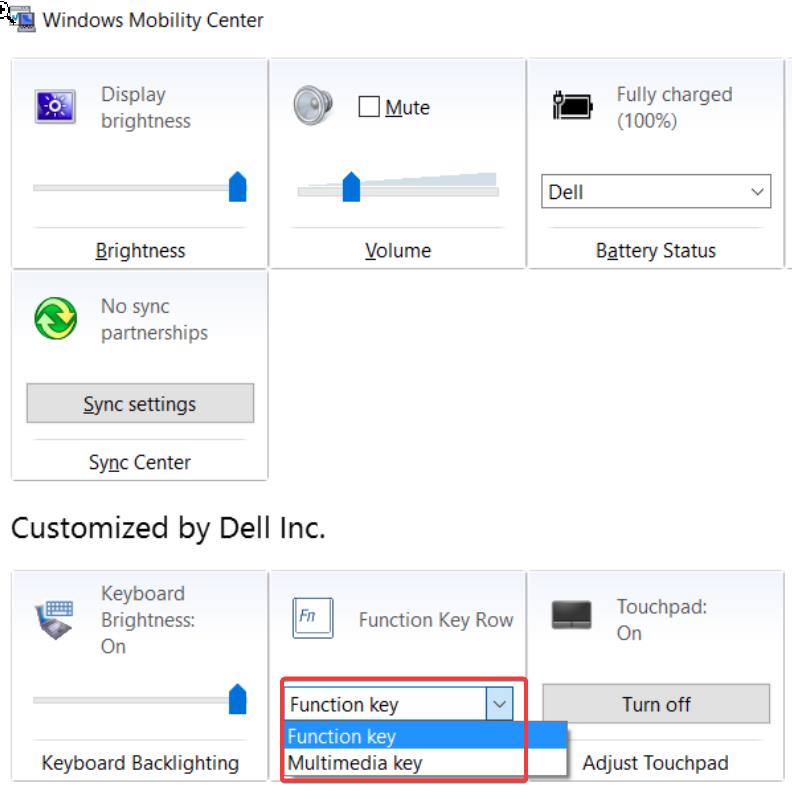
Now the Function Key is Locked.
Method 4: Using Third-Party app:
If you don’t have the Function key lock, or mobility center on your laptop, then you can use this method to disable the Fn key. In this method, we are going to use AutoHotKey.
Download and install AutoHotKey from its official website.
Open AutoHotkey and create a new script by going to File > New.
In the script editor, type the following code:
Fn:: returnSave the script and run it by going to File > Run Script.
This Script will disable the fn key, To enable it back, just right-click on the AutoHotKey tray icon and select Exit.
Read Also:
How to Turn On or Off toggle keys tone in Windows 11?
How to Disable Keyboard beeping sound in Windows 11/10?
How to Remap Keyboard Keys in Windows10/11?
How to Disable Sticky Keys in Windows 11?
How to Disable a Keyboard Key in Windows 10?


